Rendering With Gendo
.png&w=3840&q=75)
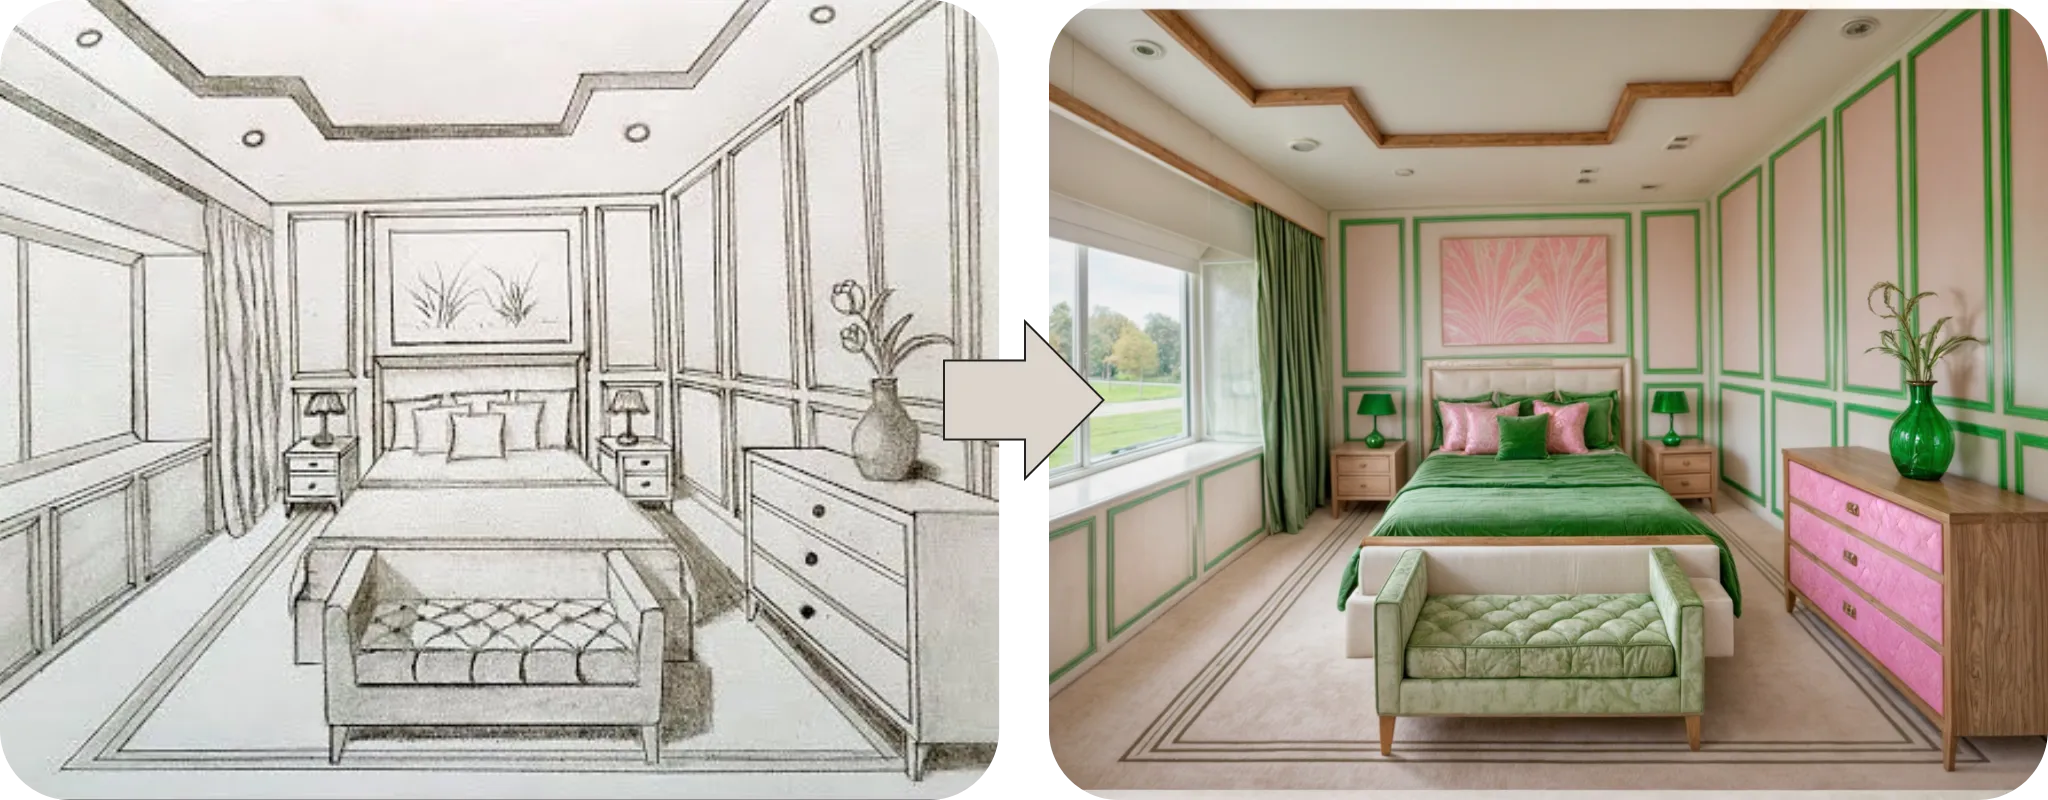
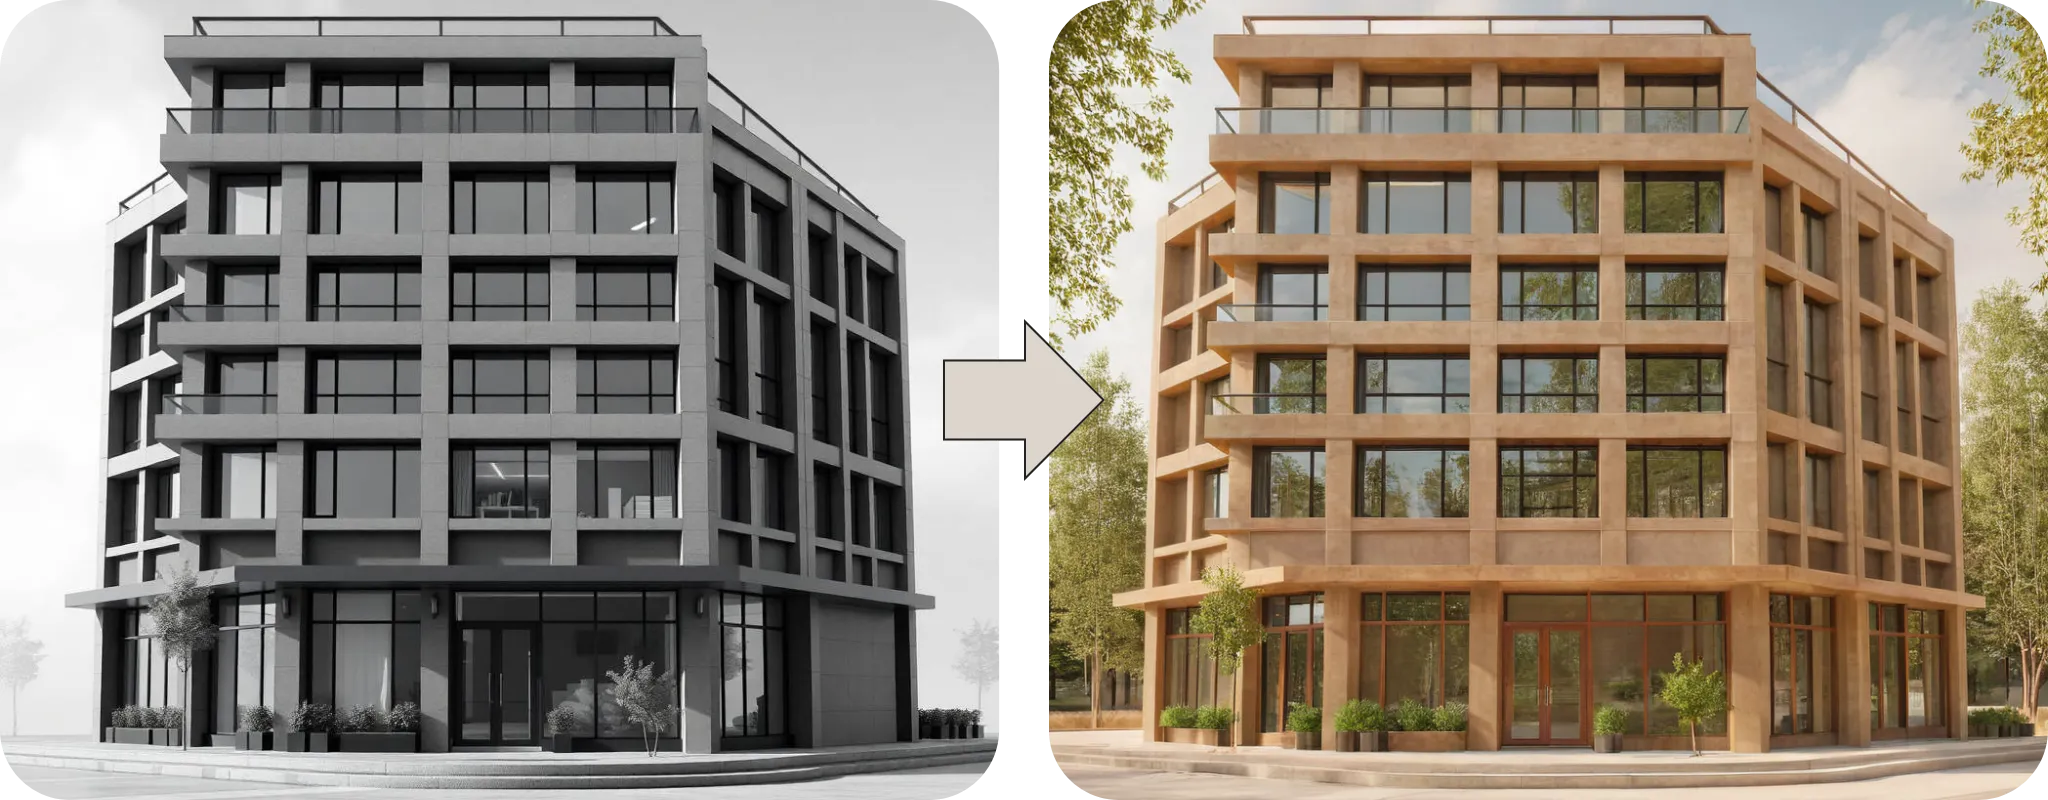
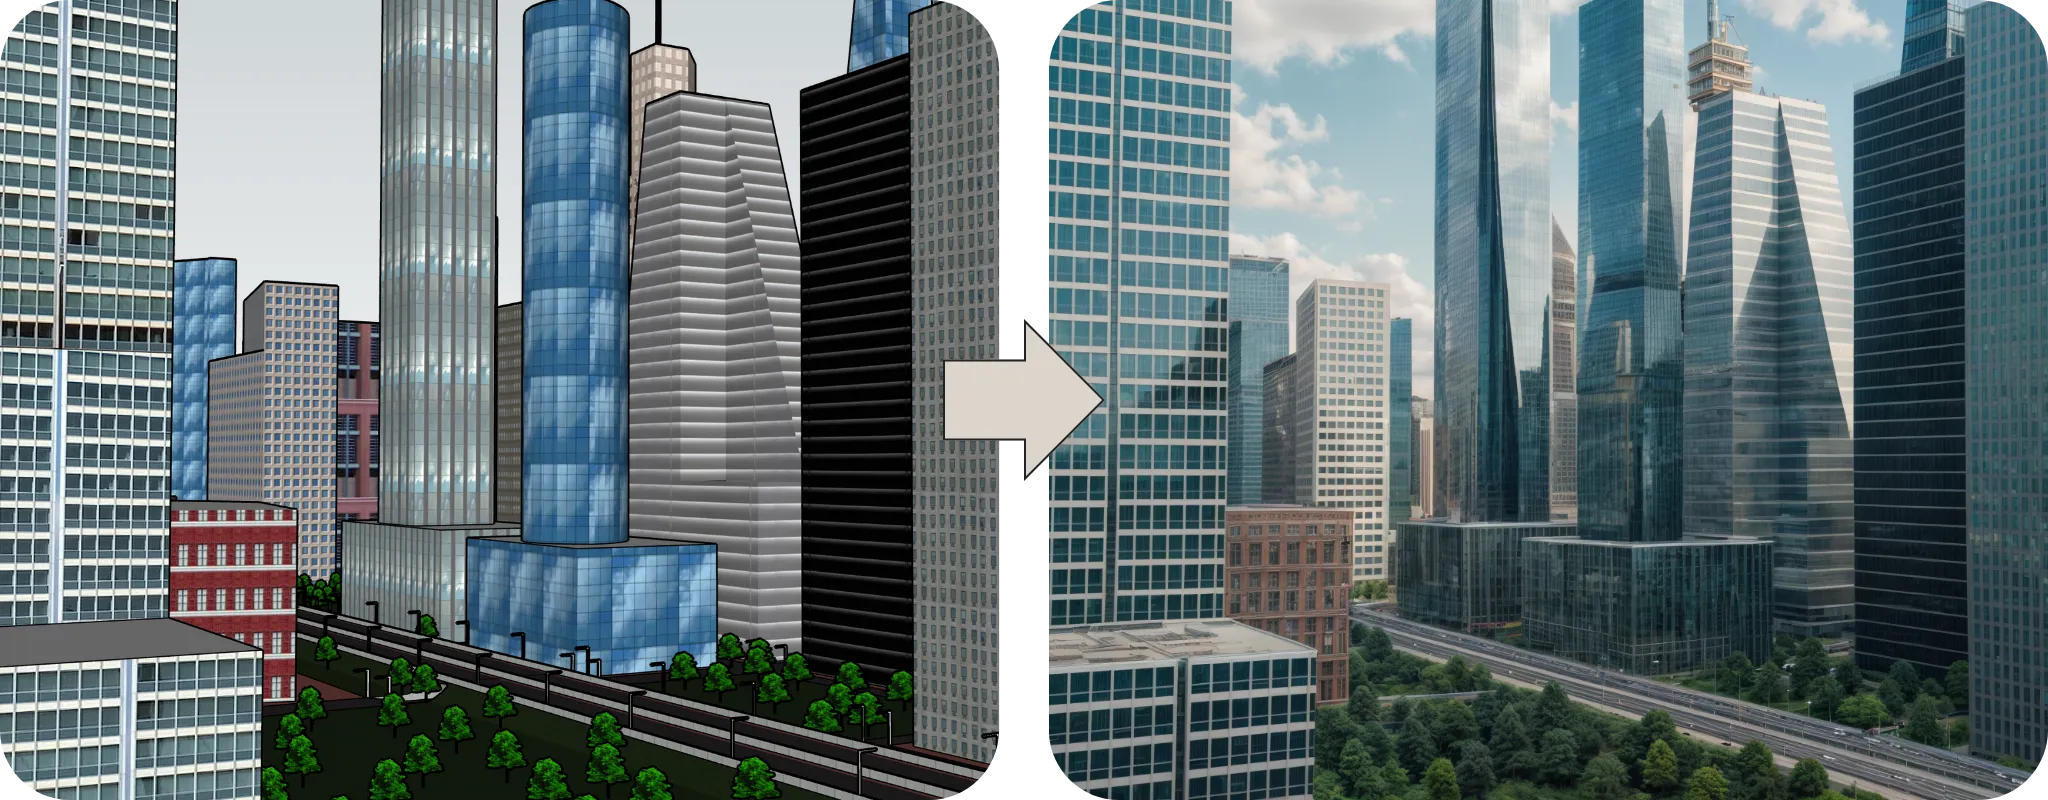
The Render tool takes your design intent and elevates it into a polished, high-quality image. It is ideal for transforming CAD models or conceptual sketches into hero images, ensuring that your designs are presented with clarity, detail, and artistic refinement.
Best use case: generate a visually enhanced version of your design with improved lighting, textures, and composition.

Prompting TIPS - Render Tool
Formula for Render Tool
[Main subject], [Context & Key features], [Atmosphere & Lighting], [Style], [Extra Keywords]
Each tool has specific requirements. For Render, an input image is necessary as a starting point. Some examples for a great input image:

✔ Describe each object in detail rather than relying on positional descriptions. (No need to say “in front of the table,” simply list the objects and their characteristics.)
✔ Use precise, technical, or artistic terms relevant to architecture and design for the best results. Check out our blog for The Main Principles of Prompting – a detailed guide to help you get the best results.
✔ Include colors and materials for all elements in the input image.
“a modern bedroom, a central bed with a high headboard, two wooden nightstands, each topped with a green lamp, a framed artwork with pink abstract lines, a small wooden bench, a large window with green velvet curtains, elegance, natural light, photorealistic, cinematic photography”
Additional settings:
Properly adjusting the additional settings is just as crucial as your prompt. Composition and color settings define how closely the output aligns with the input while preserving key design elements. When starting with a sketch or greyscale image, it’s best to set color Adherence at the lowest.

Render Tool is designed to preserve the core elements of your input design. It does not generate additional elements such as people or trees.
Composition defines how much of the original structure remains in the generated image.
“A modern bedroom interior, a central bed with a high headboard, flanked by two wooden nightstands, each topped with a lamp. A framed artwork with golden abstract lines is mounted on the wall above the bed. A small wooden bench with a woven rattan cushion is placed at the foot of the bed. A large window with burnt orange velvet curtains. Elegance, natural light. Photorealistic, cinematic photography.”
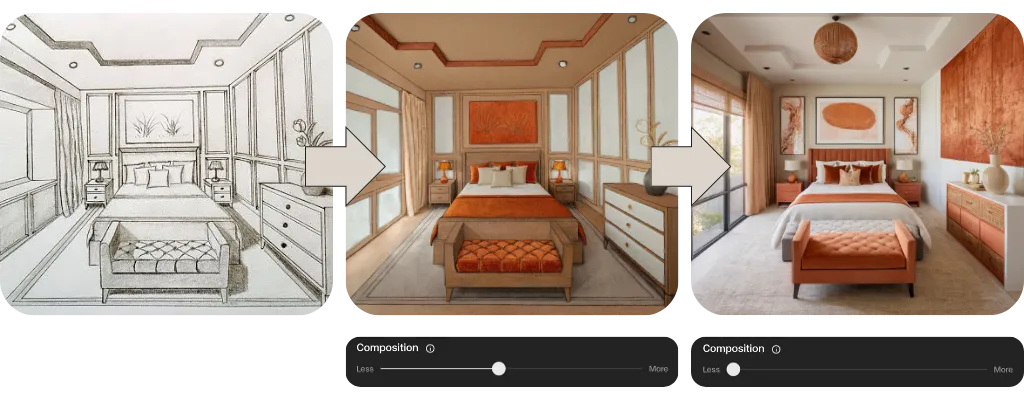
⬆️ Higher Values preserve the original composition more strictly but may also degrade image quality if you go too high!
⬇️ Lower Values allow for more stylistic freedom, creativity and transformation.
Edges and Depth are sub-sliders to Composition, for when you need finer grain control. Edges help with details and Depth with overall volumes. Higher Edge sensitivity helps distinguish different parts of a design—use it for highly detailed inputs to ensure clarity. If details are lost, increase the Depth setting and re-generate.
Color adherence: Affects how closely the colors in the output match the input image.
We recommend starting low and gradually increasing it as needed. Keep below the middle for most cases unless you have already applied some basic colors or materials within your image. When starting with a sketch or greyscale image, it’s best to set it at the lowest point.


⬆️ Higher Values maintain the original color palette and the texture.
⬇️ Lower Values recommended when converting black-and-white sketches into photorealistic images.
We recommend starting low when modifying textures or styles while retaining recognisable forms. Experiment with different combinations to achieve your desired results. Using the primary Composition slider will be enough for most uses!
Image Reference:
Providing an image reference will help you to render in the likeness of the it. The form and the style of the reference image will guide your generations.
