Using the Edit Tool
Make targeted changes to an existing image without regenerating the entire scene.
What is the Edit Tool?
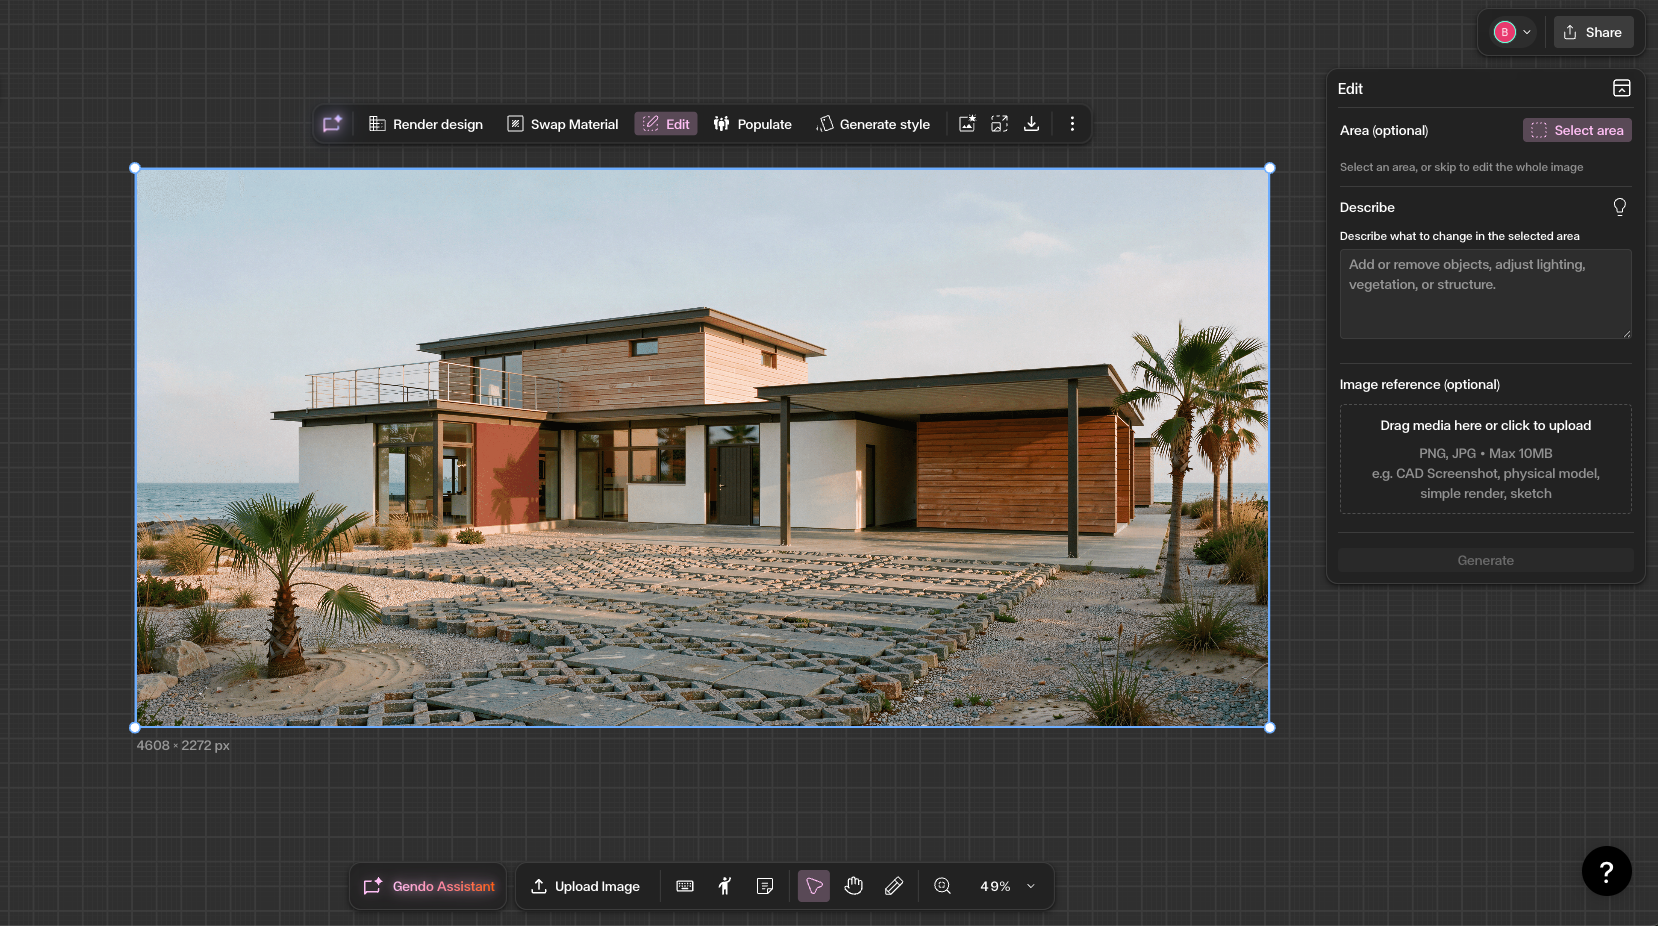
The Edit tool allows you to make targeted changes to an existing image without regenerating the entire scene. You can use it to add, remove, replace, or adjust specific elements within an image while keeping the rest of the composition intact. You can either edit the full image or draw a box around a specific area you want to change. When you use a box selection, Gendo focuses the edit inside that selected region and keeps the rest of the image unchanged. This is useful when your image is already close to what you want, but you need to fix or improve one part of it. For example, you can add people, remove unwanted objects, change a wall colour, replace furniture, adjust landscaping, or refine a specific architectural detail.
Understanding the interface
Understanding the interface
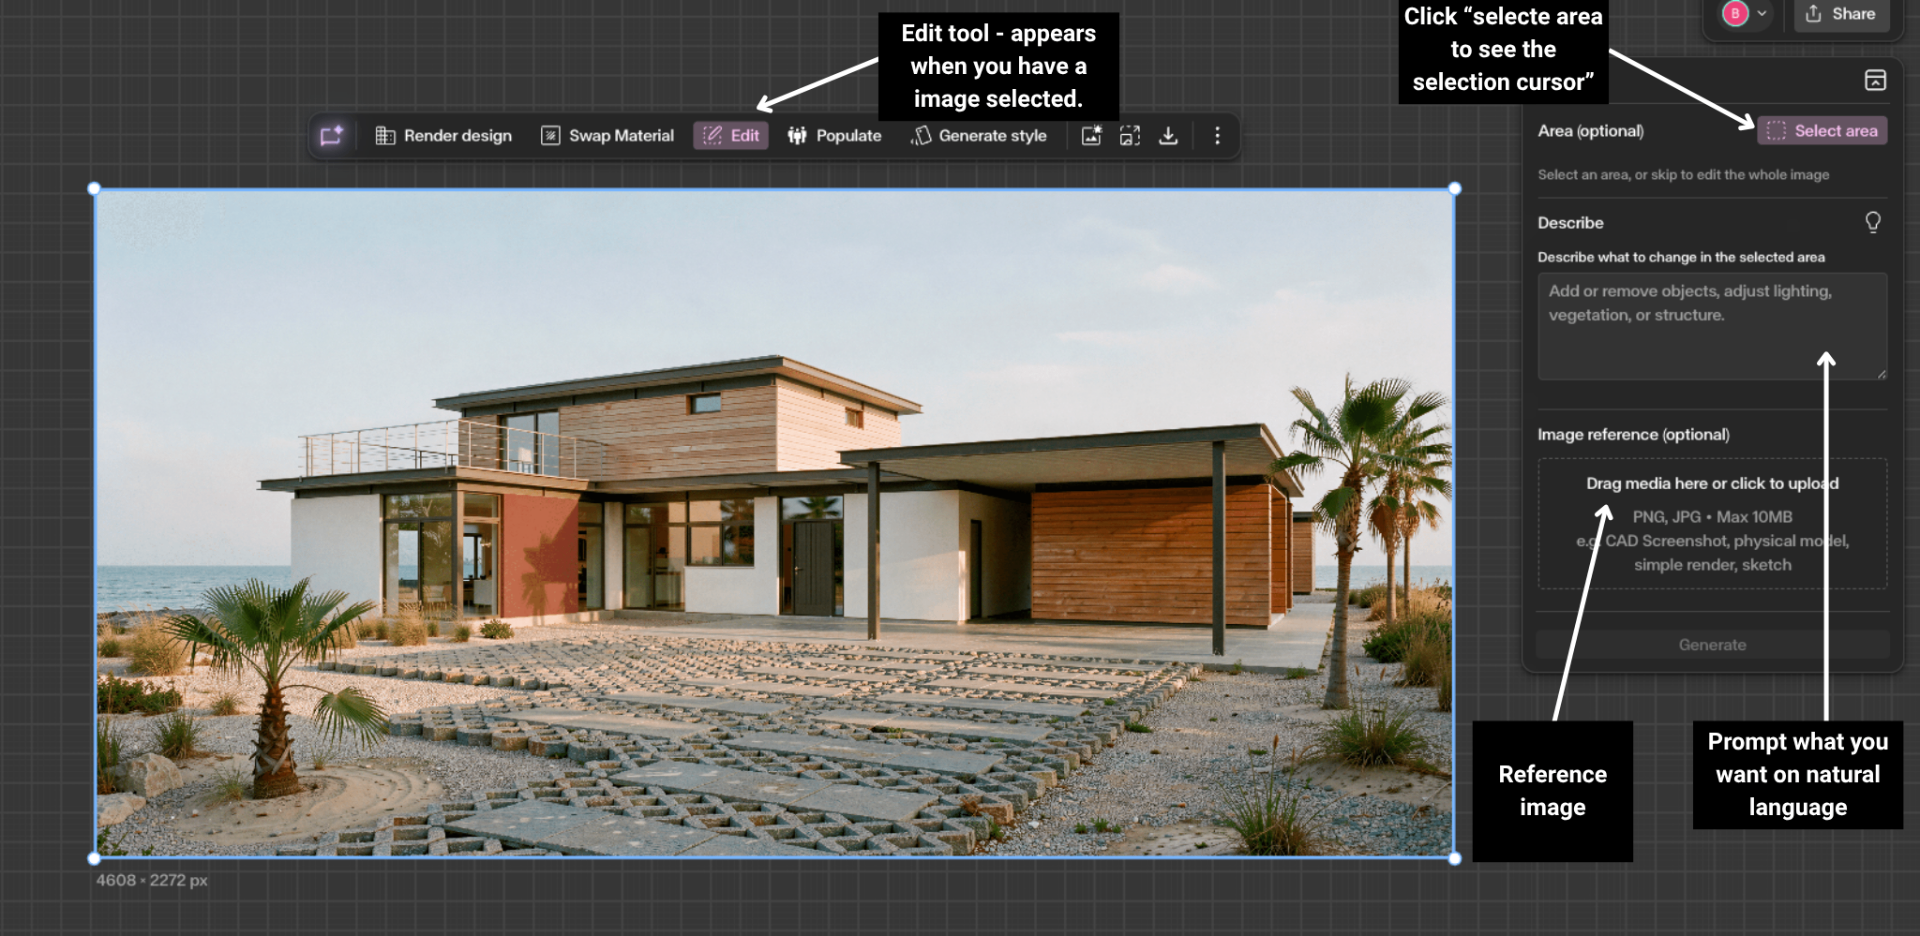
When you select an image and open the Edit tool, the edit interface appears on the canvas. From here, you can choose whether to edit the whole image or select a specific area to edit.
- Select area – click this to start drawing a box around the part of the image you want to edit.
- Edit box – the selected region where Gendo will focus the edit. Anything outside the box will remain unchanged.
- Reference image – optionally upload or select a reference image to guide the edit. Useful when you want to match a specific object, material, colour, texture, or visual style.
- Prompt box – describe the change you want to make. Be clear about what should change and what should stay the same.
- Move / resize selection – adjust the box before generating if the selected area is too small, too large, or not in the right place.
Step by Step
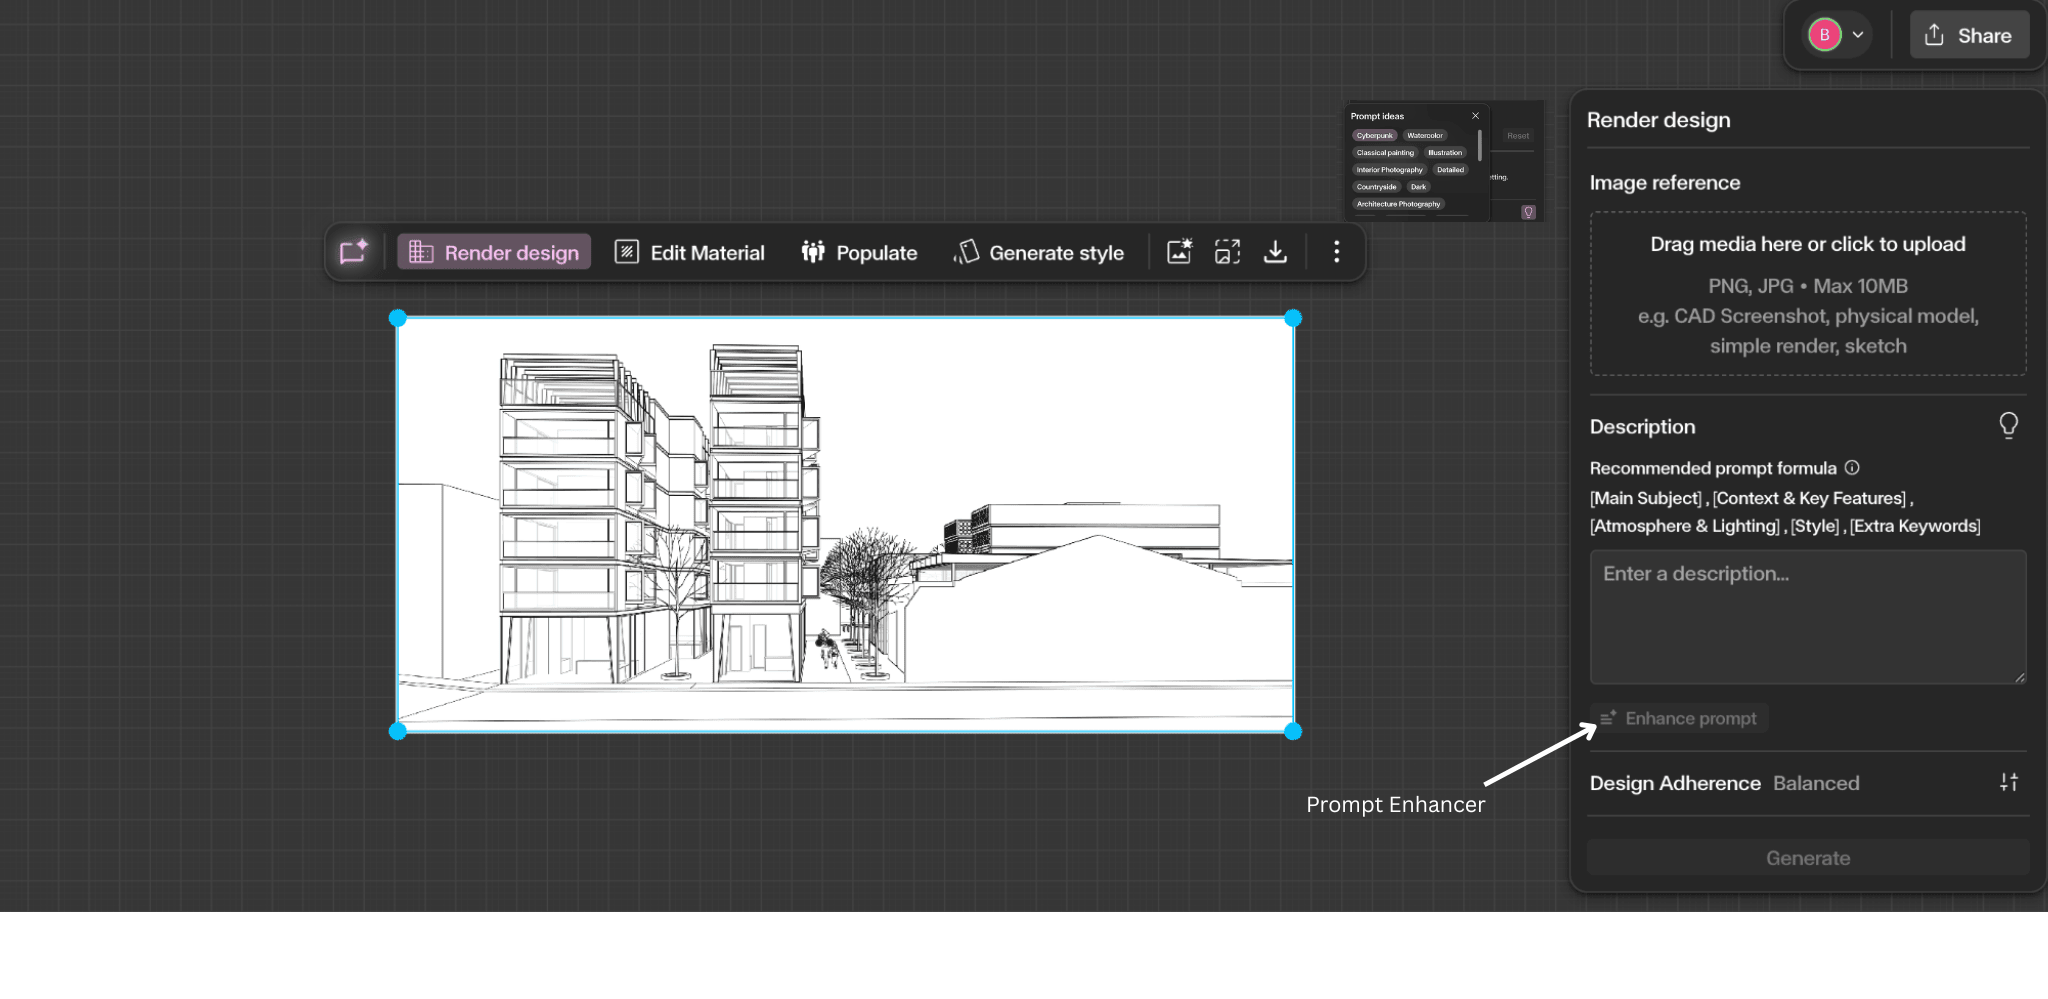
Select the image and open Edit
Select the image you want to edit on the canvas. The Edit tool only appears once an image is selected.
When the image is selected, the contextual toolbar will appear above it. Click Edit from the toolbar to open the Edit panel on the right-hand side.
From here, you can choose whether to edit the whole image or select a specific area to edit.
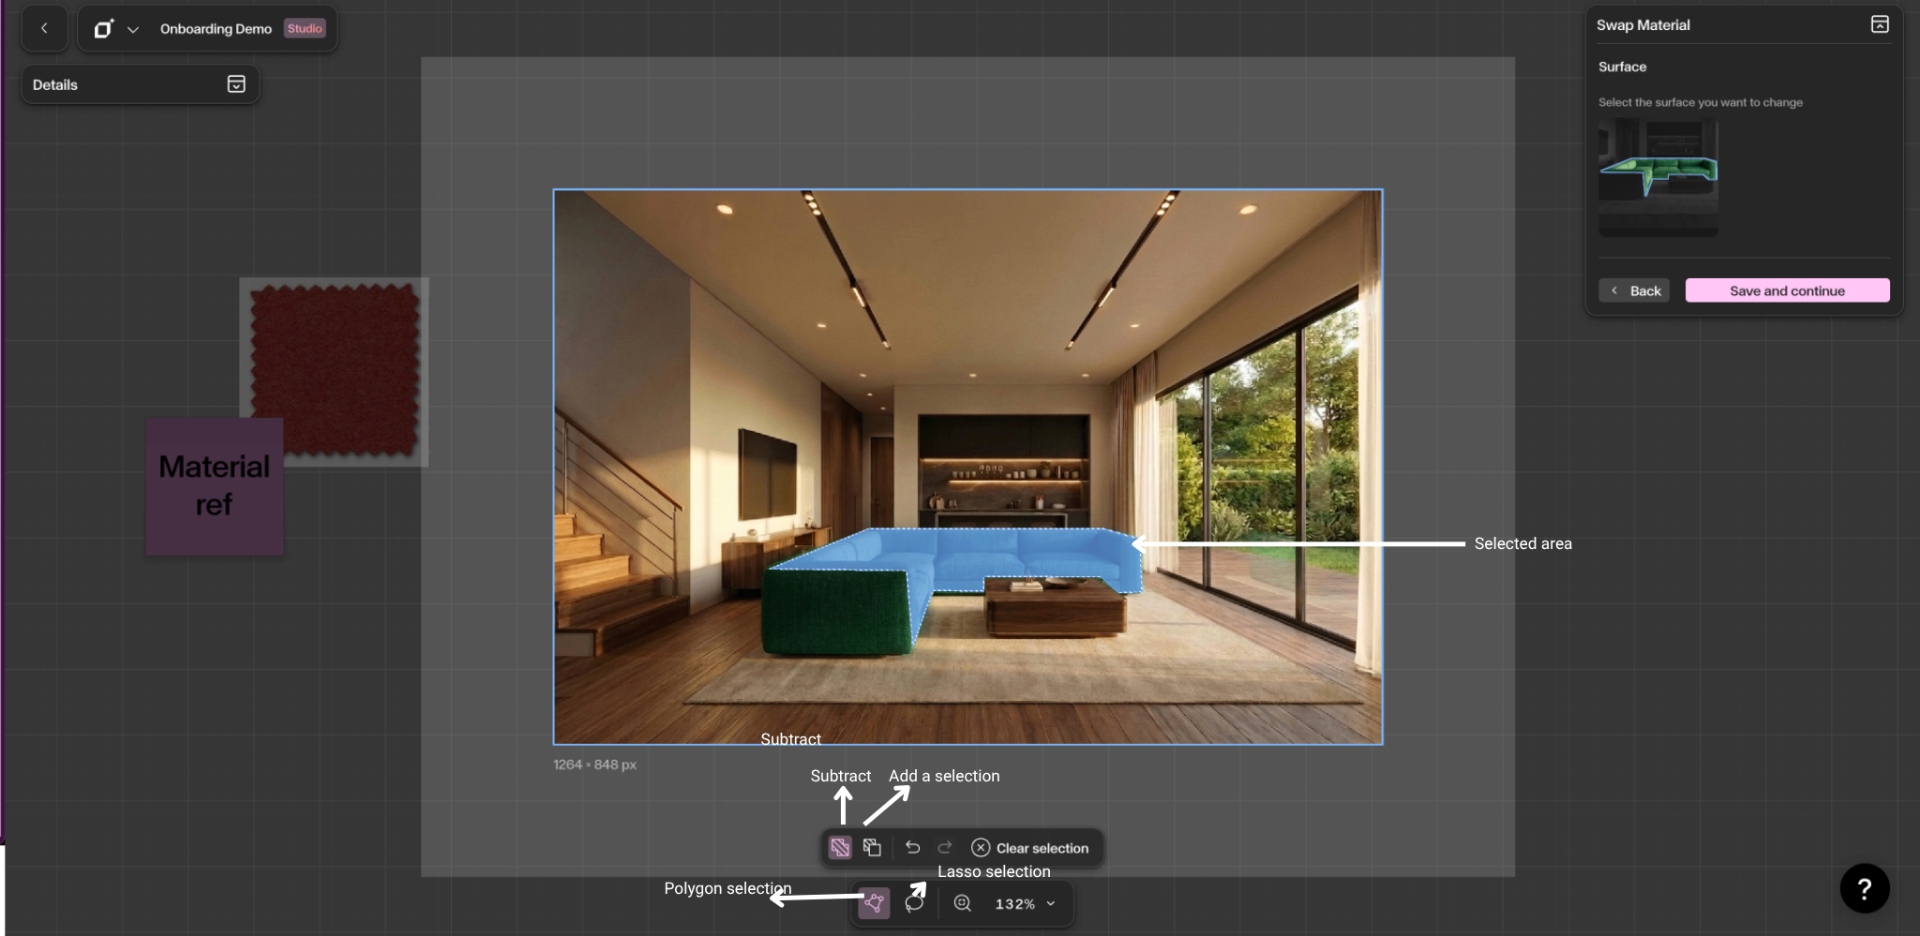
Click Select area and draw the edit box
Click **Select area** in the Edit panel, then draw a box around the part of the image you want to change. The box tells Gendo where to focus the edit. Anything outside the selected area should remain unchanged.
When selecting an area, do not try to trace the object too precisely. Edit is different from Swap Material — Swap Material is designed for more precise masking, while Edit works best when you give it a rough area with enough surrounding context.
A good selection should:
- Cover the full area you want to edit
- Include a little extra surrounding context
- Avoid being too tight around the object
- Avoid very long, thin, or narrow selections
- Avoid selecting most of the image unless you want a large edit
For example, if you want to add people or furniture to the foreground, select the foreground area and some of the surrounding space so Gendo understands where the objects should sit in the scene.
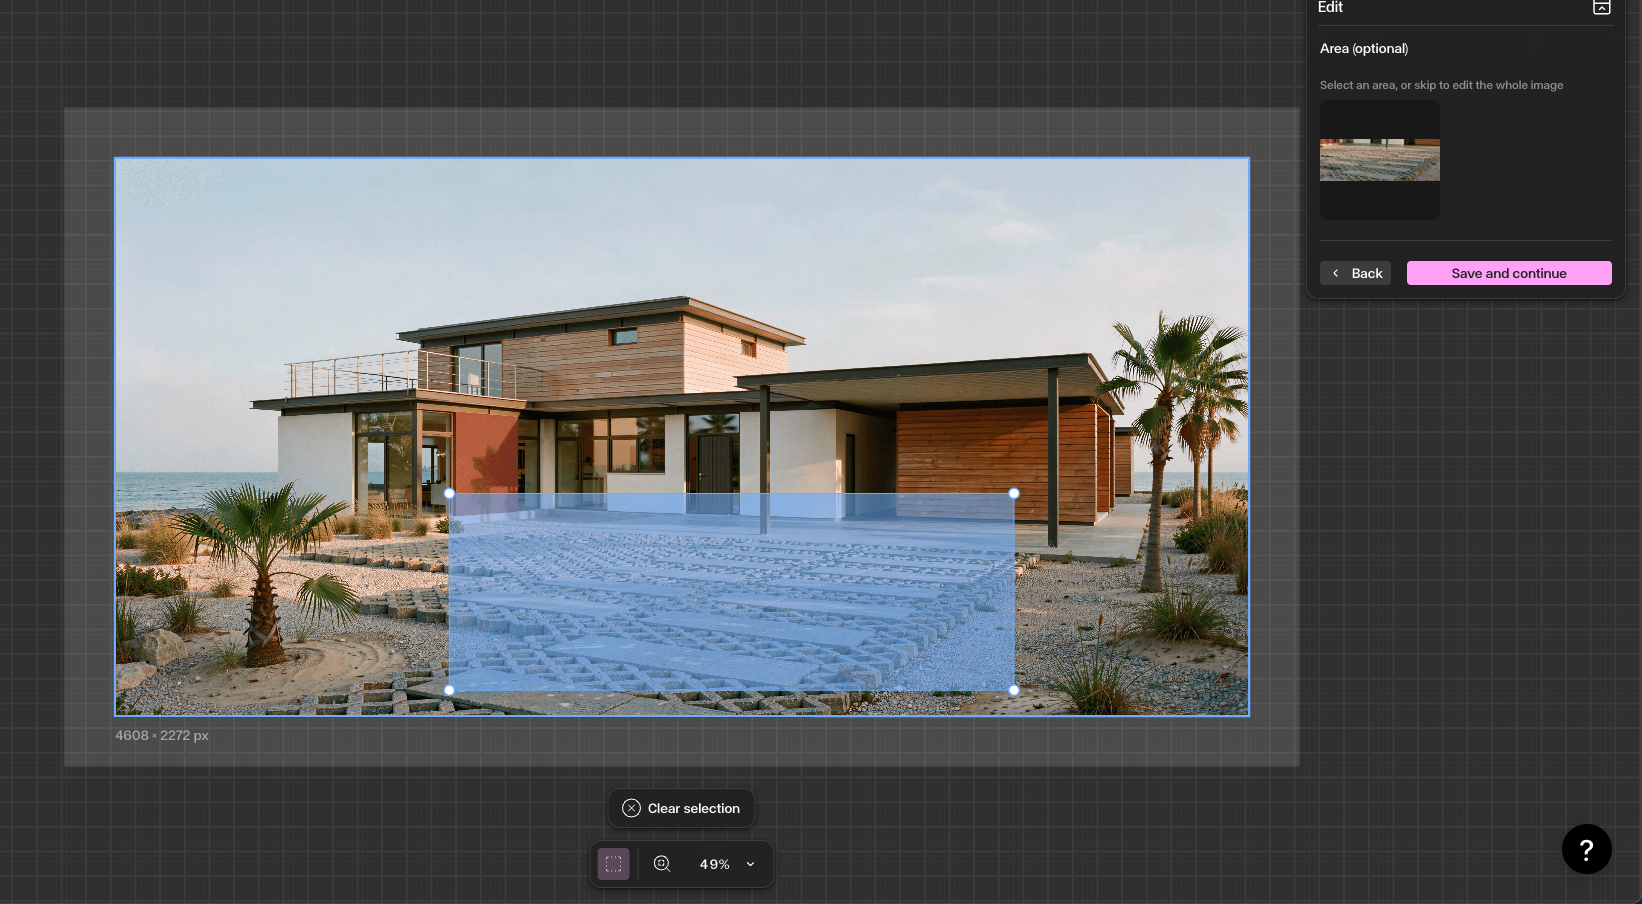
Save the area, write your prompt, and generate
Once you are happy with the selected area, click **Save and continue**. You can resize, move, or clear the box at any time before saving.
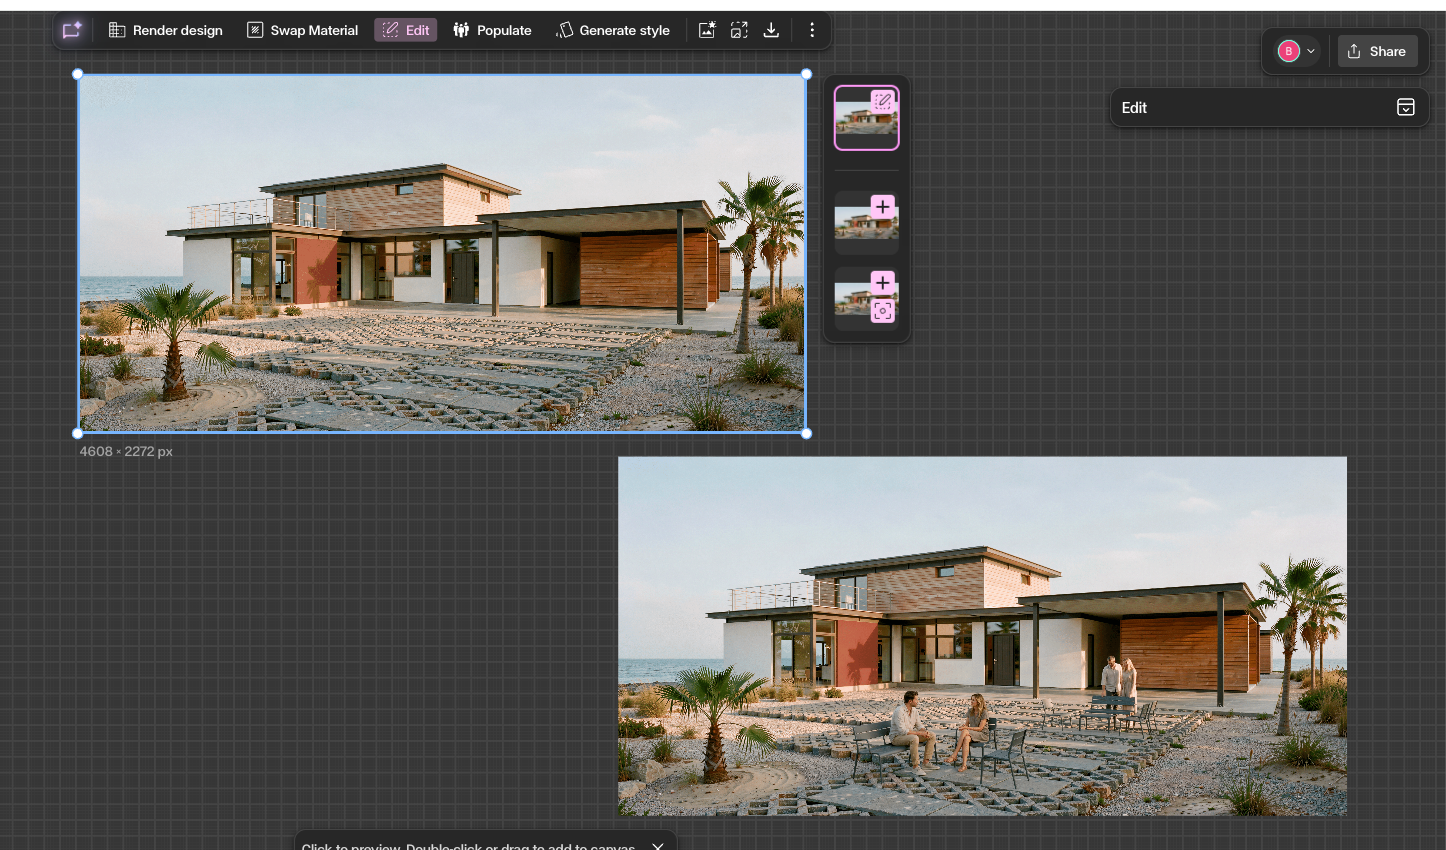
Next, write your prompt in the Describe box using natural language. Be specific about what should change — and, if your selection includes areas that should stay the same, say so explicitly.
For example:
- "Add a group of people sitting on benches in the foreground."
- "Change the timber wall to dark grey concrete. Keep the roof, windows, and paving unchanged."
Optionally, add a reference image to guide the result — useful for matching a specific object, material, colour, or planting style.
When ready, click Generate. Review the outputs, then click the + button on your favourite to add it to the canvas. Edit works best as an iterative workflow: make one clear change at a time, review, and refine from there.
Get Better Results
Use Edit when the image is already close and you only need to change part of it.
Use the box selection when you want to control where the edit happens.
Do not make the box too tight — give Gendo enough surrounding context.
Avoid very long, thin, or narrow boxes. More balanced selections usually work better.
Avoid selecting most of the image unless you want a large edit.
Be explicit in the prompt — say exactly what you want changed, and also what you do not want changed if there is a risk of confusion.
Use one edit at a time where possible. Smaller iterative edits usually give better results than asking for many changes at once.
Use Edit for general changes, fixes, additions, removals, and colour adjustments. Use Material when you need a precise material swap with an exact mask or polygon selection.
If the result is not right, adjust the box size, add more context, or make your prompt more specific.
Generate multiple options and compare them side by side on the canvas.
Best use cases: add people, furniture, planting or design details; remove unwanted objects; replace one object with another; change wall or surface colours; fix small distortions; refine interiors, exteriors, landscapes and presentation visuals.