Using the Custom Cutout Tool
Generate bespoke human figures with full control over appearance, pose, and styling.
What is the Custom Cutout Tool?
The Custom Cutout tool allows you to generate people with full control over their appearance, pose, and styling. This tool helps you quickly add realistic human figures to architectural visuals to improve scale, context, and storytelling. You can control appearance (age, ethnicity, identity), pose and movement (walking, standing, sitting), and clothing style through a text prompt. Once generated, the cutout can be placed and positioned anywhere on the canvas.
Understanding the interface
The Cutout Panel and Appearance Settings
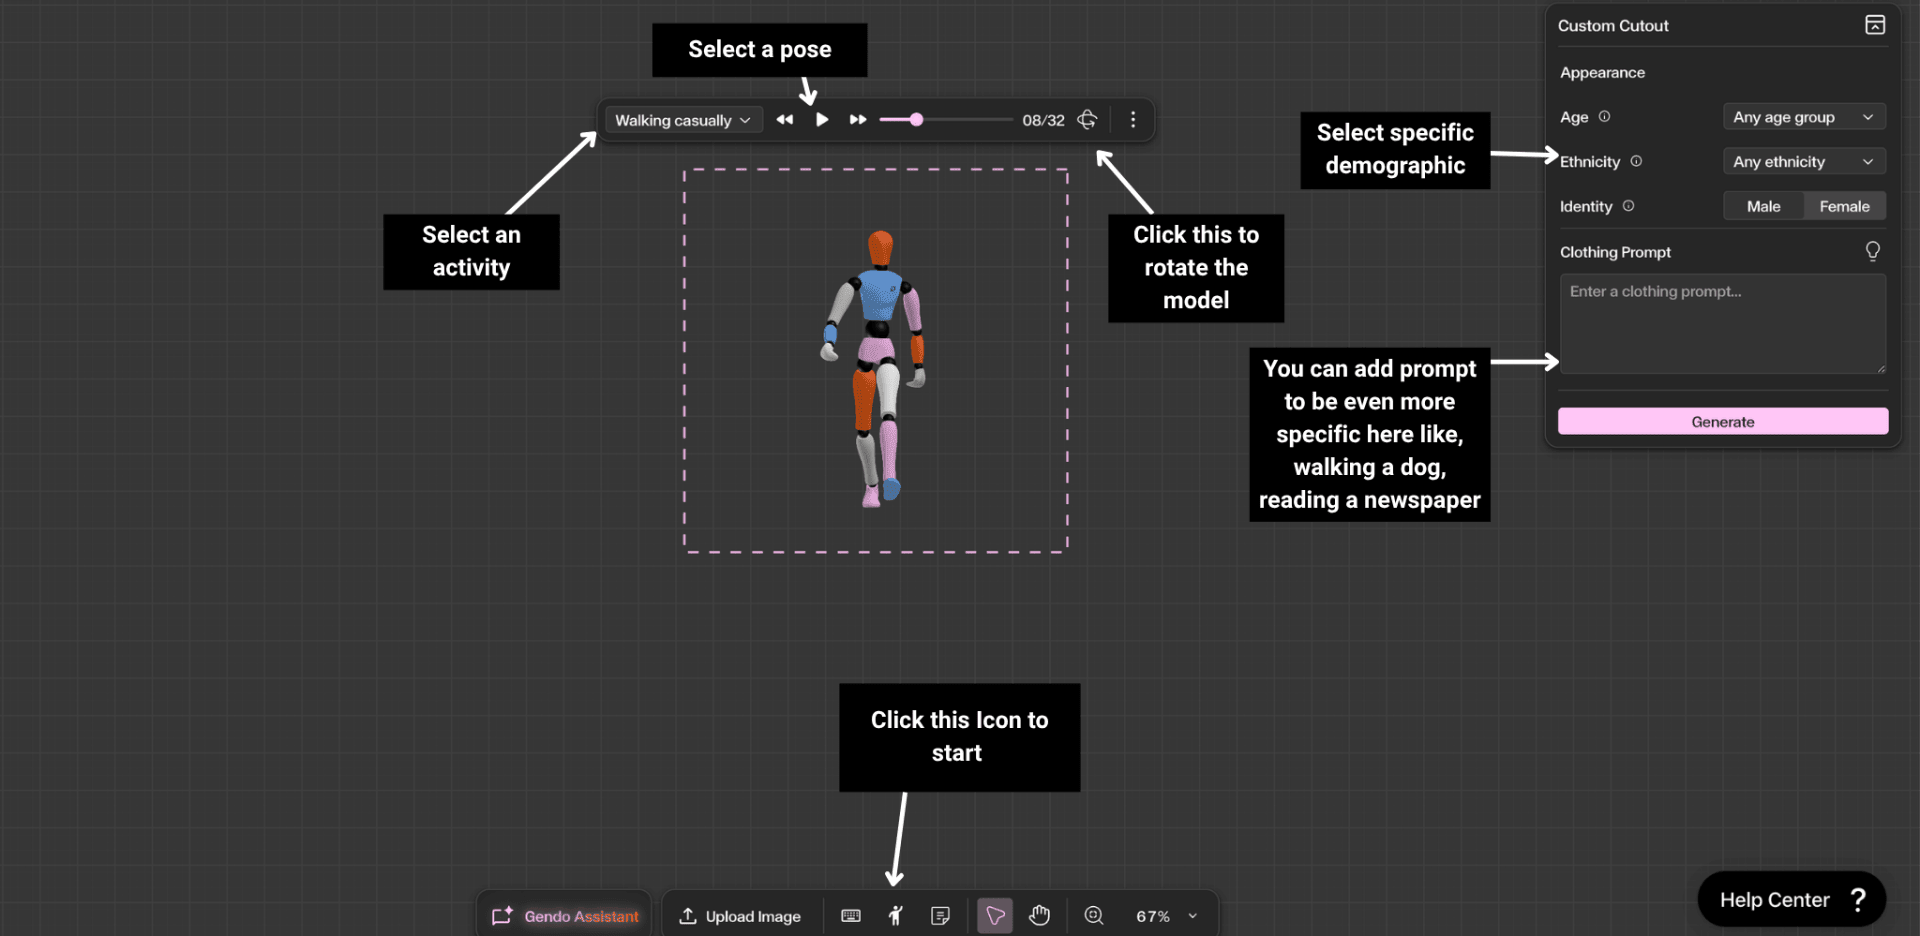
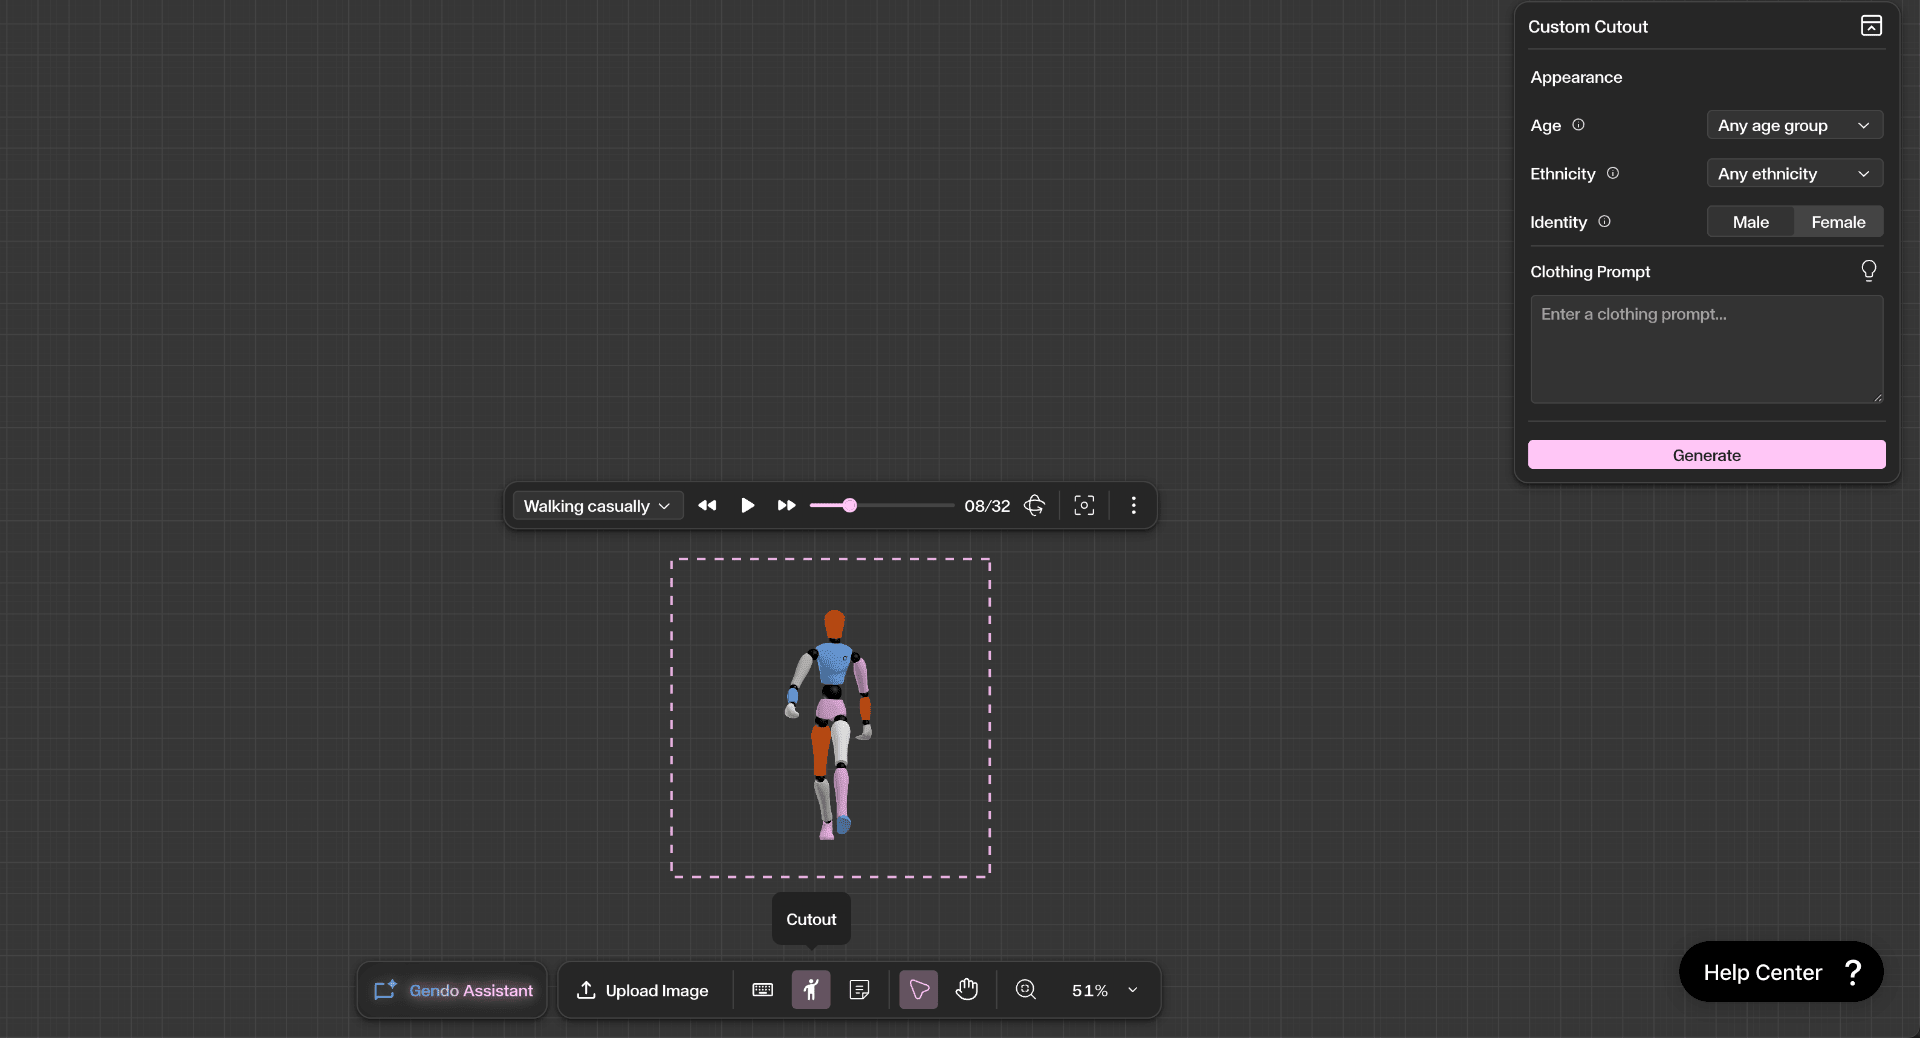
The Custom Cutout tool is located in the bottom toolbar of the canvas, represented by a person icon. Click it to open the Custom Cutout panel on the right side of the canvas.
When the tool opens, a preview area appears in the centre of the canvas showing a human model performing the selected pose. The panel on the right allows you to customise the character before generating.
Pose Selection — At the top, choose a pose or movement type. Examples include walking, standing, sitting, and interacting with the environment.
Appearance — The Appearance section lets you customise demographic attributes: Age (select an age group or allow any), Ethnicity (choose a specific ethnicity or allow multiple), and Identity (select male or female).
Below the appearance options, add a Clothing Prompt to be even more specific — for example, walking a dog, reading a newspaper, or carrying a briefcase.
Step by Step
Click the icon and load the model to the canvas
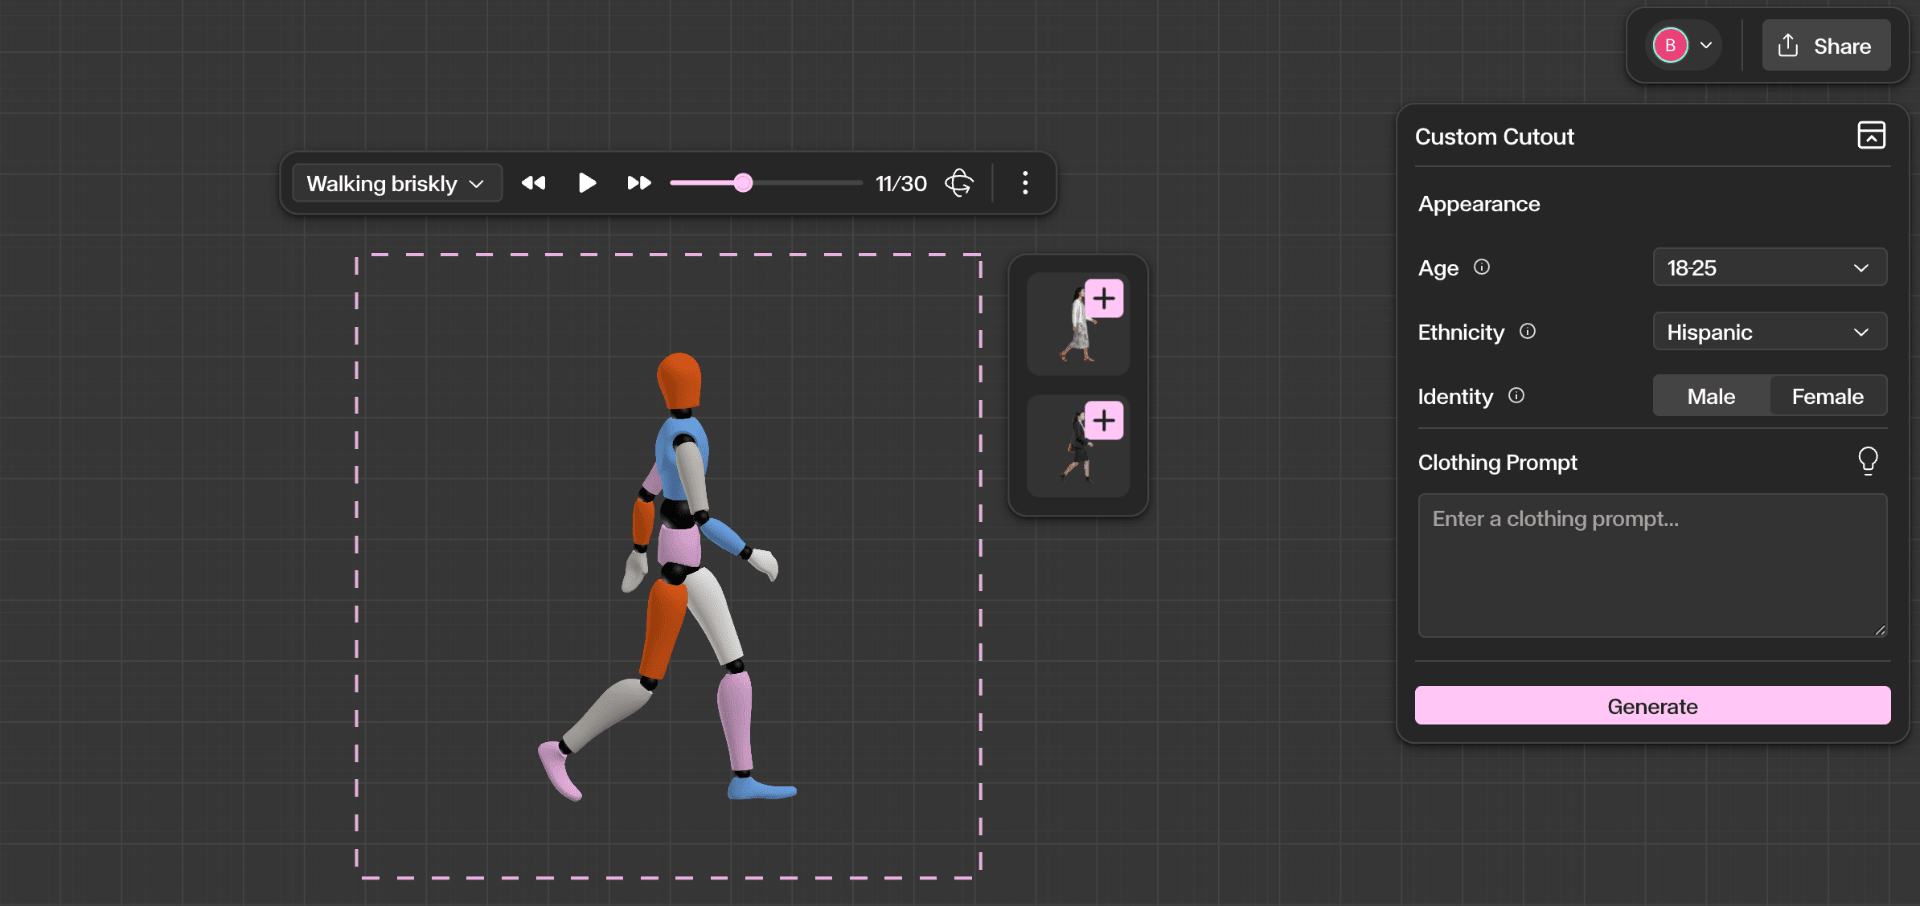
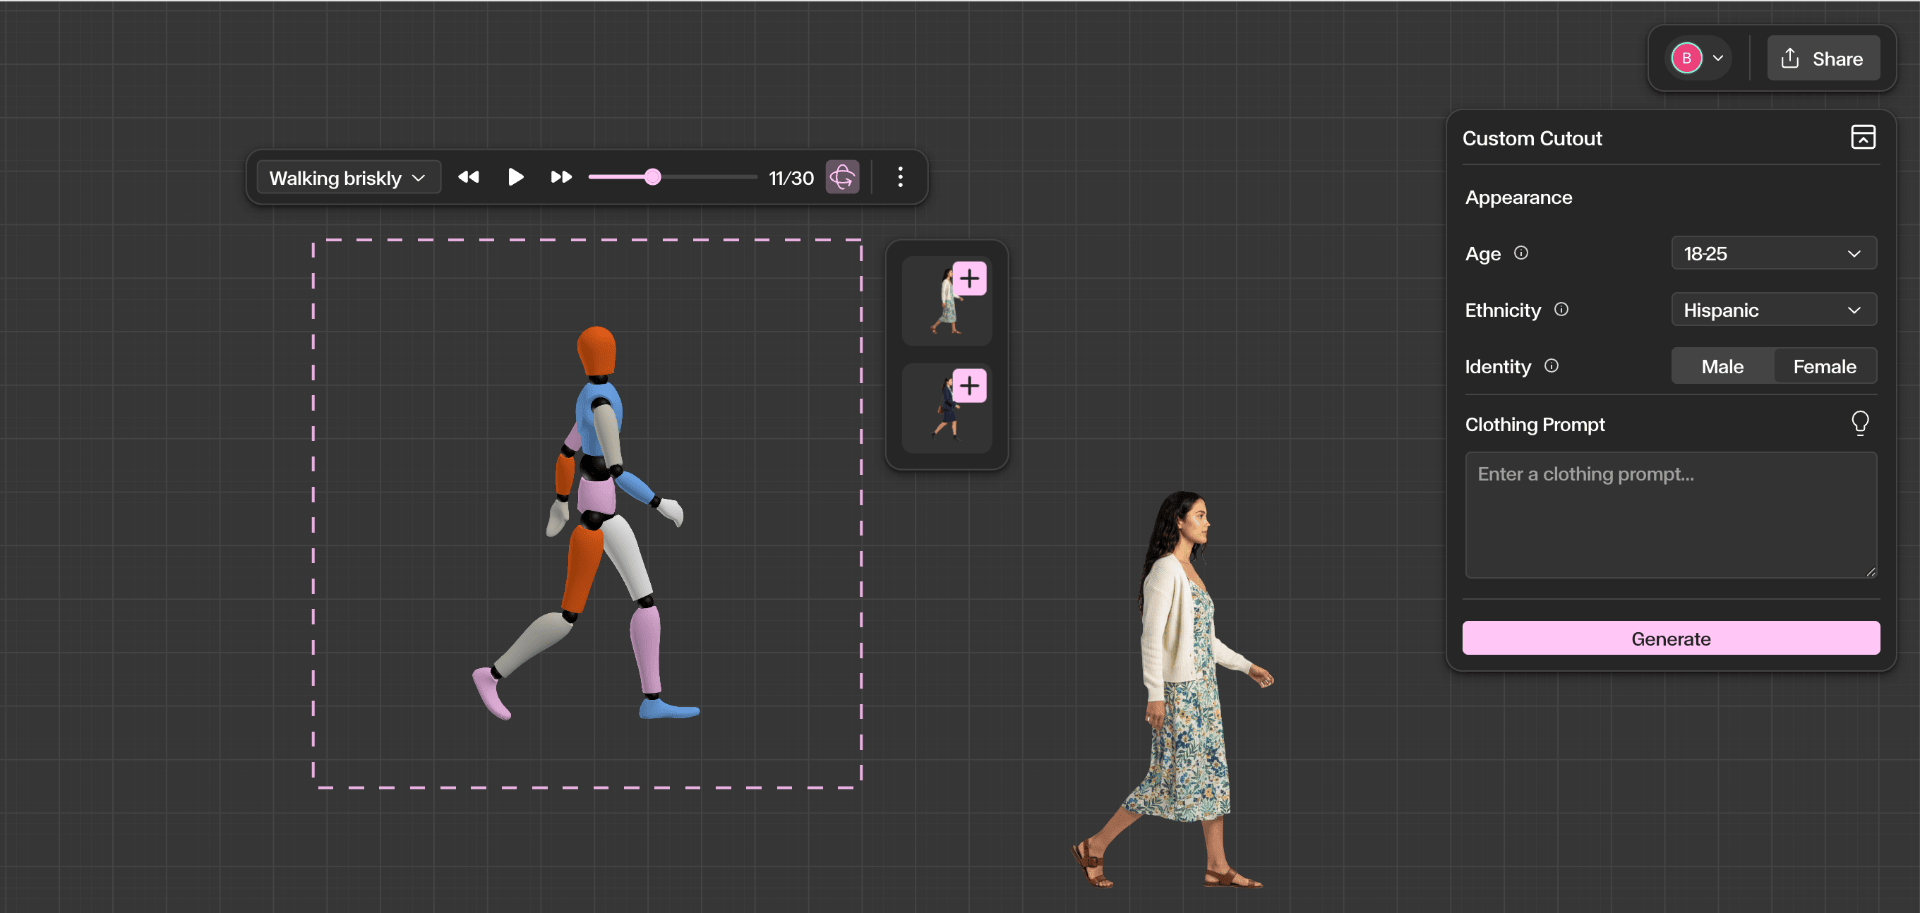
Click the person icon in the bottom toolbar. A 3D mannequin appears on the canvas — select a pose or movement from the dropdown (walking, standing, sitting) and preview it using the animation controls.
Confirm settings and write a prompt
Set the appearance options (Age, Ethnicity, Identity) to match your scene. Then add a **Clothing Prompt** — you can be as specific as you like. For example: walking a dog, reading a newspaper, or carrying a briefcase.
Hit Generate and add to the canvas
Click **Generate** to create the cutout. Once complete, the generated figure appears alongside the mannequin. Click the **+** button to add it to the canvas, then move, scale, and position the figure to fit naturally within your architectural scene.
Get Better Results
Choose poses that match the context of the scene — a seated figure for a café terrace, a walking figure for a streetscape.
Use clothing prompts to guide style and realism — describe materials, colours, and formality to match the project context.
Position characters carefully to maintain correct scale and perspective within the architectural composition.
Combine Custom Cutouts with the Populate tool to create more dynamic and varied scenes.