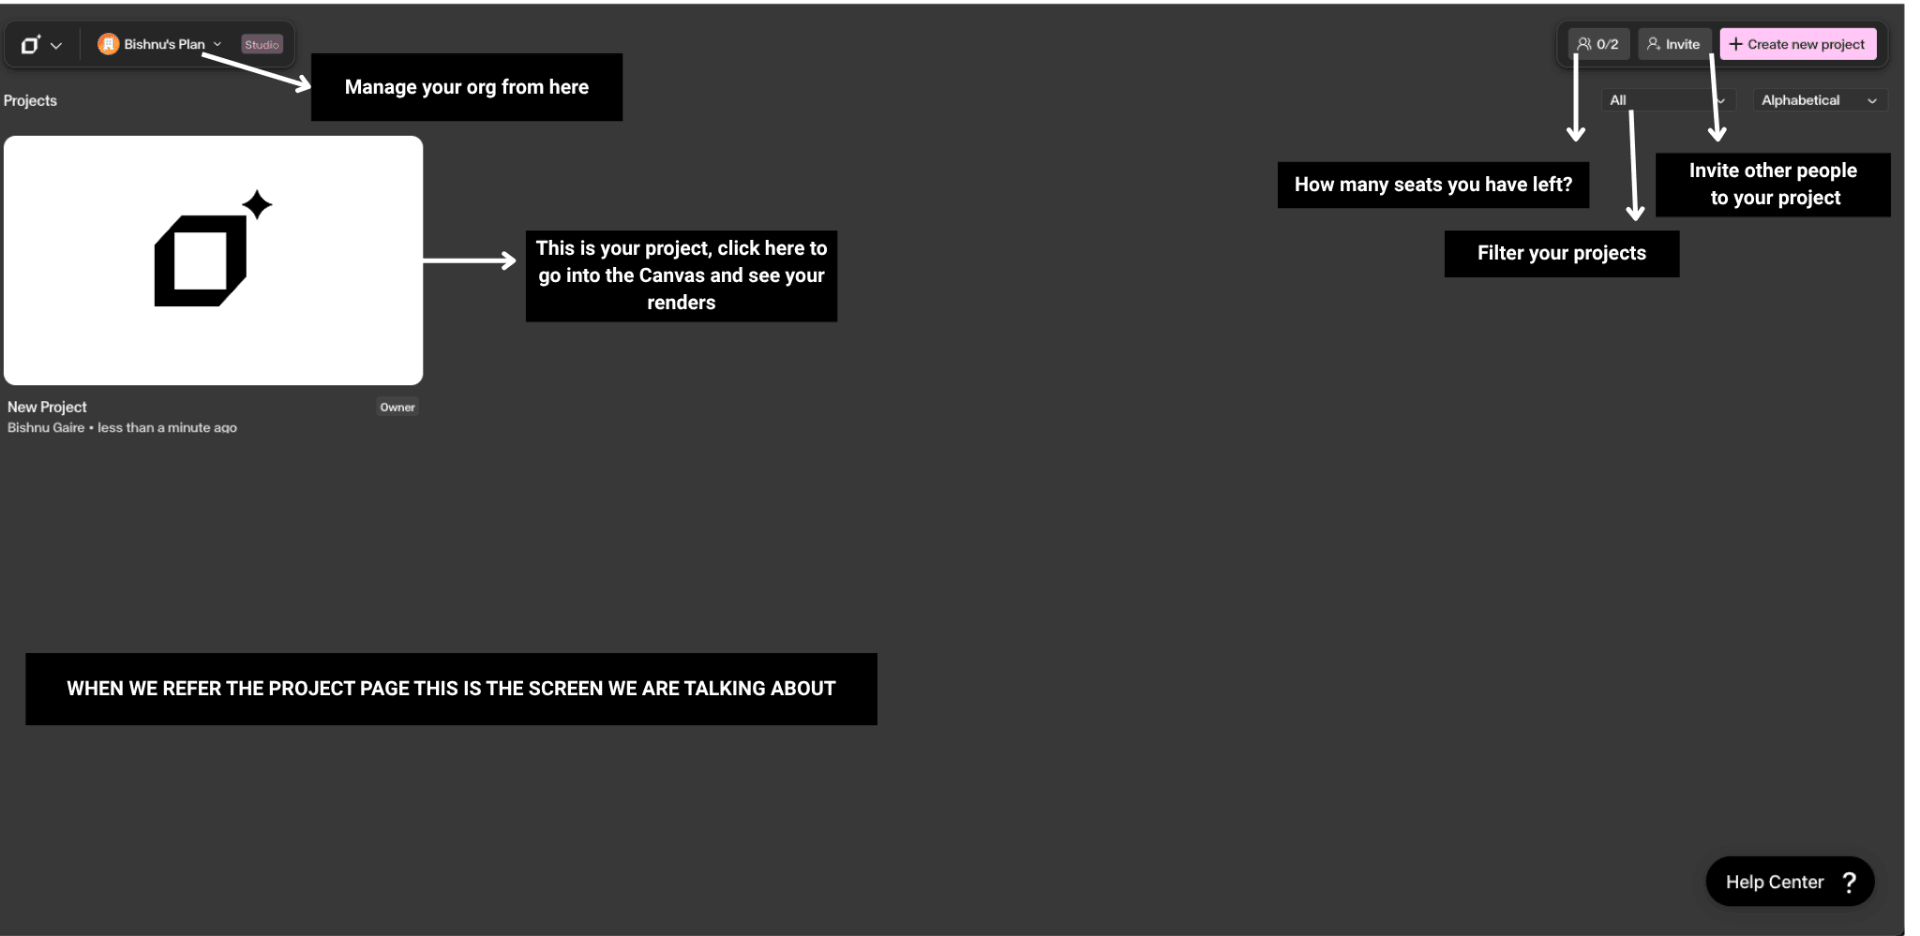
Studio Interface
The main creative workspace — an infinite, in-browser canvas for managing images, renders, and notes.
What is the Studio Interface?
The Studio Interface is the main creative workspace where you design your images. It is an infinite, in-browser canvas that allows you to manage multiple images, renders, and notes simultaneously. Instead of opening separate files, you can run multiple AI generations at once, leave comments on images, and keep all your original sketches and final renders in one place. As you improve your design, the canvas tracks your changes, allowing you and your team members to collaborate and iterate together on a single surface.
Understanding the interface
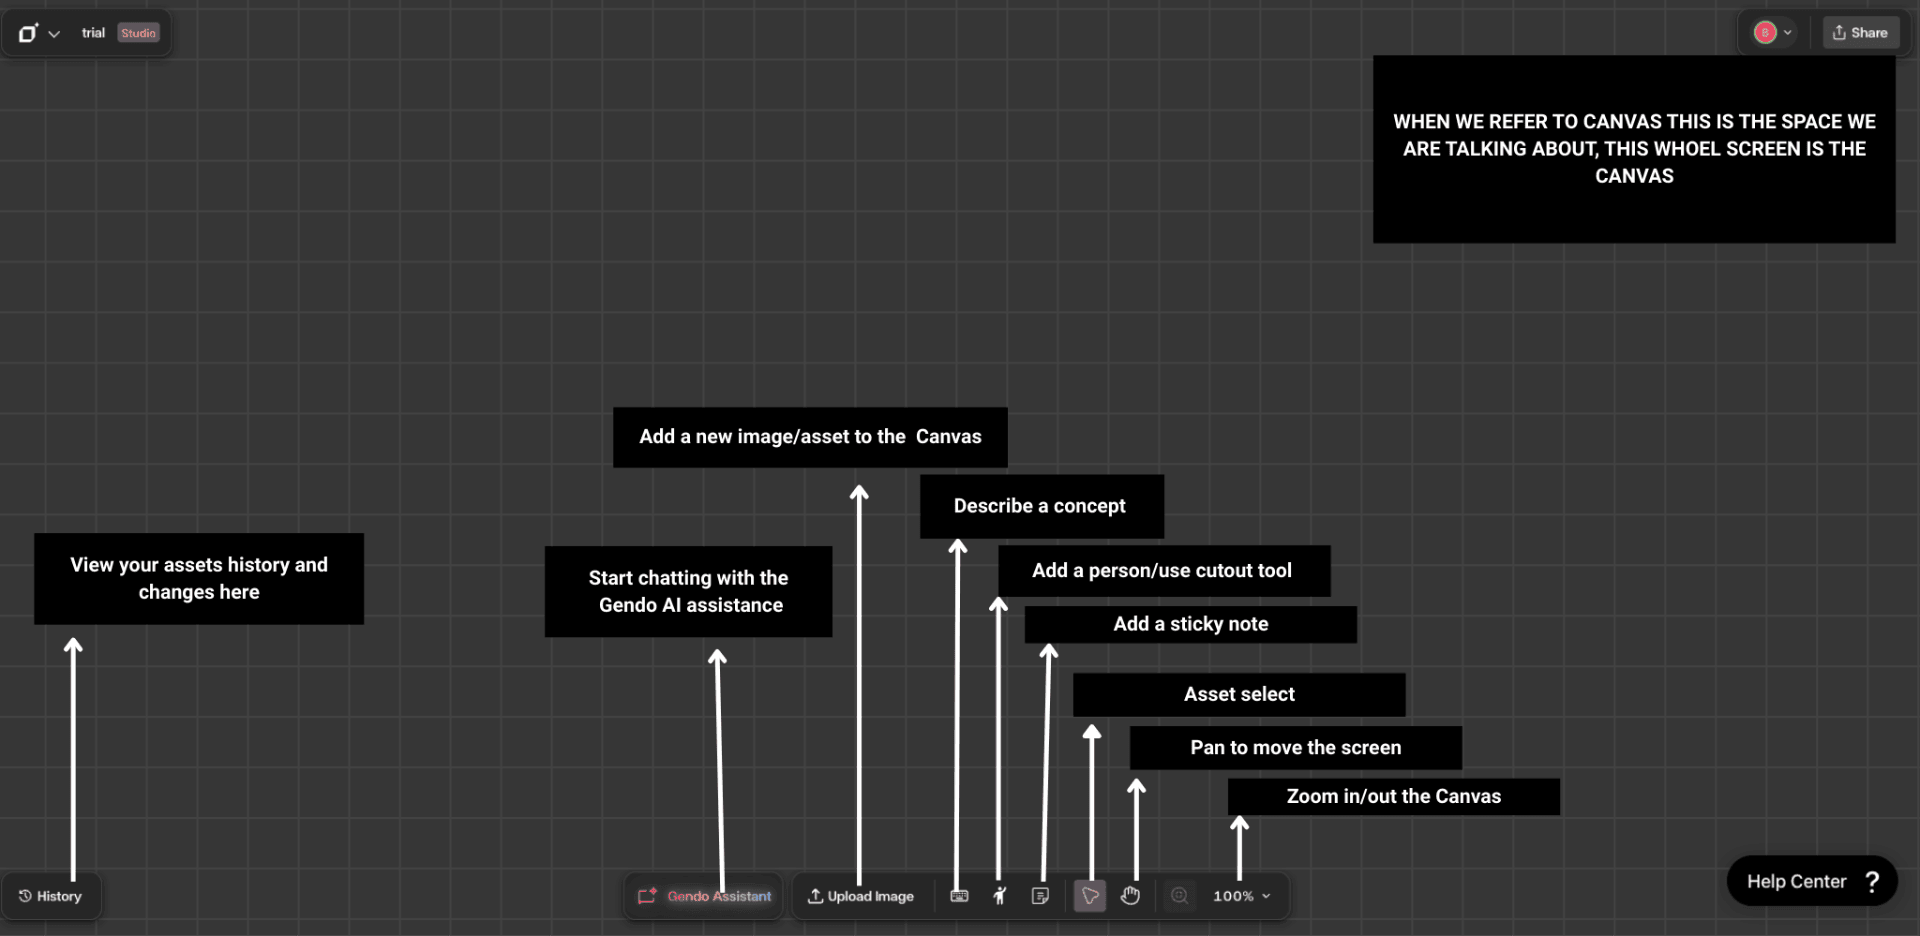
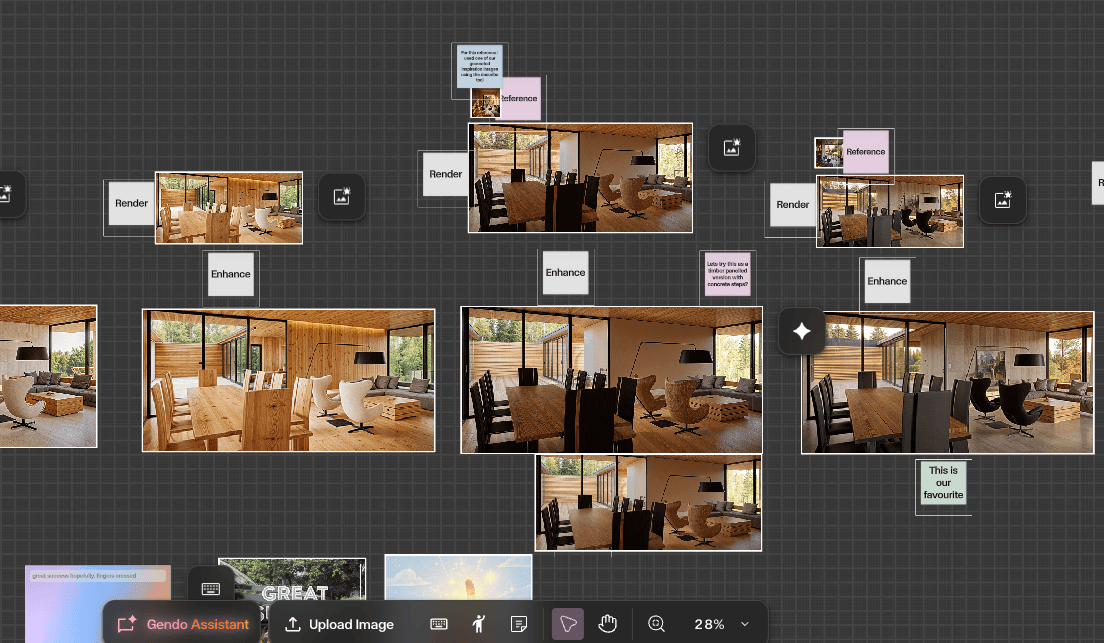
The Canvas
The Canvas is a large, shared workspace where you work on many different images at the same time. Run multiple AI generations at once, leave comments on images, and keep all your original sketches and final renders in one place.
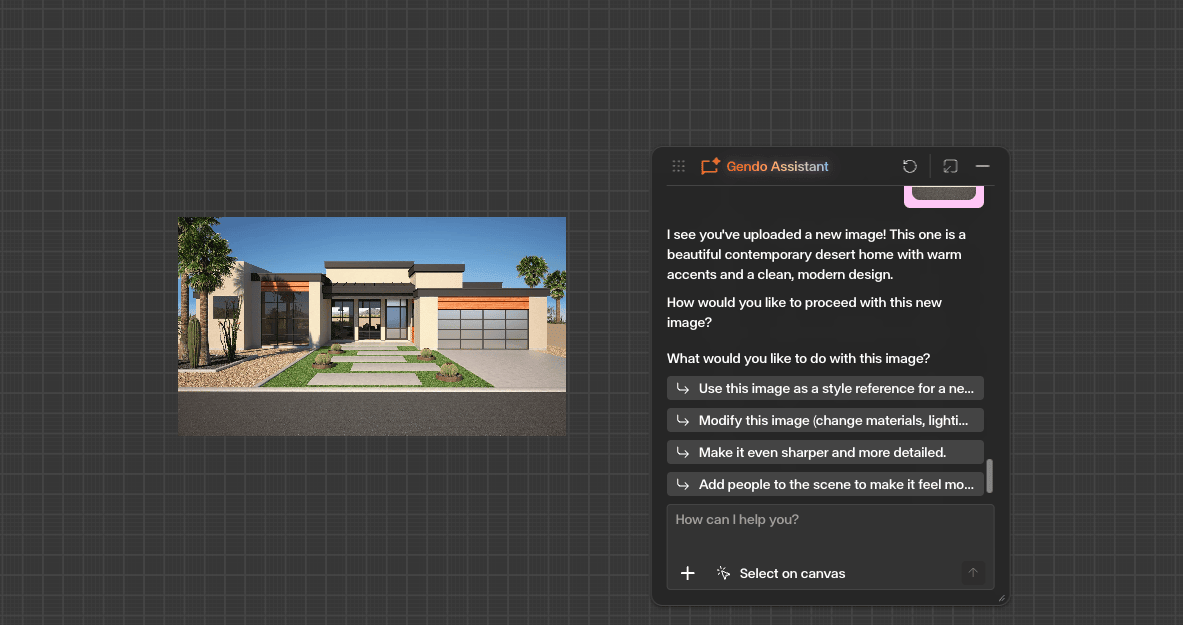
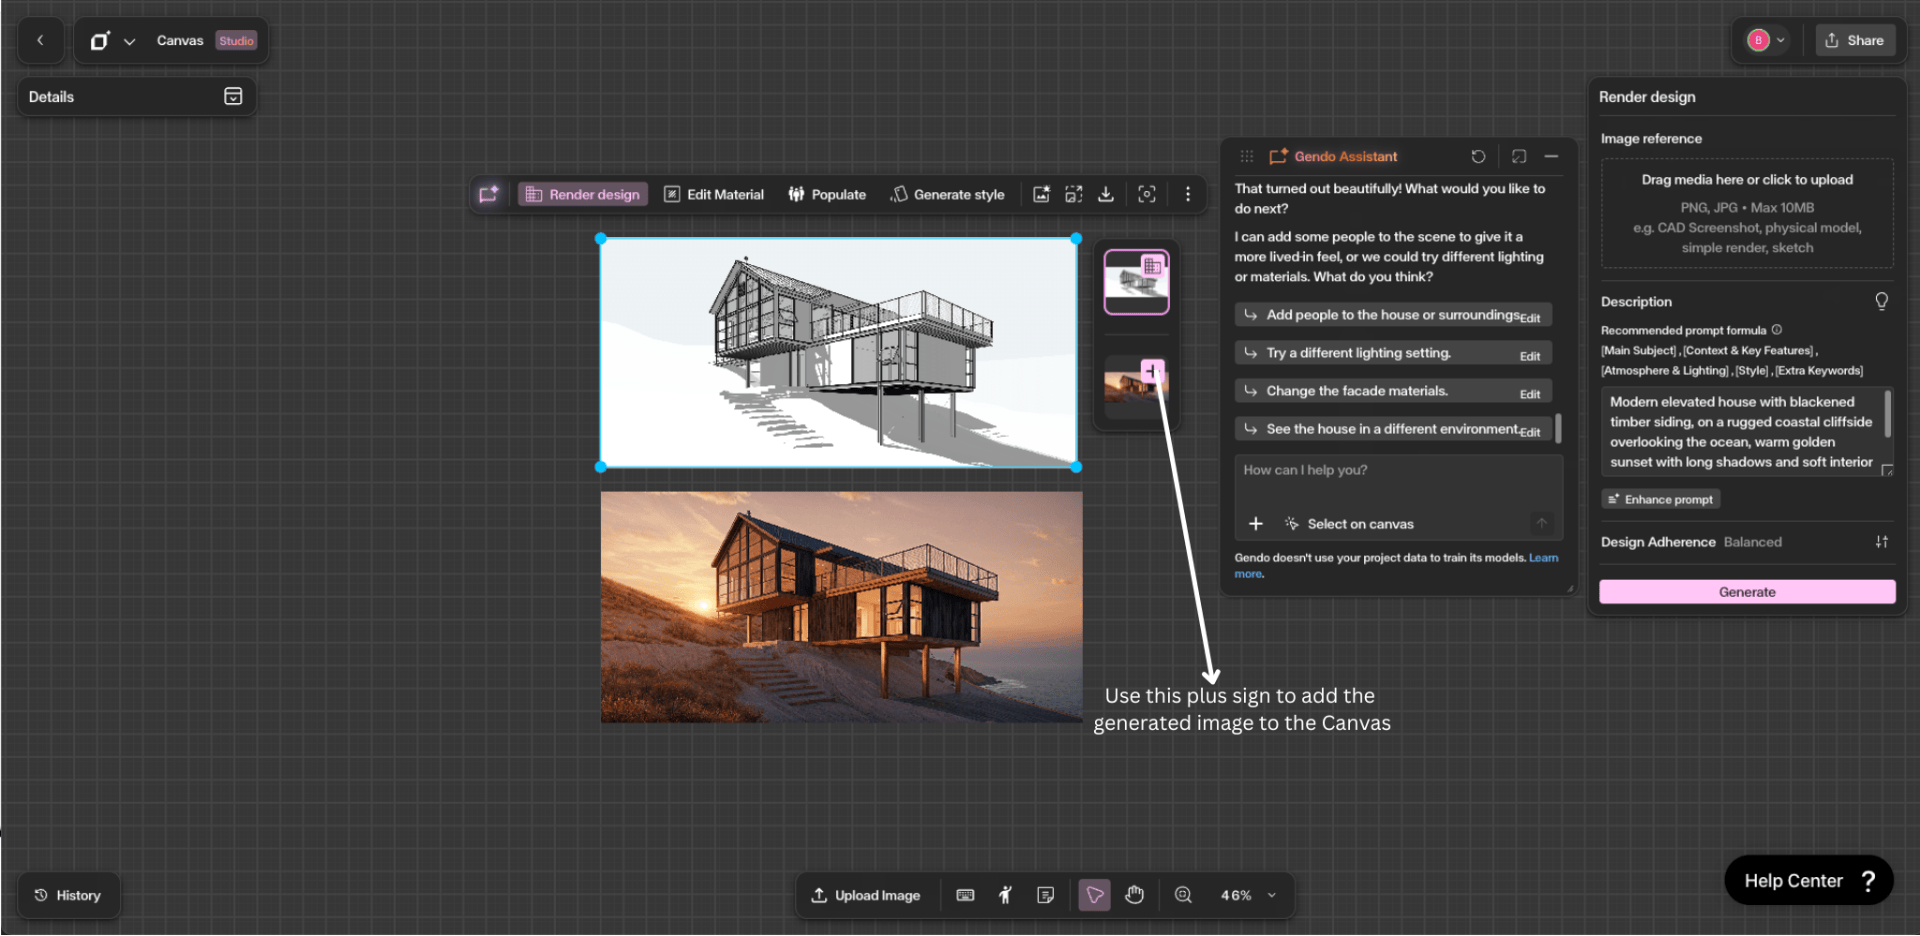
Gendo AI Assistance
The Gendo AI Assistant is your interactive partner on the canvas. This AI-powered chat has direct access to all the tools in the workspace, allowing you to control your project using natural language. Click the colourful 'Gendo Assistance' button located in the bottom toolbar to get started.
For a full walkthrough of the chat interface and workflows, see the Gendo AI Assistant guide.
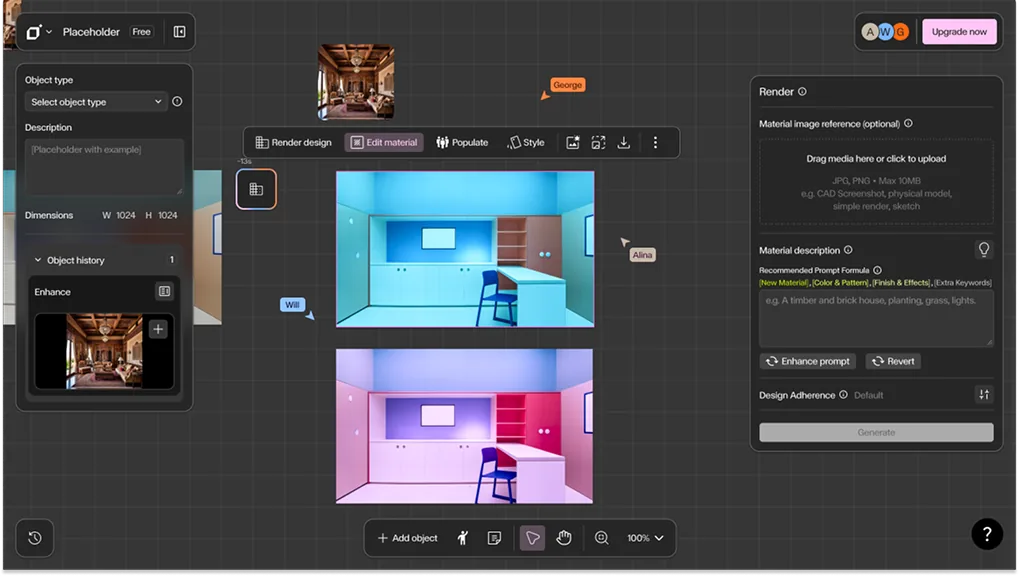
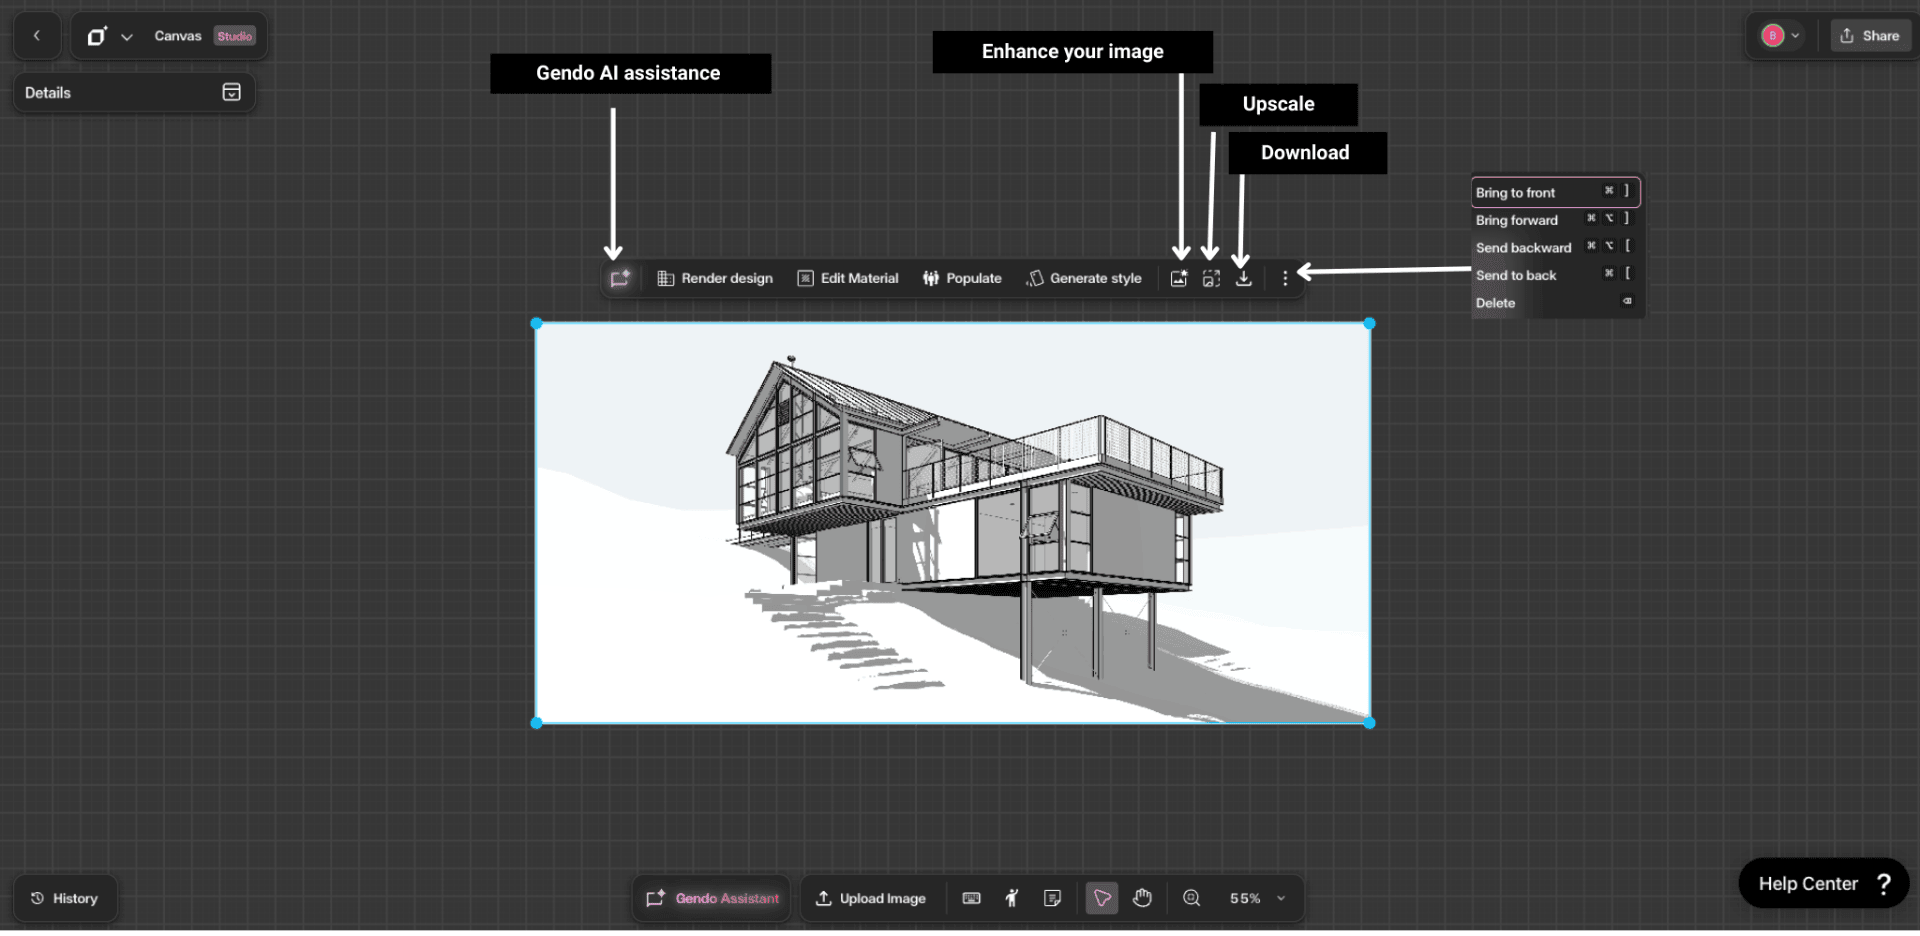
The Contextual Toolbar
The Contextual Toolbar appears automatically when you select an asset on the canvas. It provides quick access to AI actions and editing tools specific to the selected object, including Render Design, Edit Material, Populate, Style, Enhance, Upscale, Download, and more.
Step by Step
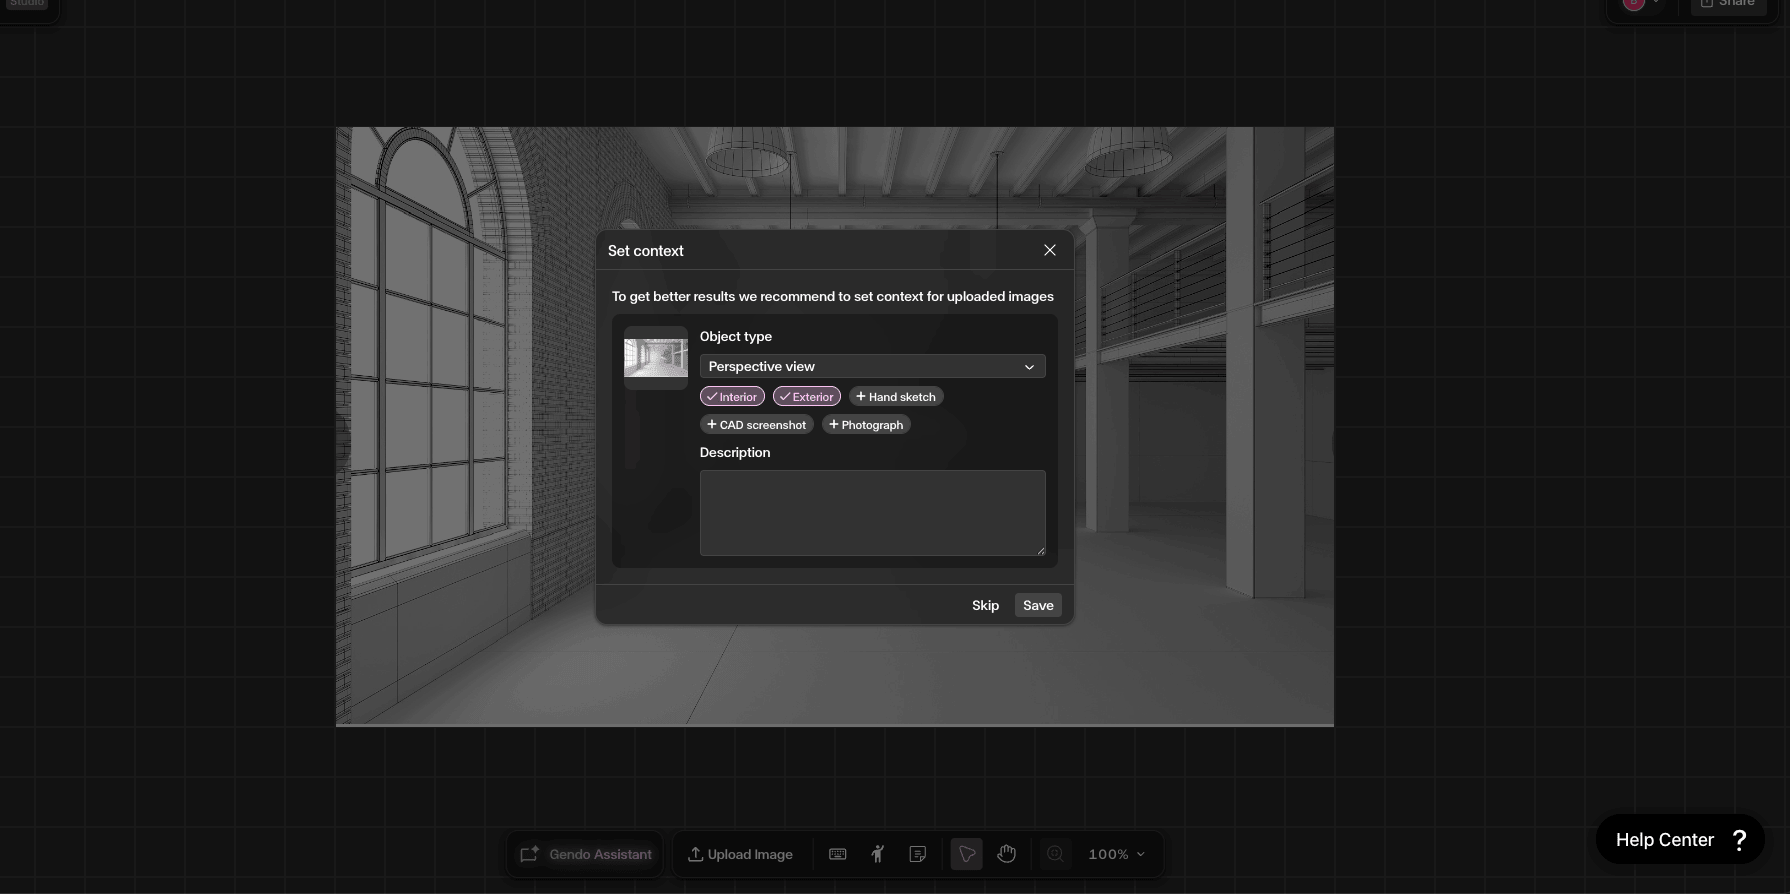
Upload images and set context
Click 'Upload Image' in the bottom toolbar to bring assets onto your Canvas. When you import an image, you are asked to set context — object type, tags (Interior, Exterior, Hand sketch), and a description. This helps the AI provide more accurate results.
Generate a design
Select the uploaded image, choose a tool (Render Design, Edit Material, Style, or Populate) or use the Gendo AI Assistant for a guided workflow. Enter your prompt, adjust settings, and click Generate.
See the Render Design guide for detailed prompt guidance.
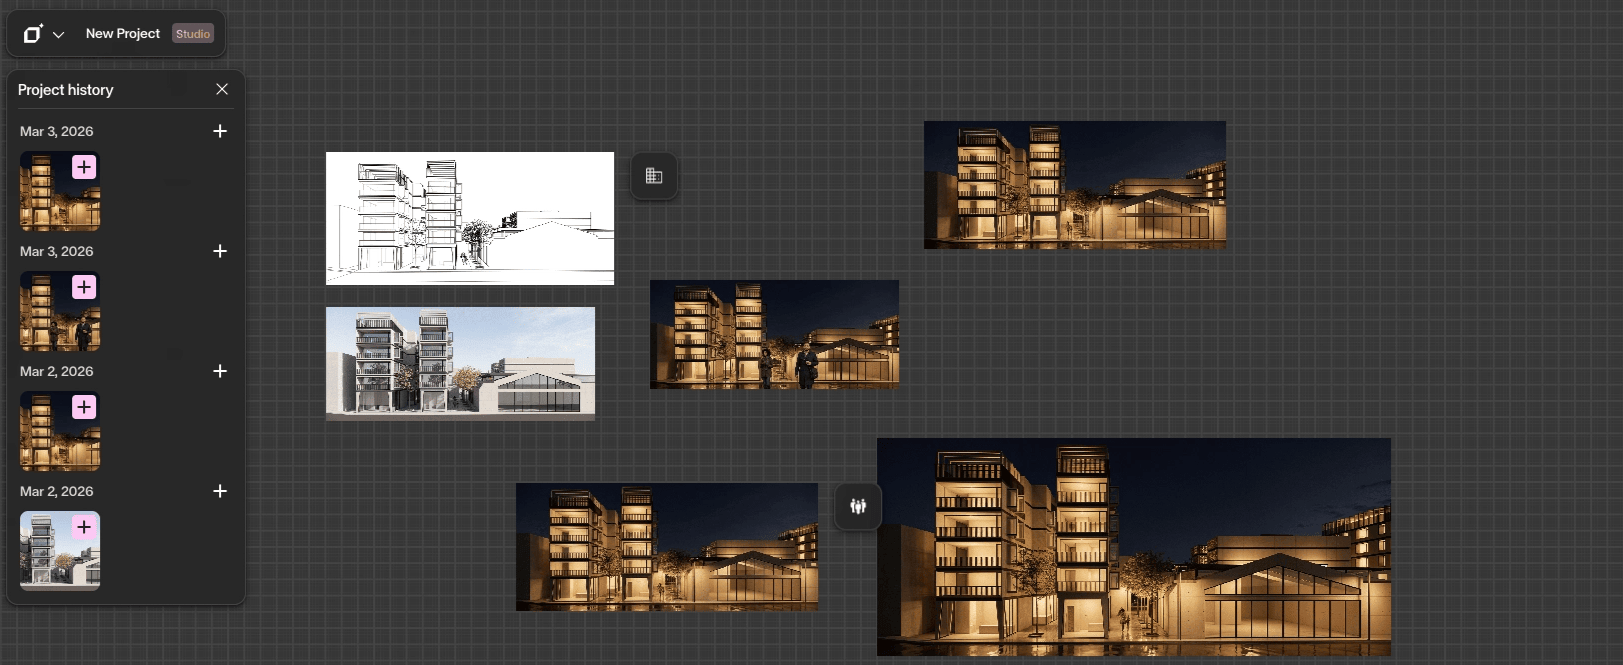
Track changes with History
The History panel allows you to look back at every version of your assets. Click the History button in the bottom-left corner to open it. Each entry shows a dated thumbnail for easy comparison and recovery.
For a detailed walkthrough, see the History Panel guide.
Create custom cutouts
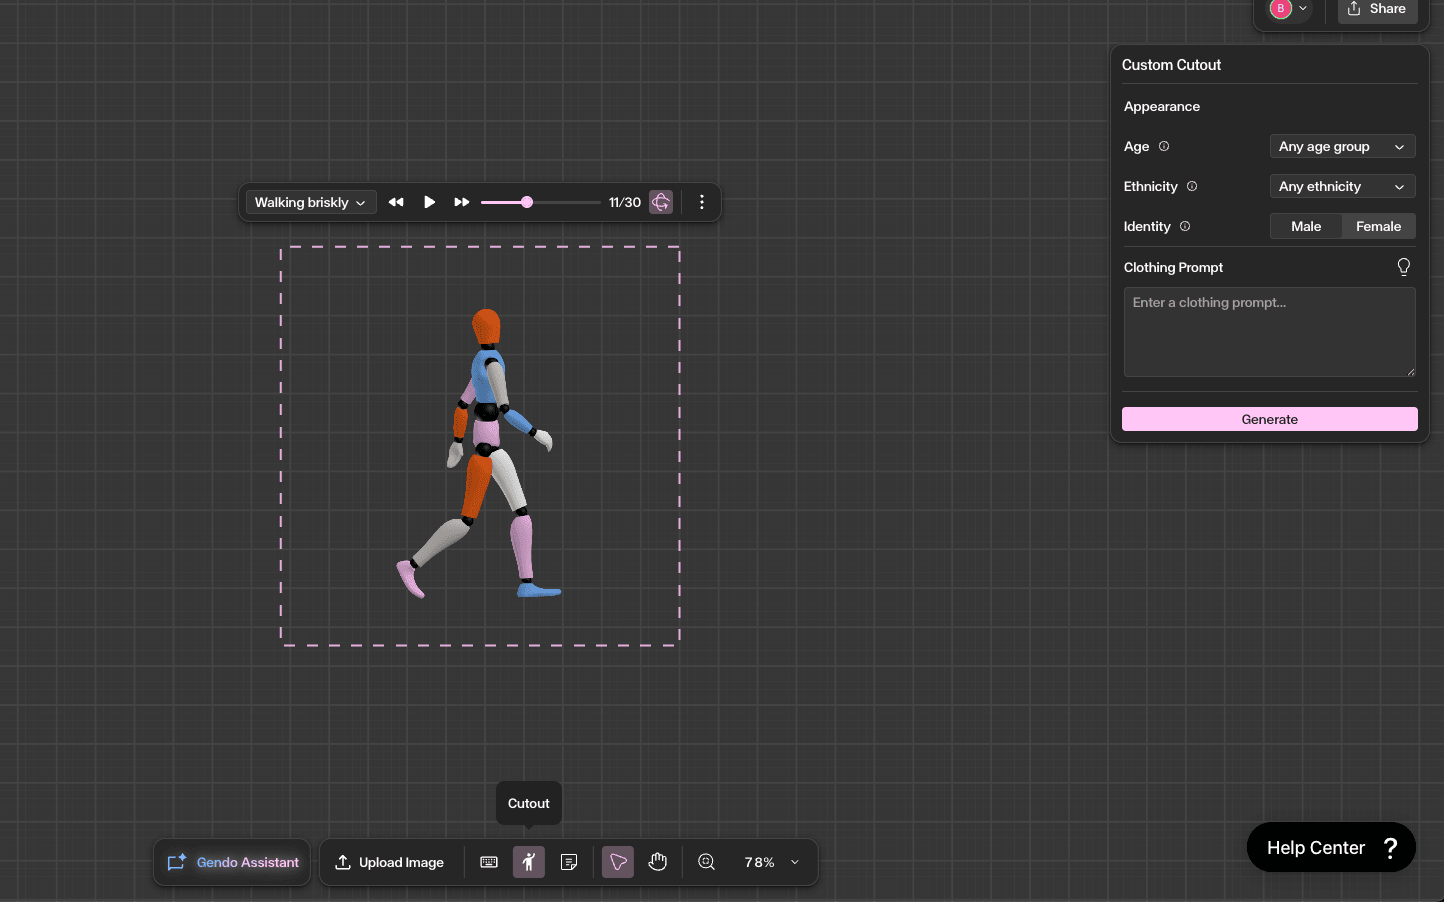
The Cutout tool lets you generate human figures with control over appearance and posture. Click the Person icon in the bottom toolbar, describe the person and pose you need, and place them onto your canvas.
For full details on poses, appearance, and clothing prompts, see the Custom Cutout guide.
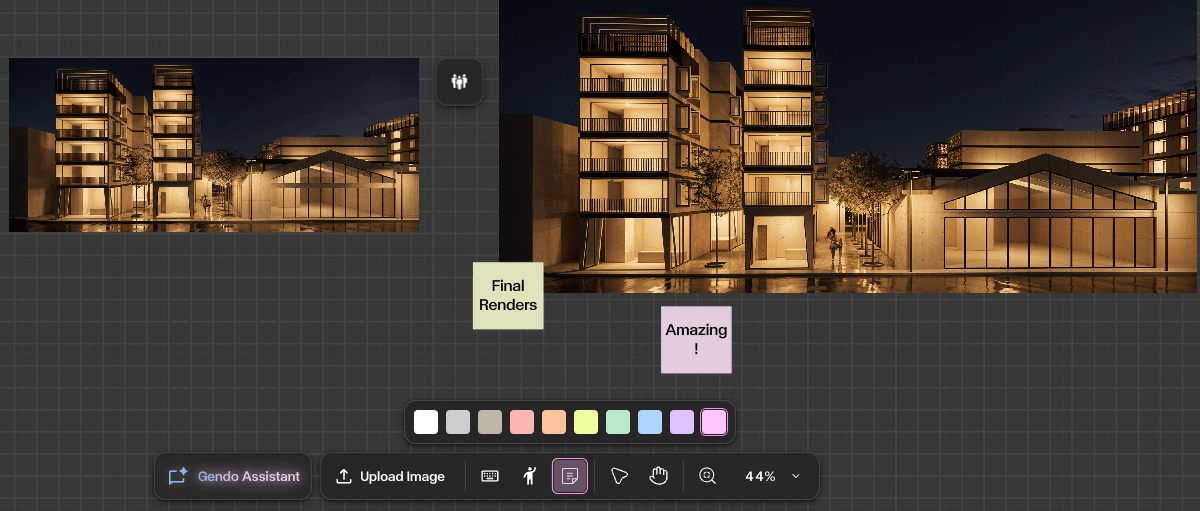
Annotate with Sticky Notes
The Sticky Note tool enables clear communication and project management within the canvas. Attach notes to images, choose colours to categorise feedback, and facilitate collaboration. Click the Document icon in the bottom toolbar.
Navigate the workspace
Asset Select (select multiple assets), Pan (move your view), and Zoom (adjust magnification) tools help you navigate and manage the infinite canvas efficiently.
Get Better Results
Use the Gendo AI Assistant to control your project with natural language — describe what you want and let the AI choose the right tool.
Set context on every uploaded image for significantly more accurate AI results.
Use sticky notes to keep feedback and decisions visible on the canvas for your entire team.
Familiarise yourself with the Contextual Toolbar — it adapts to the selected asset and provides direct access to every AI action.
Use the History panel regularly to track iterations and recover earlier versions of your designs.