Using the Gendo AI Assistant
Refine, generate, and modify designs on the canvas using natural language.
What is the Gendo AI Assistant?
The Gendo AI Assistant allows you to refine, generate, and modify designs directly on the canvas using natural language. Instead of manually choosing the right tool each time, the assistant interprets your request, asks follow-up questions when needed, and calls the most appropriate tool based on what you want to do. When an image is attached, the assistant automatically inspects it and suggests possible next steps, such as creating a photorealistic render or applying a different style.
Understanding the interface
The Chat Panel
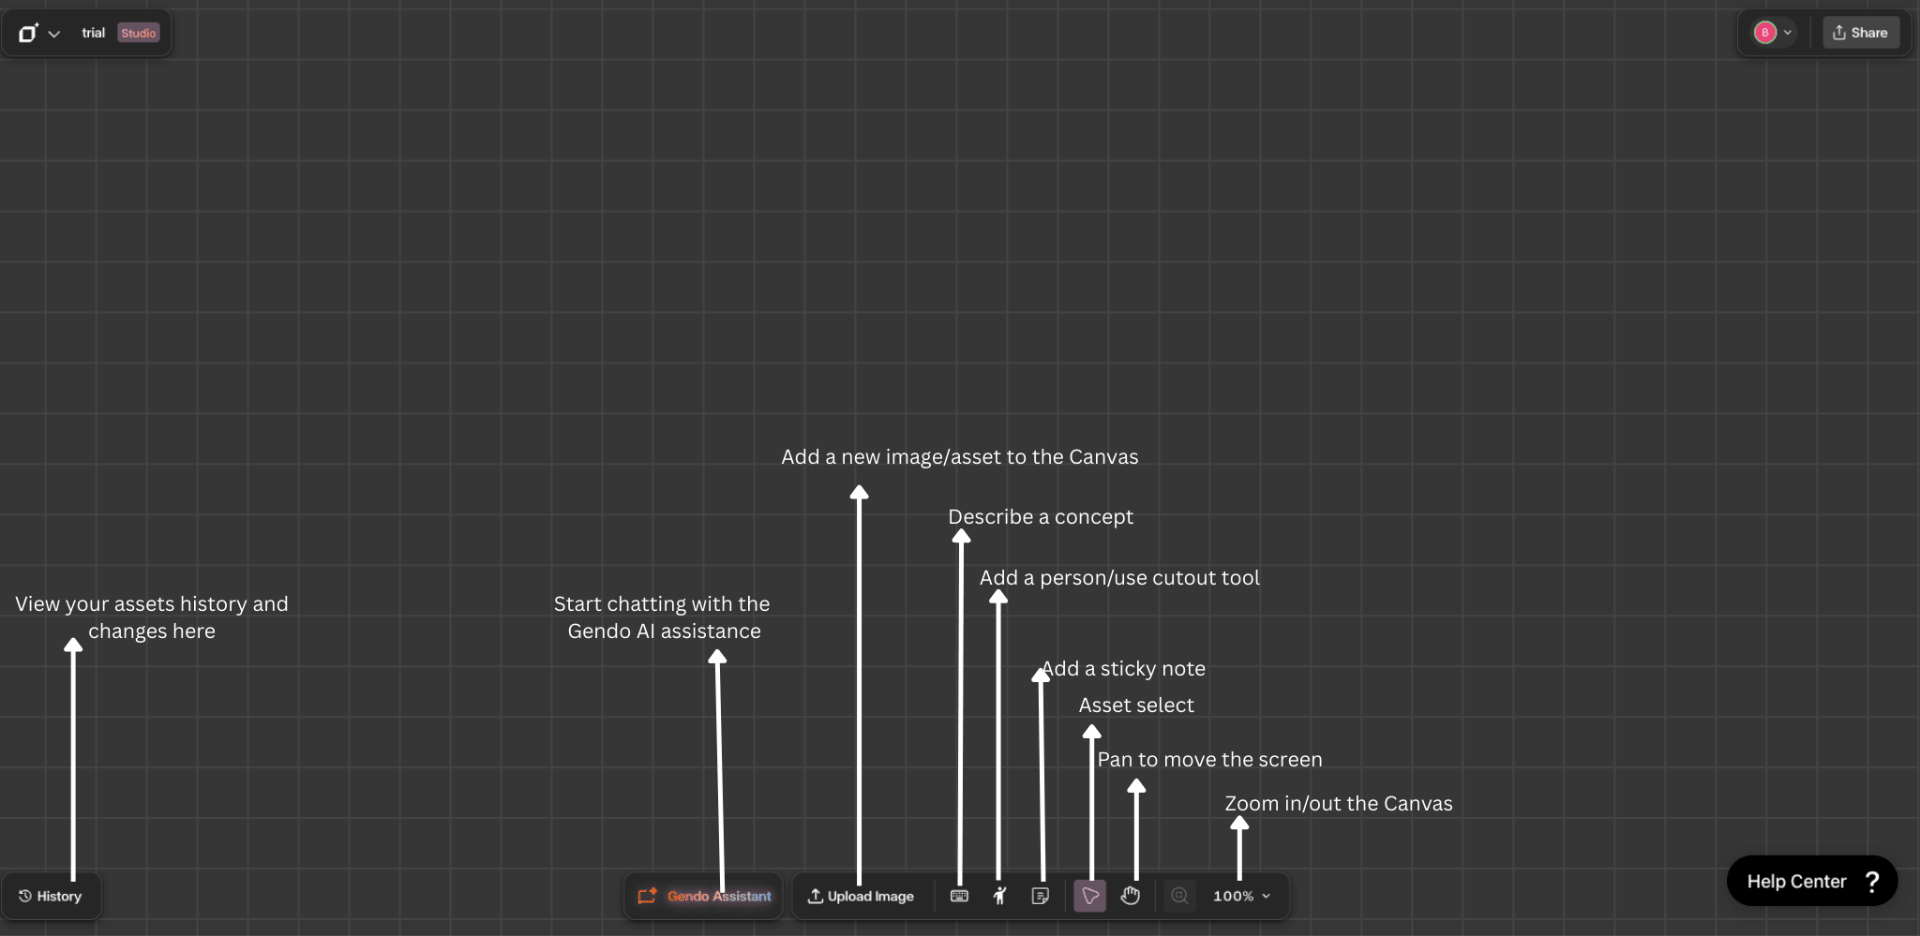
The AI Assistant lives in a dedicated chat panel on the right side of the canvas. It has direct access to every tool in the workspace — Render, Material, Style, Populate, Enhance, Upscale, Cutout, and Describe. You interact with it by typing natural language requests, and the assistant determines which tool to invoke based on your intent.
When the Chat Opens
When the Gendo Assistant panel opens, several interface controls are available at the top and bottom of the chat.
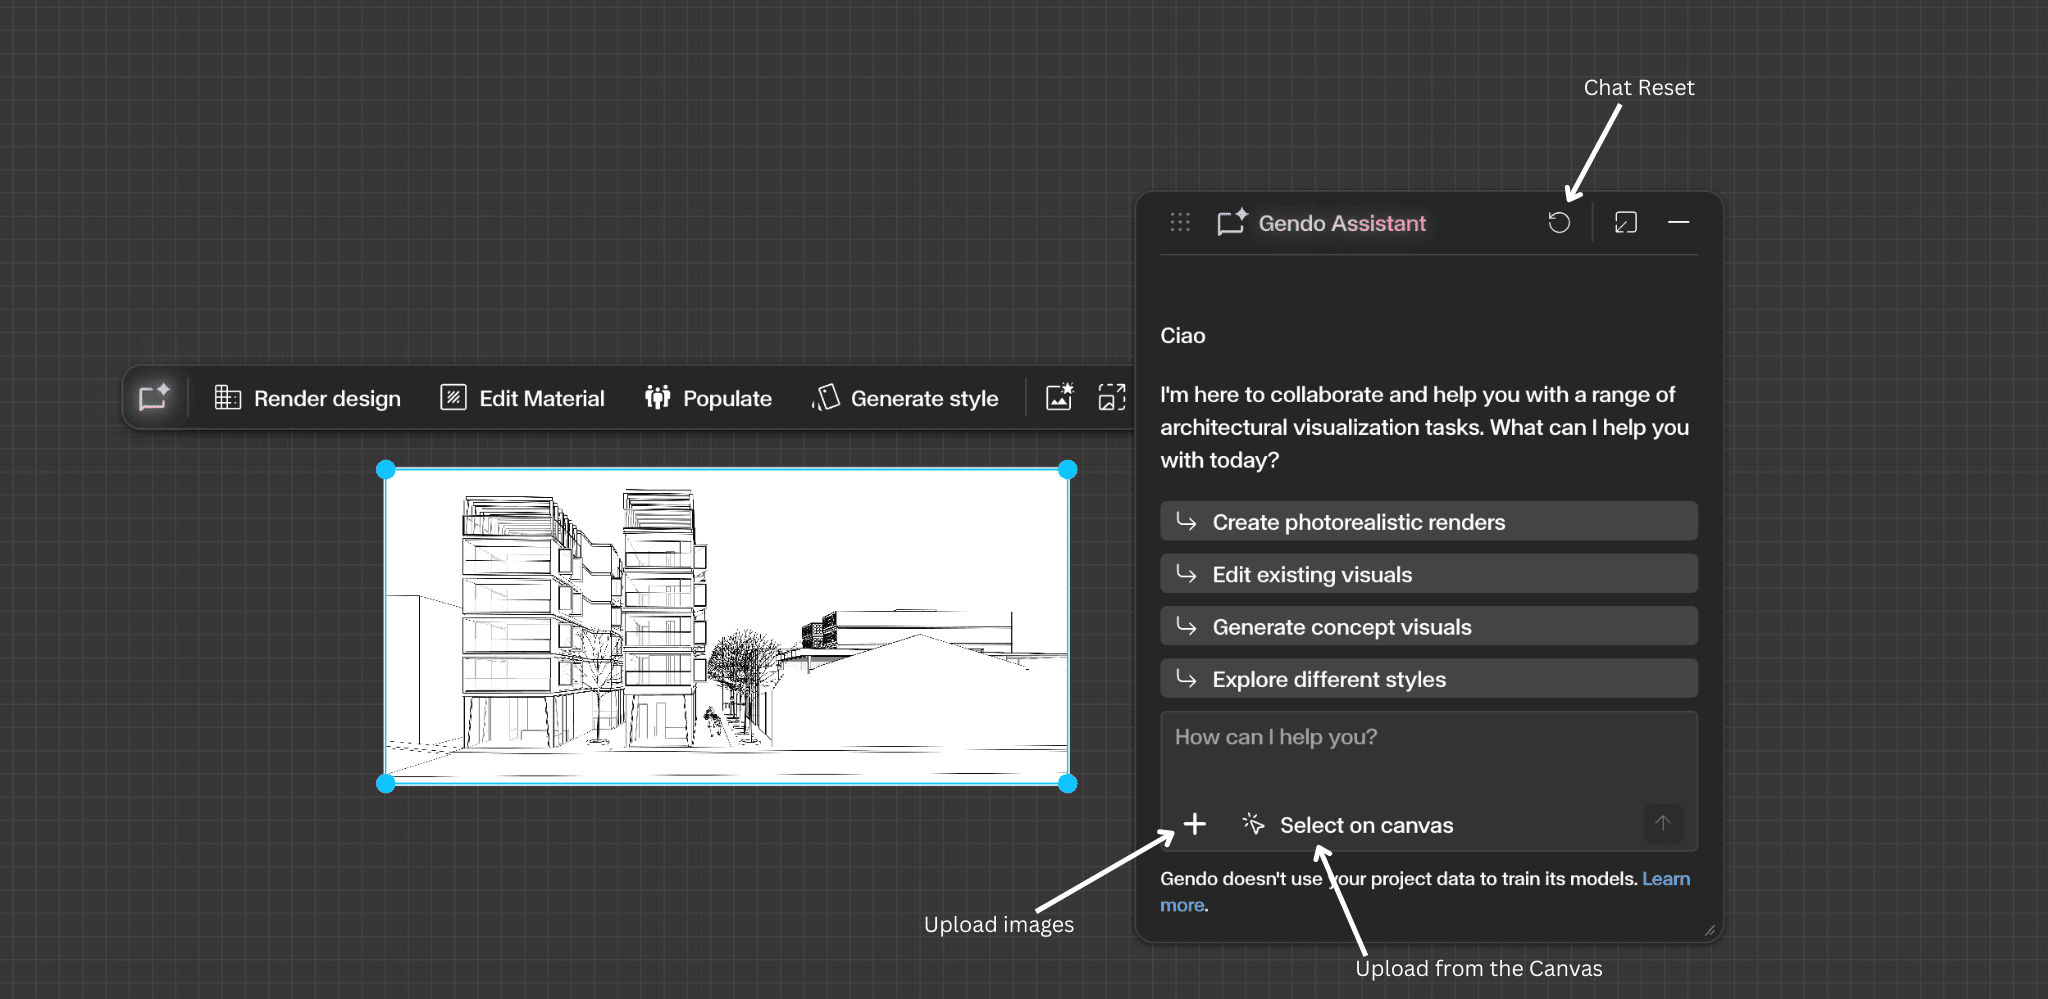
- Chat Reset — At the top of the panel you will see a circular arrow icon. This button allows you to reset the chat. Resetting the chat clears the current conversation and starts a new session with the assistant.
- Upload Images to Chat — You can upload images directly into the conversation to guide the assistant. Click the Upload option in the chat panel to add images from your computer.
- Select from Canvas — You can also attach images that already exist in your workspace. Click Select on Canvas and choose an image from the canvas.
- Suggested Actions — When the assistant analyzes an image, it may show suggested actions such as: Create photorealistic renders, Edit existing visuals, Generate concept visuals, or Explore different styles.
Step by Step
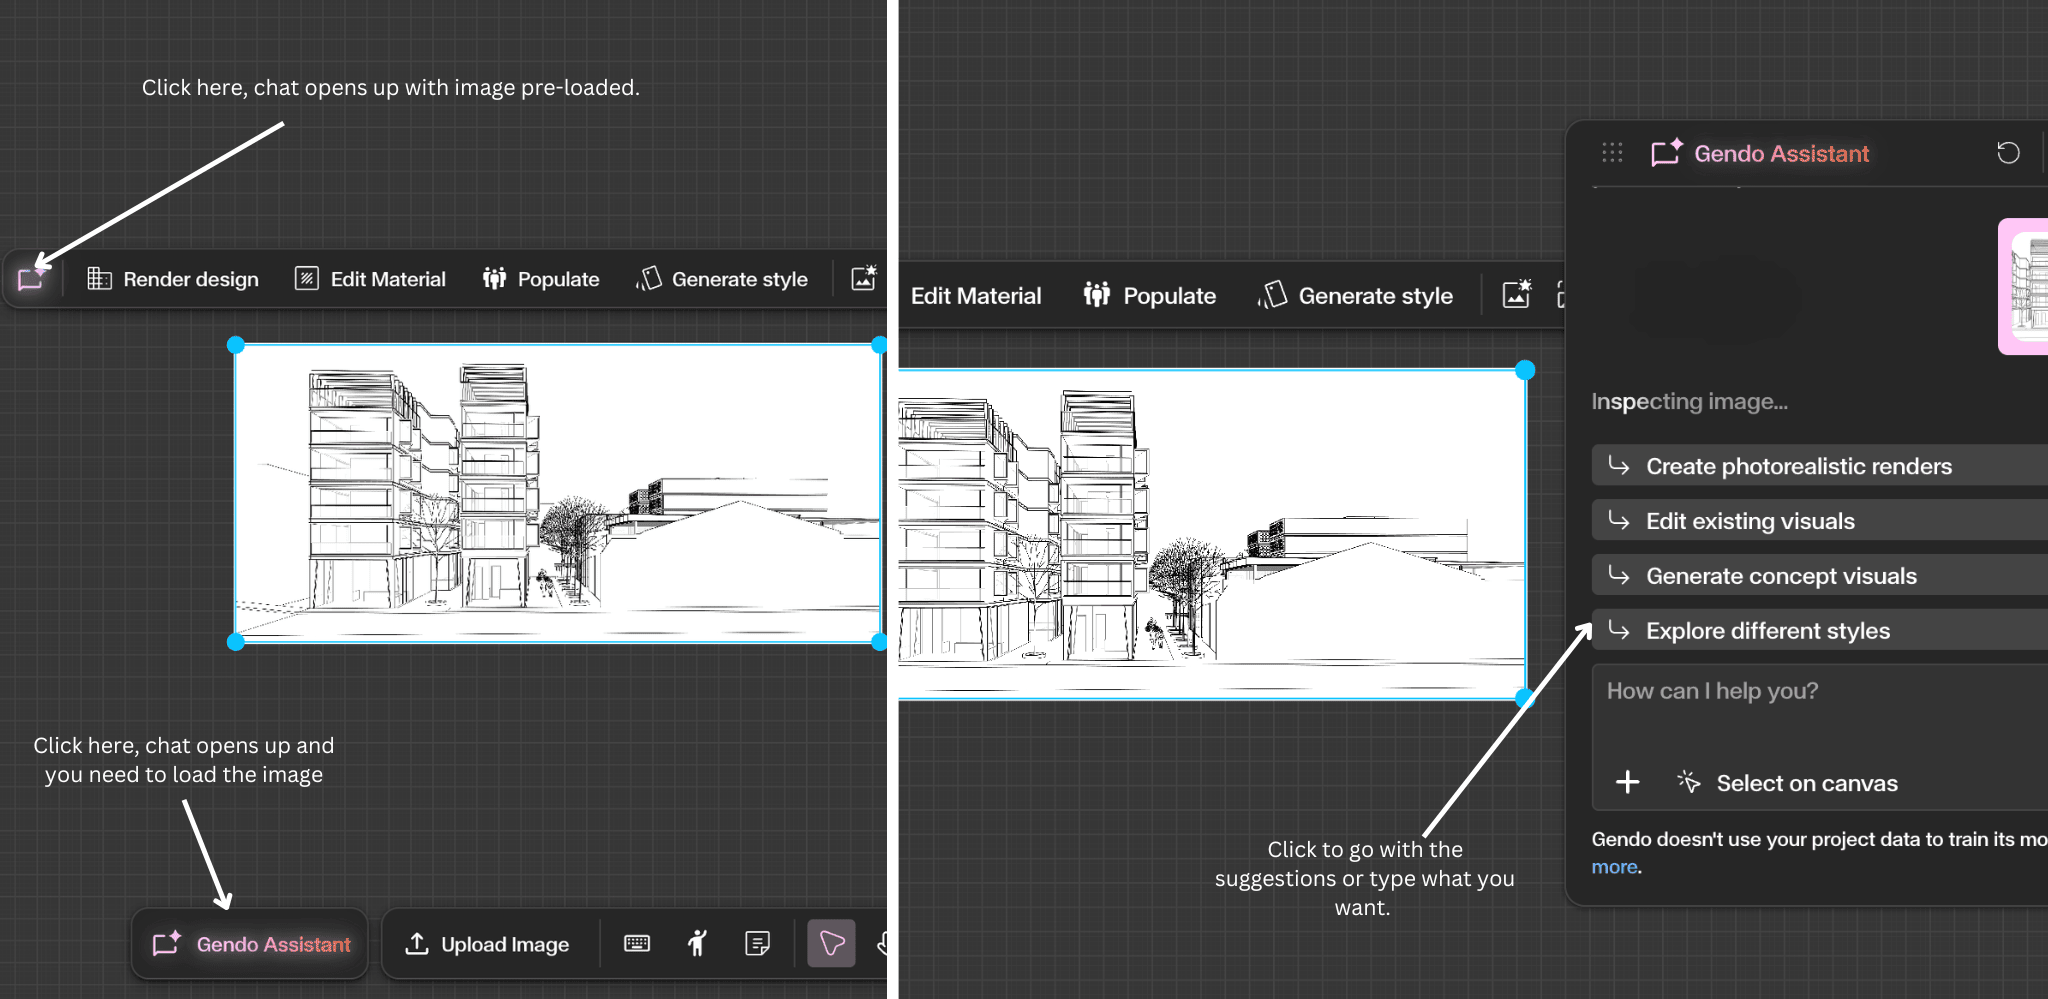
Select an image or asset on the canvas
Open the Gendo Assistant panel from the bottom toolbar, or click Start Chat from the image toolbar. If you open chat from the bottom toolbar, select the image you want to work on so the assistant knows which asset you are referring to.
Attach and describe your request
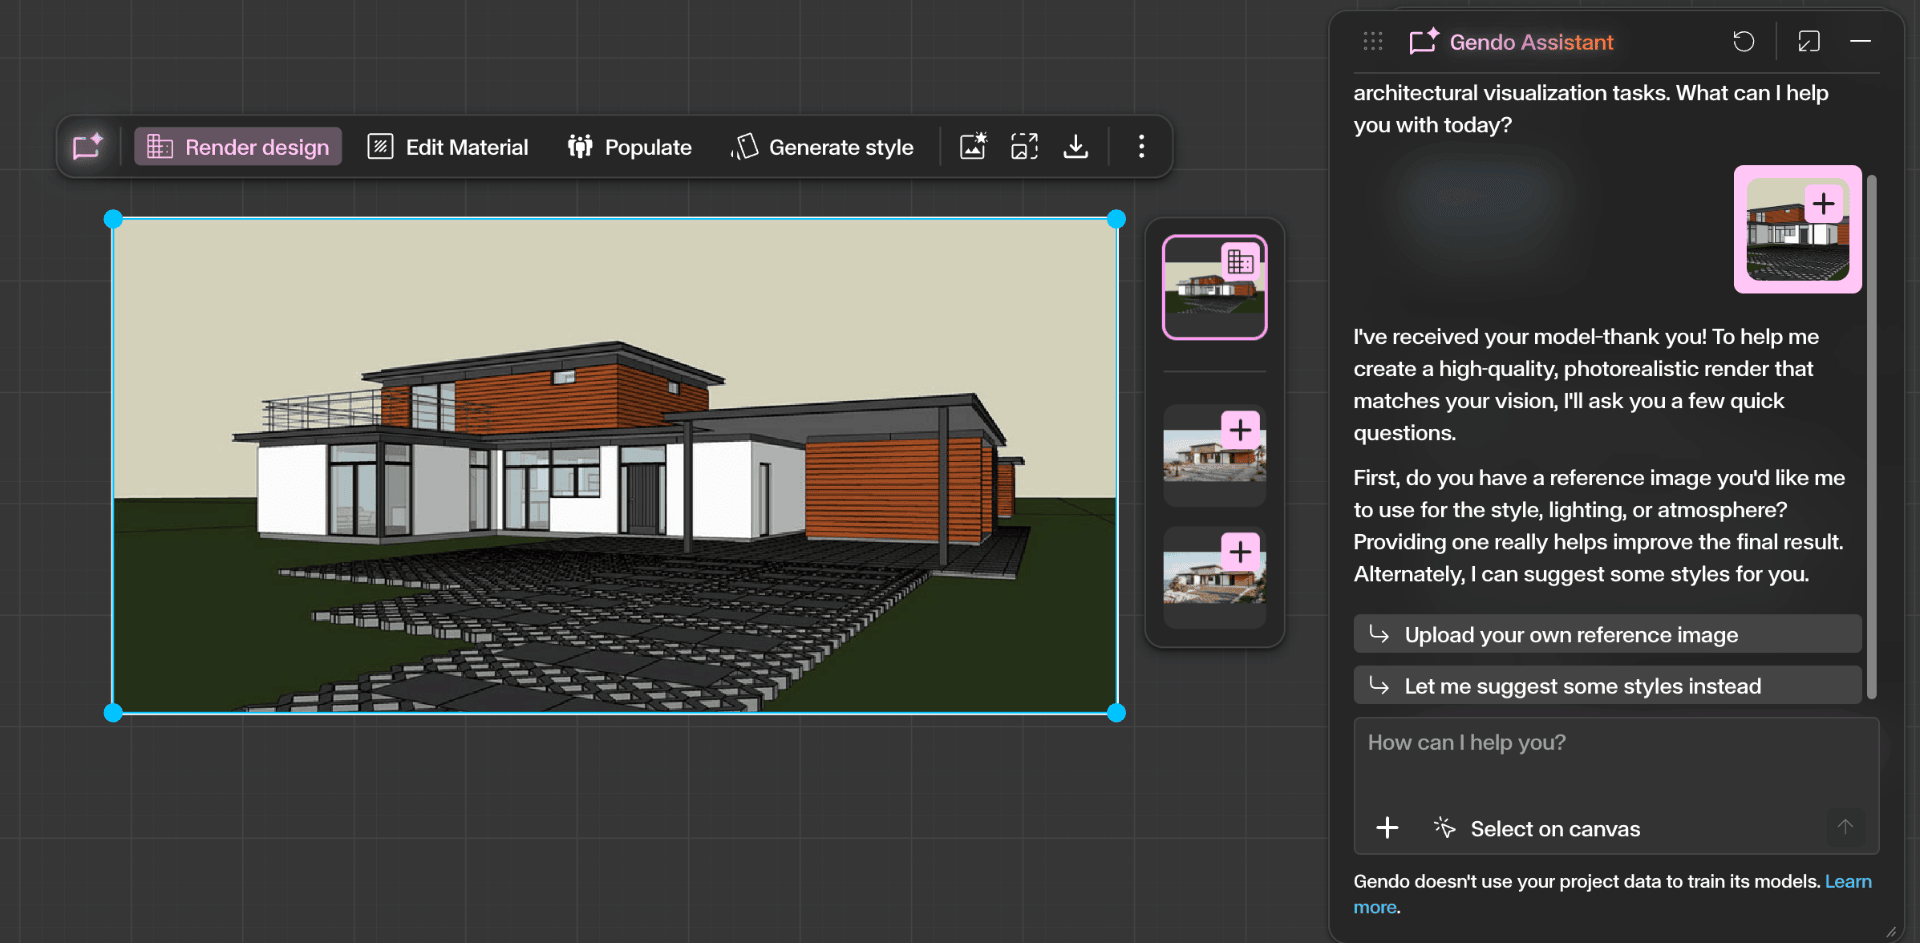
Once the image is attached, the assistant will inspect it automatically and may suggest a few pre-filled prompt options. You can either click one of the suggested options or type your own request into the chat box.
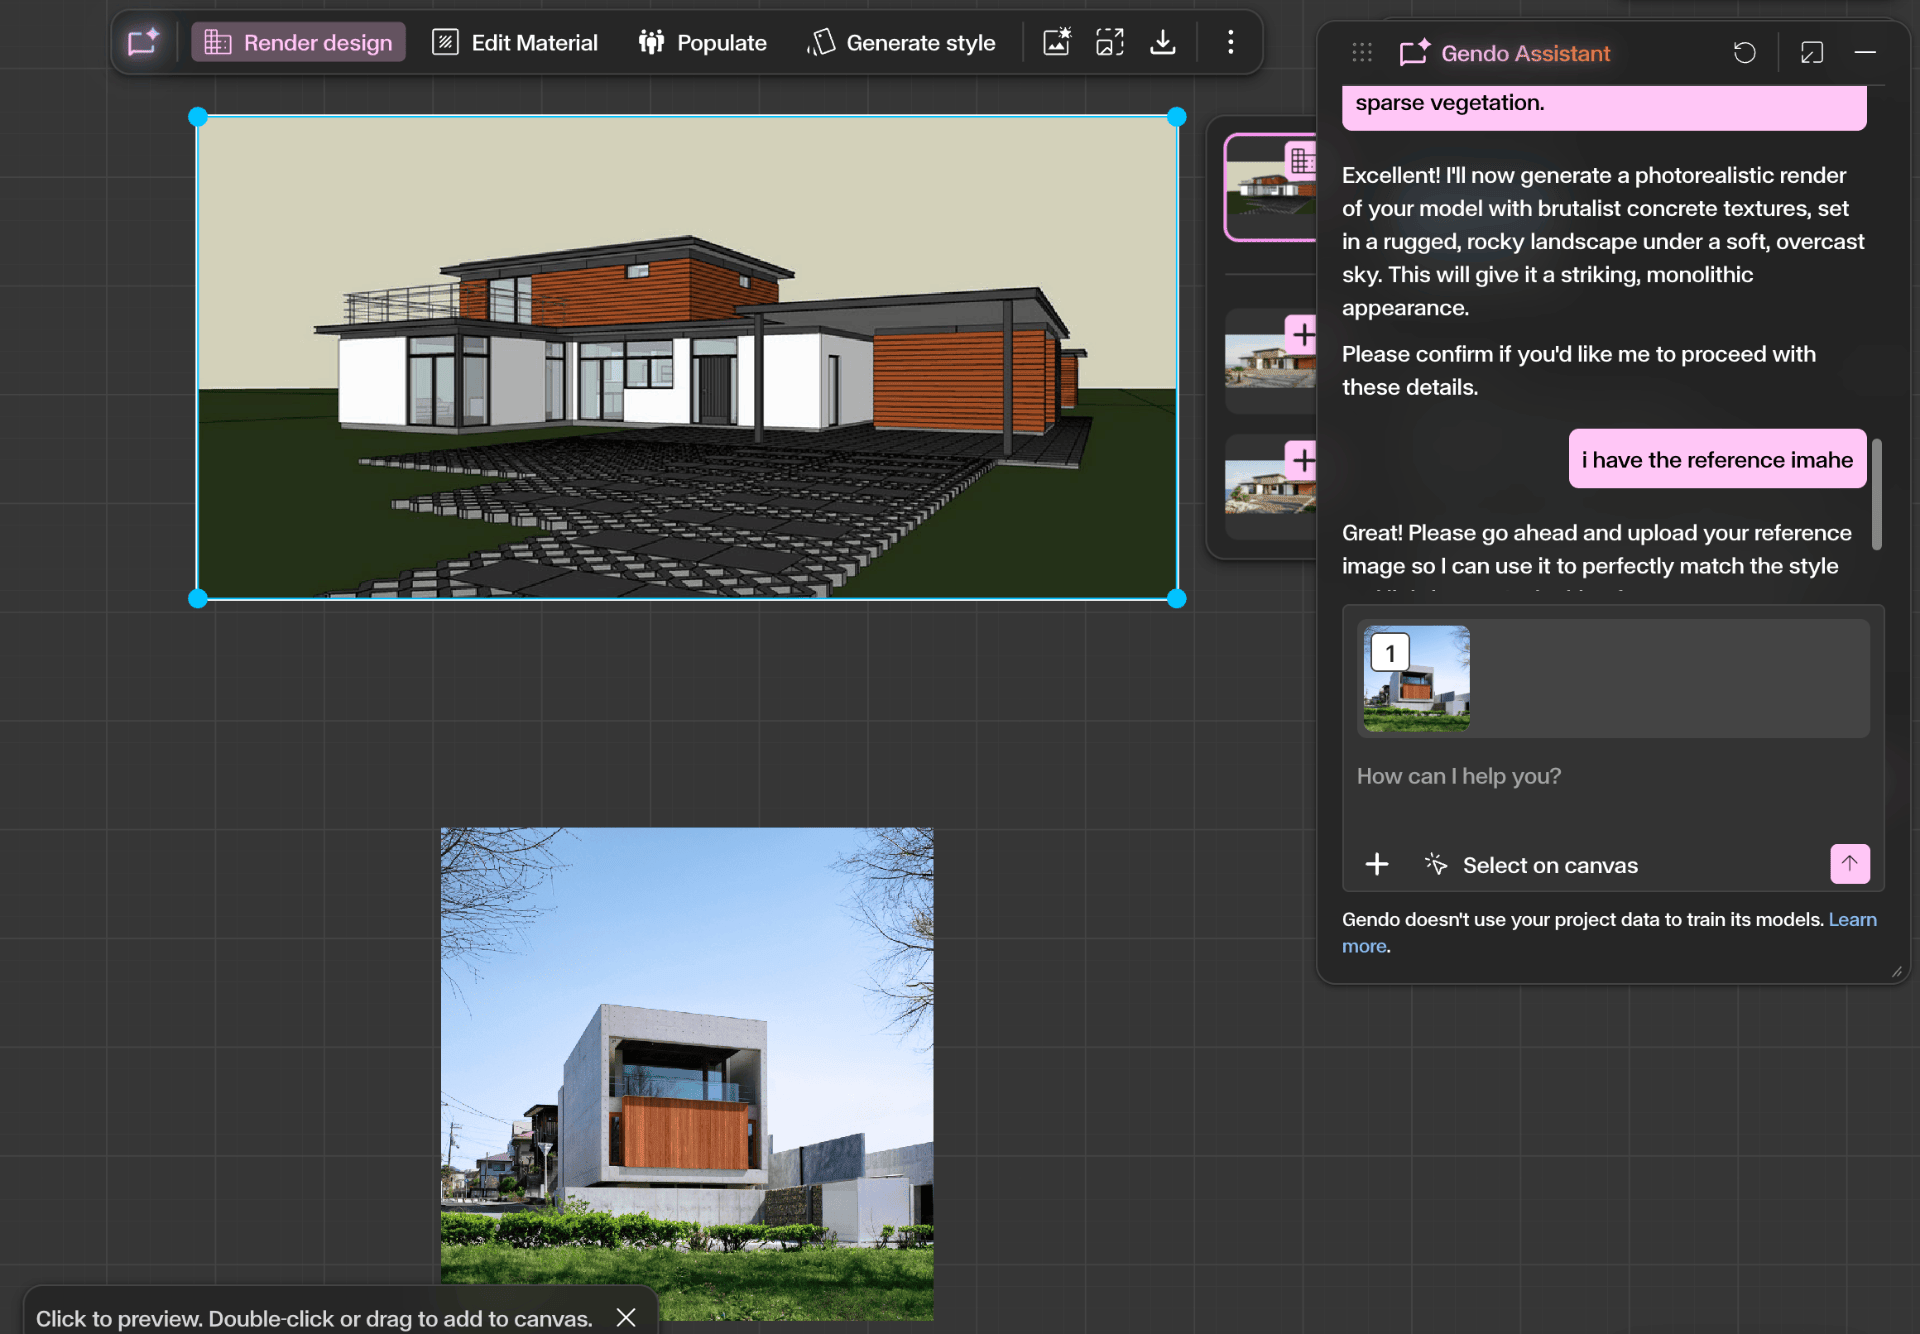
Follow up and provide references
If needed, the assistant will ask follow-up questions to better understand your goal. You may be asked to upload a reference image to guide the result. This is optional, but it usually improves the output.
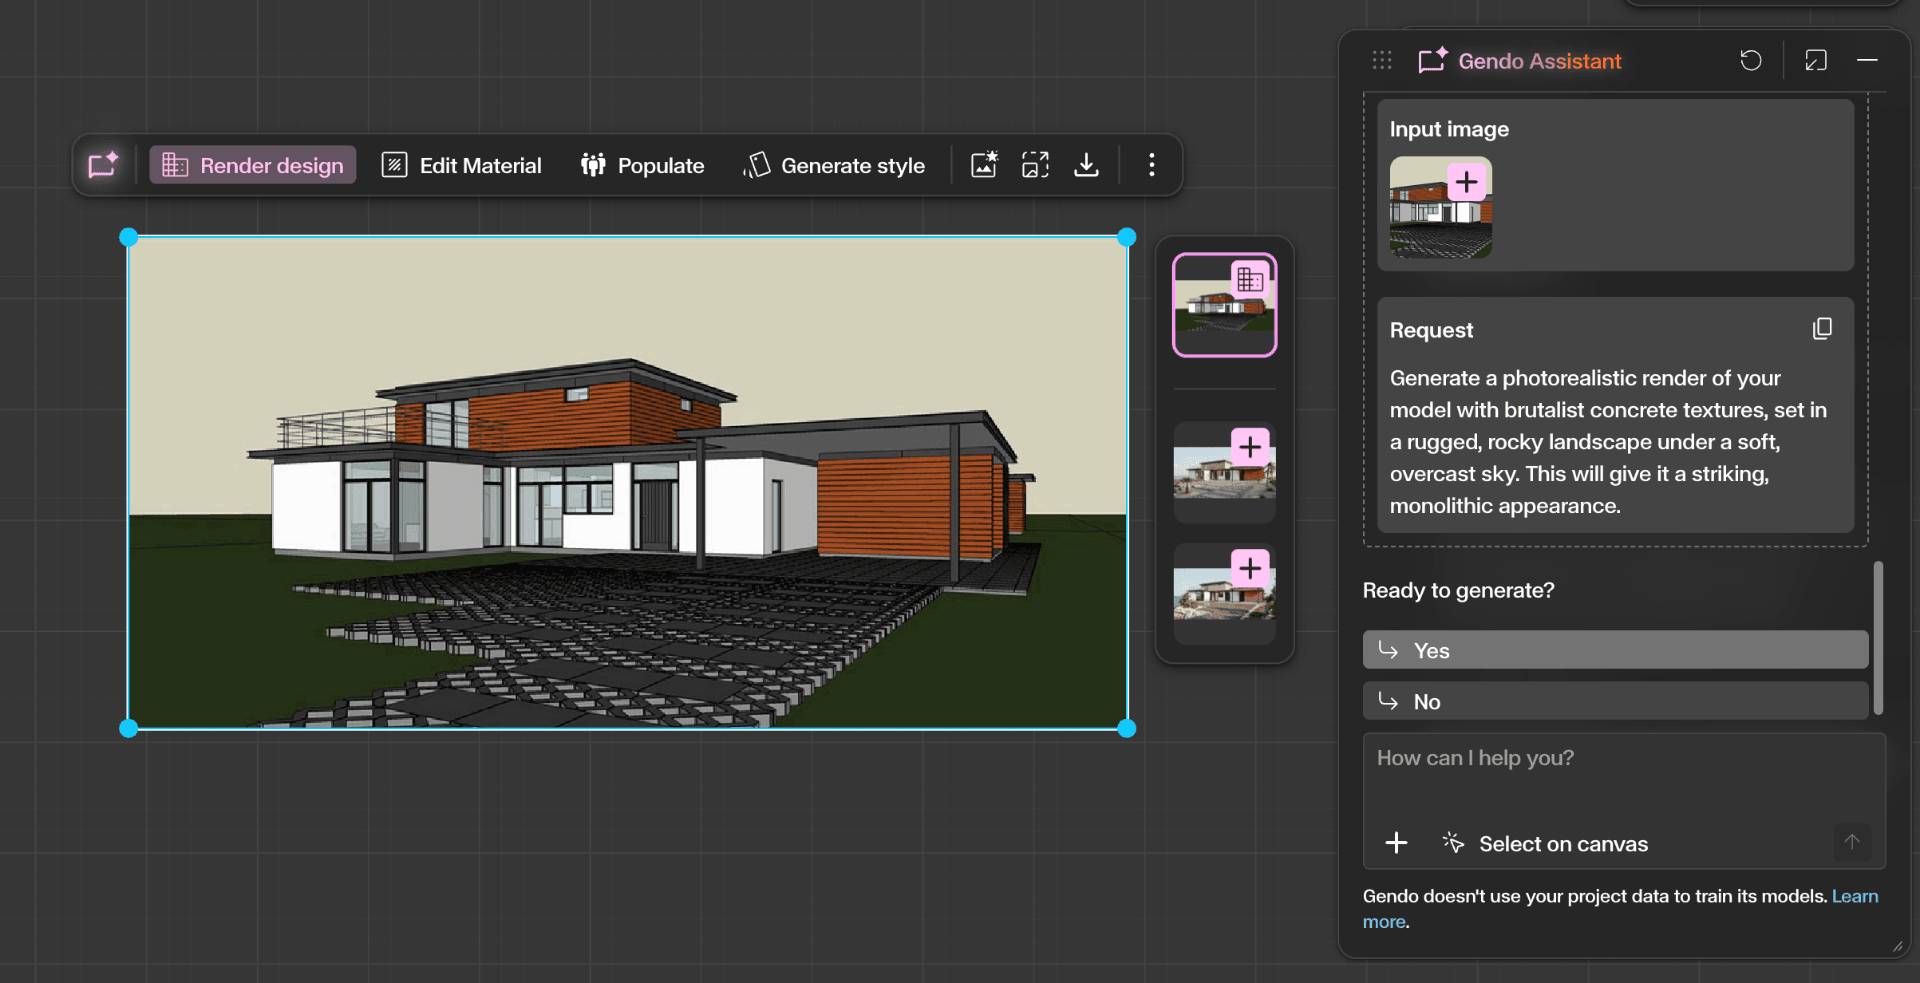
Review and generate
Once the assistant has enough information, it will create a final prompt and ask if you are ready to generate. Review the final prompt carefully. If anything is wrong, you can edit or correct the instructions before confirming.
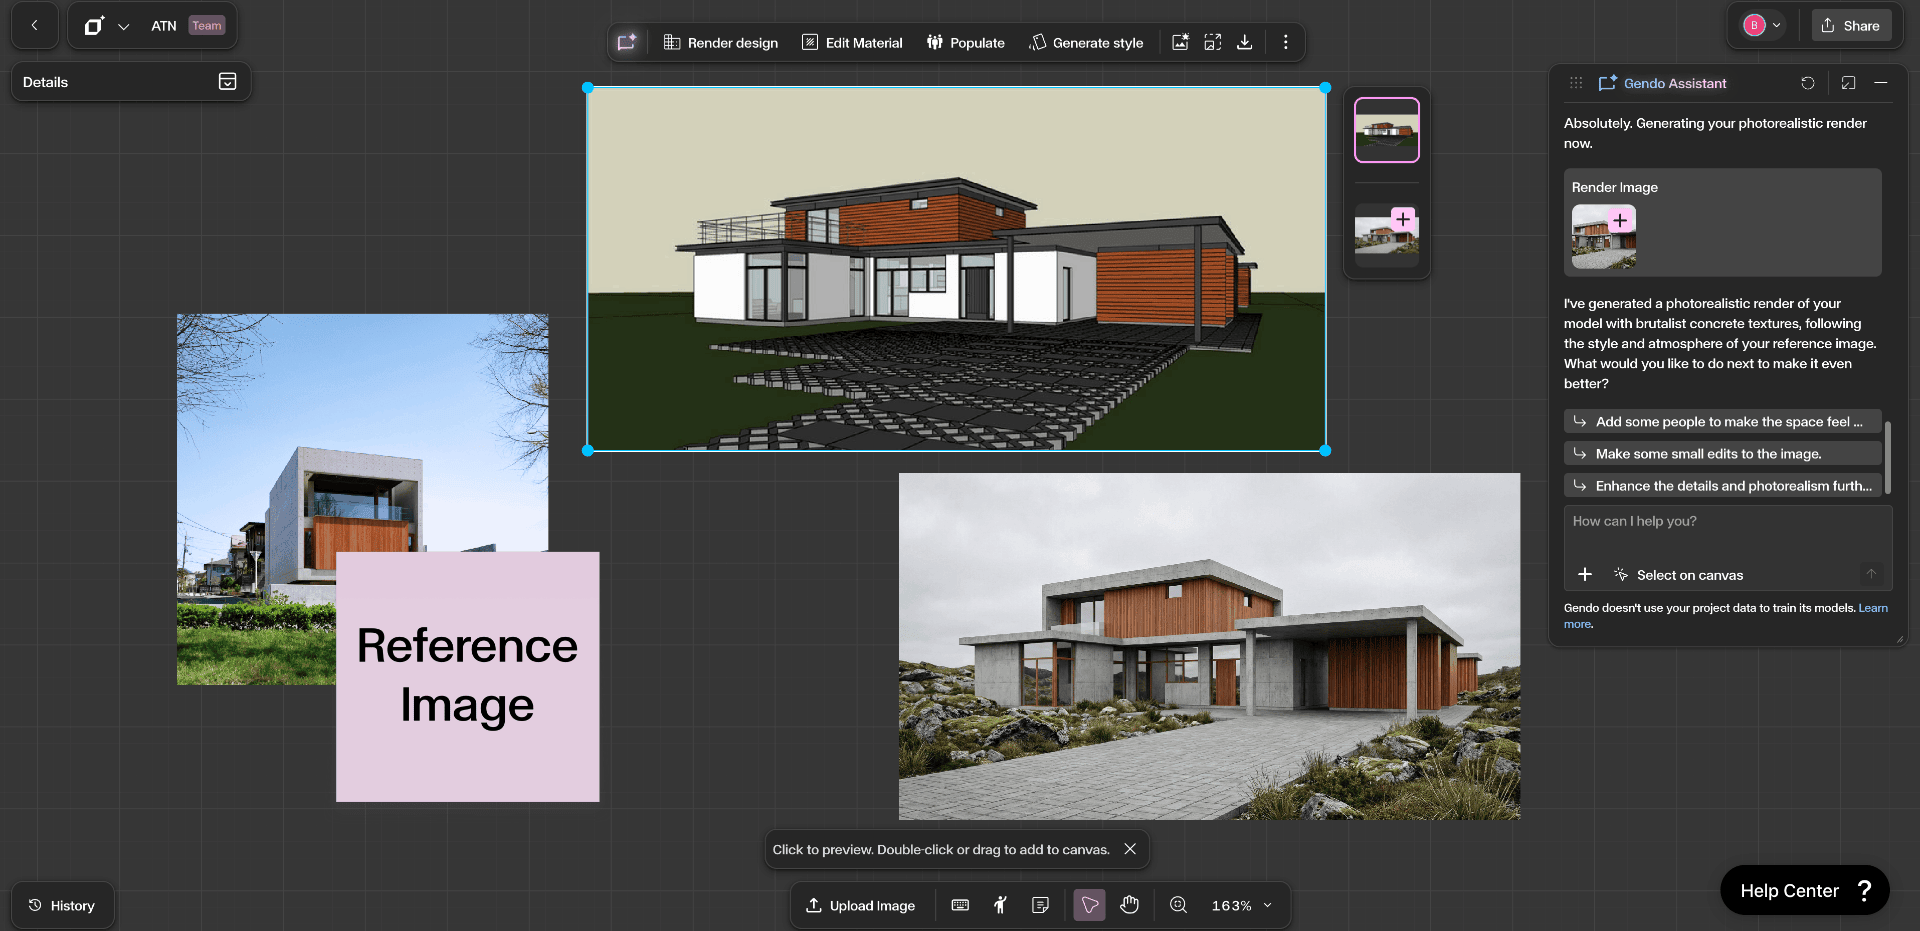
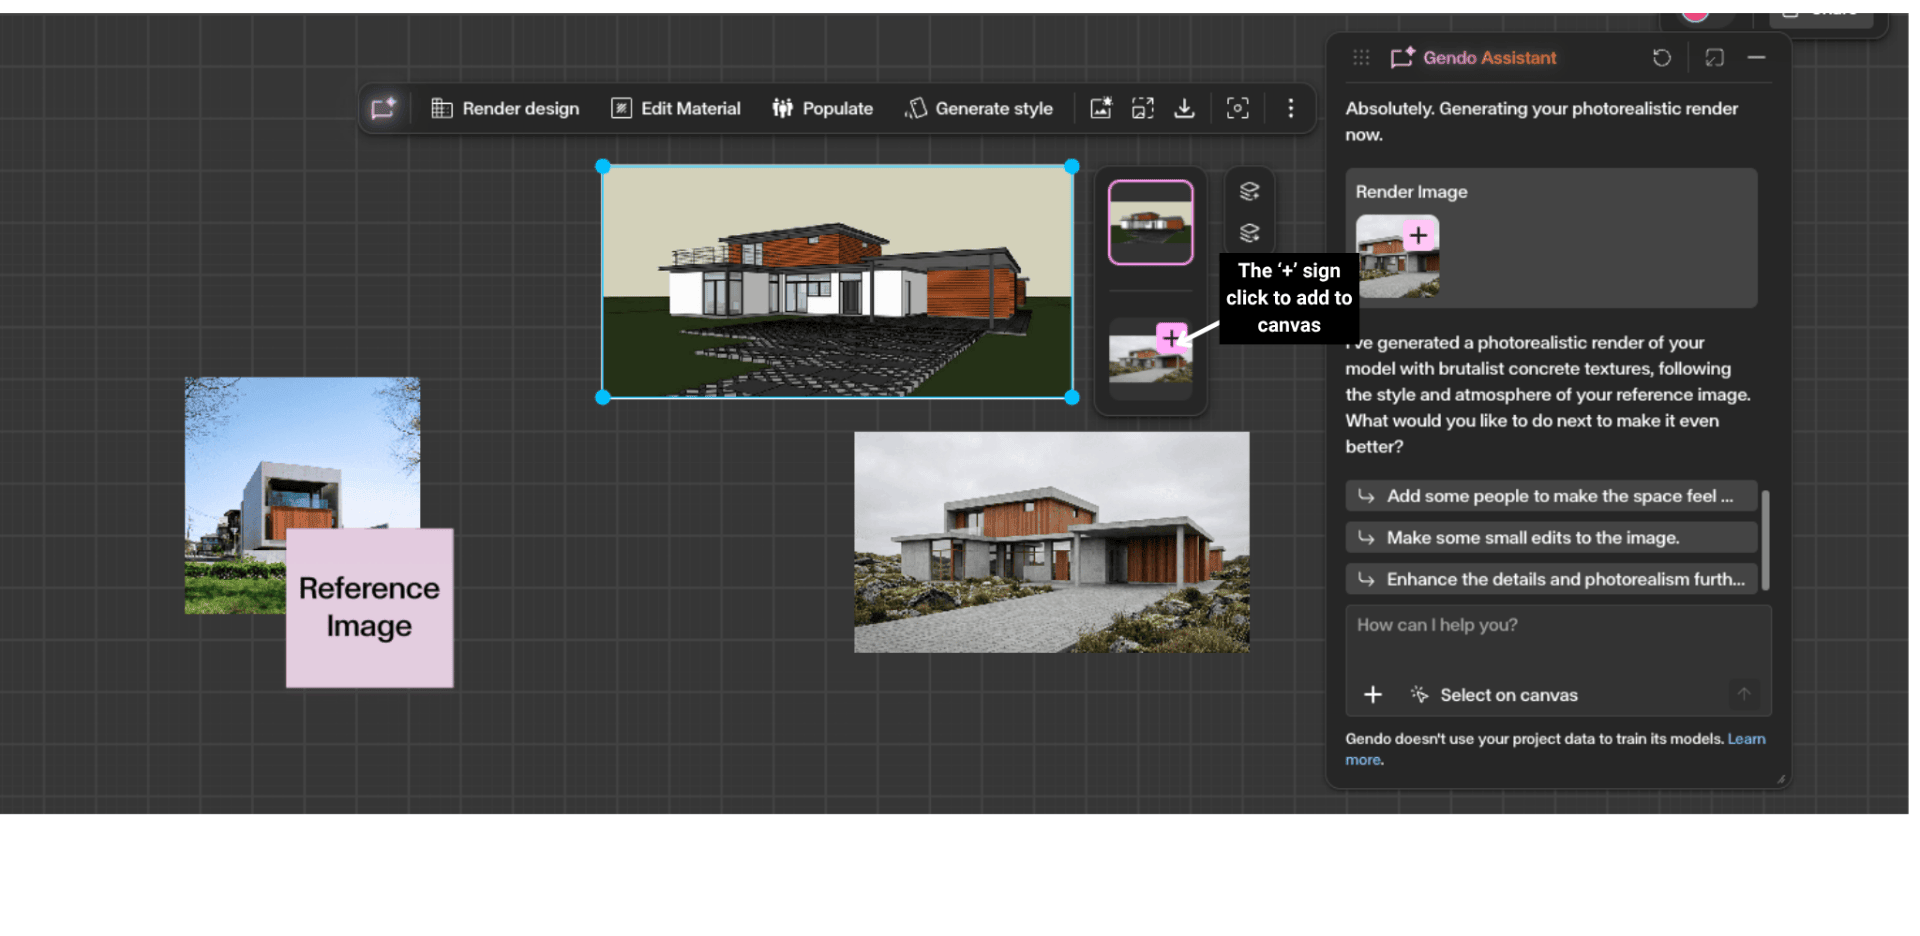
Add to canvas and iterate
After generation, the result appears in chat. Click the plus (+) icon on the generated image to add it to the canvas. Continue refining the result through more prompts or suggested next actions.
Get Better Results
Be specific about materials, lighting, and mood.
Reference architectural elements clearly.
Use a reference image whenever possible.
Upload multiple reference images if you want to guide style, materials, and lighting separately.