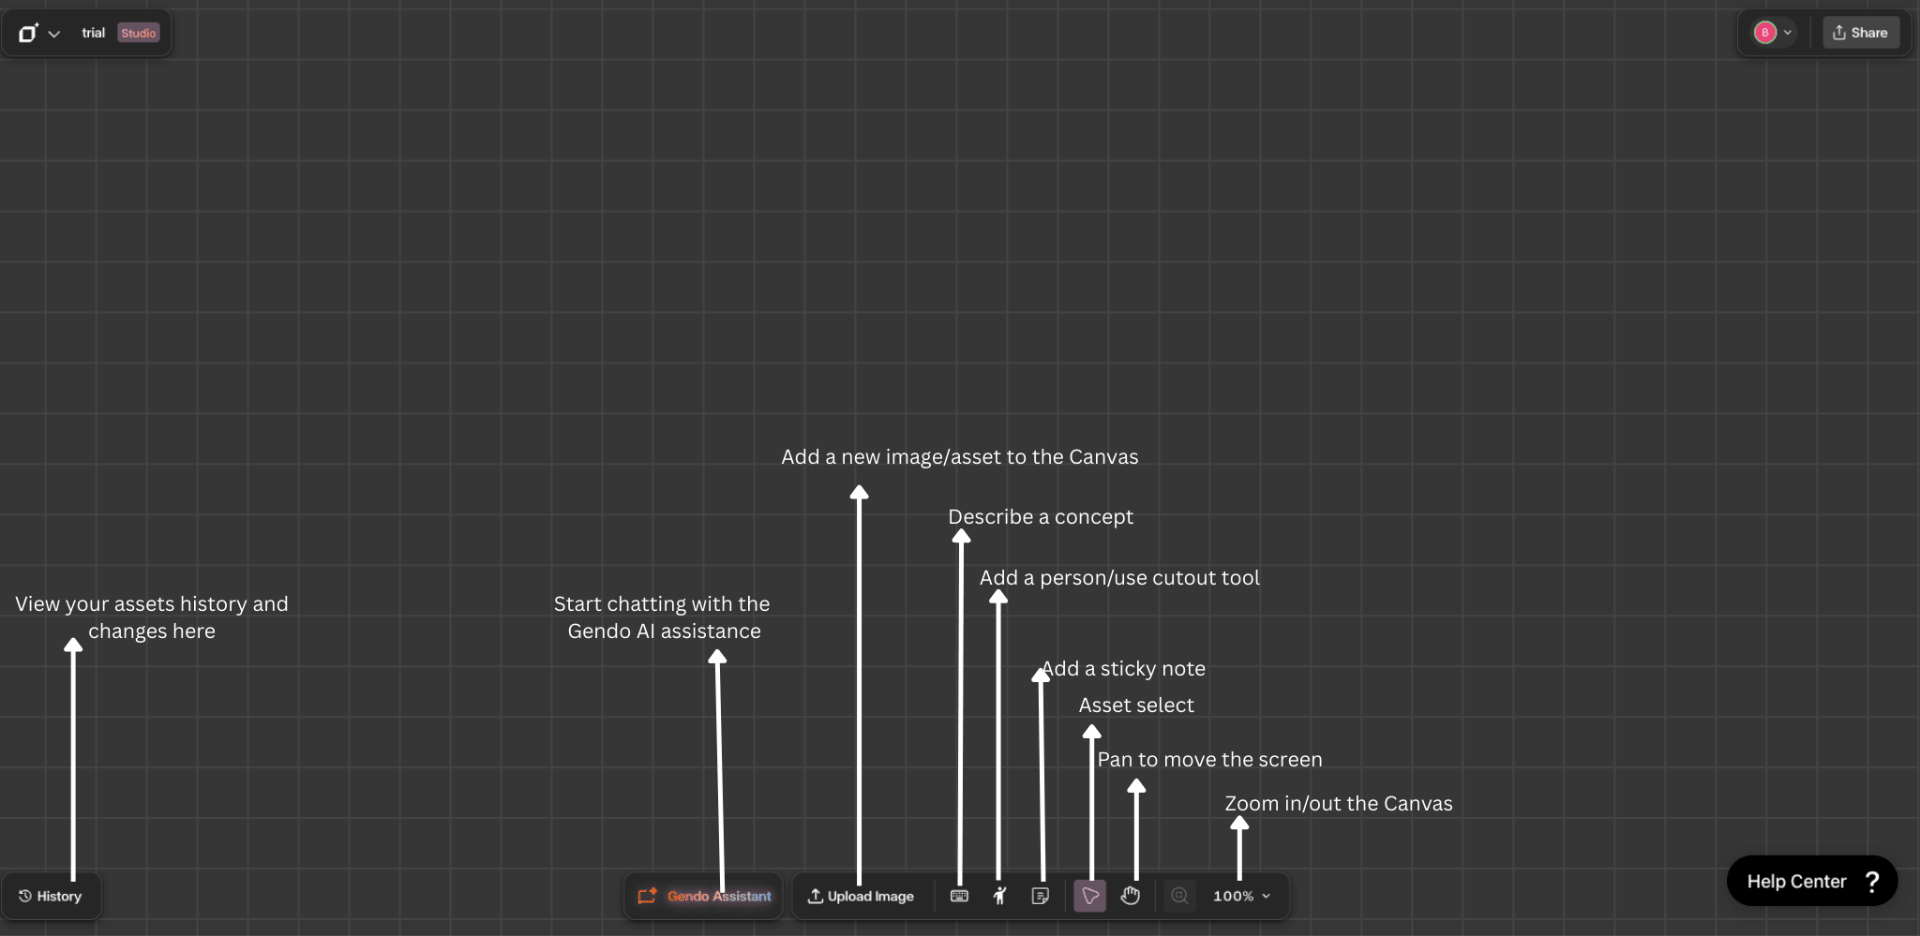
Using the History Panel
Track every image generated within your project, recover deleted work, and trace the evolution of individual assets.
What is the History Panel?
Gendo provides two complementary history systems — **Project History** and **Object History** — giving you full traceability across your design process. Project History captures every image generated within your project, acting as a safety net when assets are accidentally deleted from the canvas. Object History tracks the specific transformations applied to a single selected image, so you can trace exactly how a render evolved from its initial state to the final output.
Understanding the interface
Project History & Object History
Gendo surfaces history at two levels, both accessible from the left-hand side of the canvas:
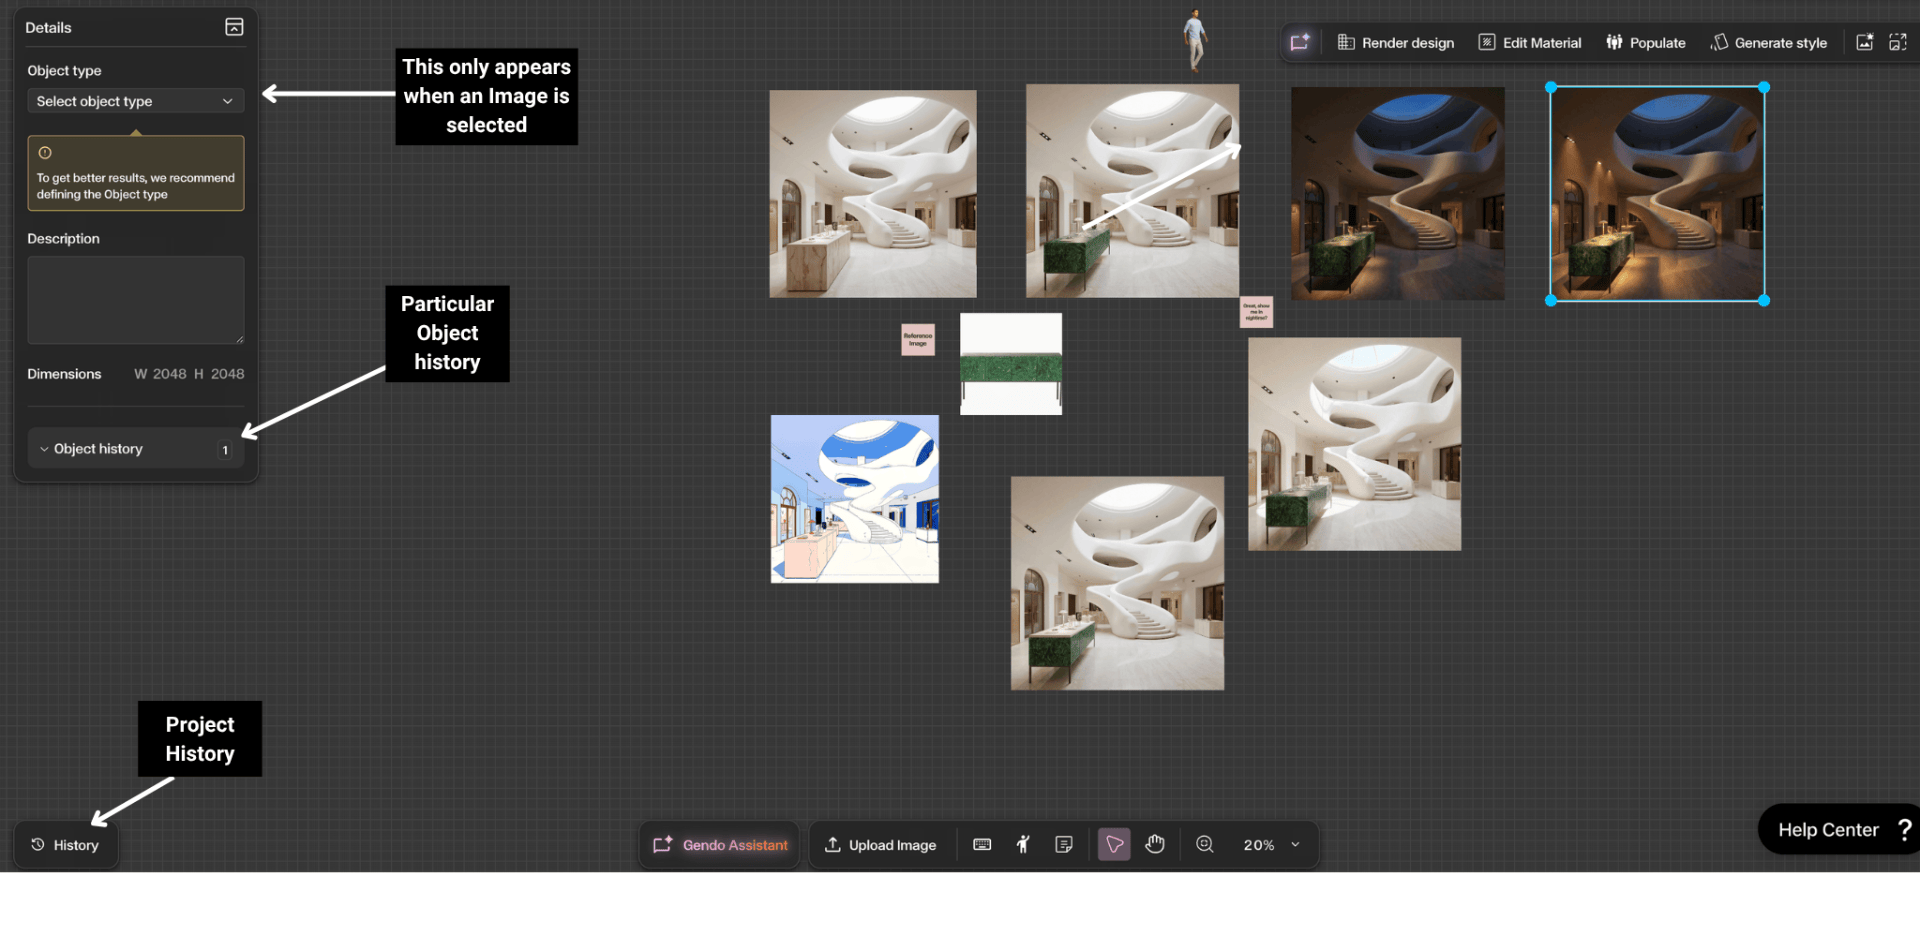
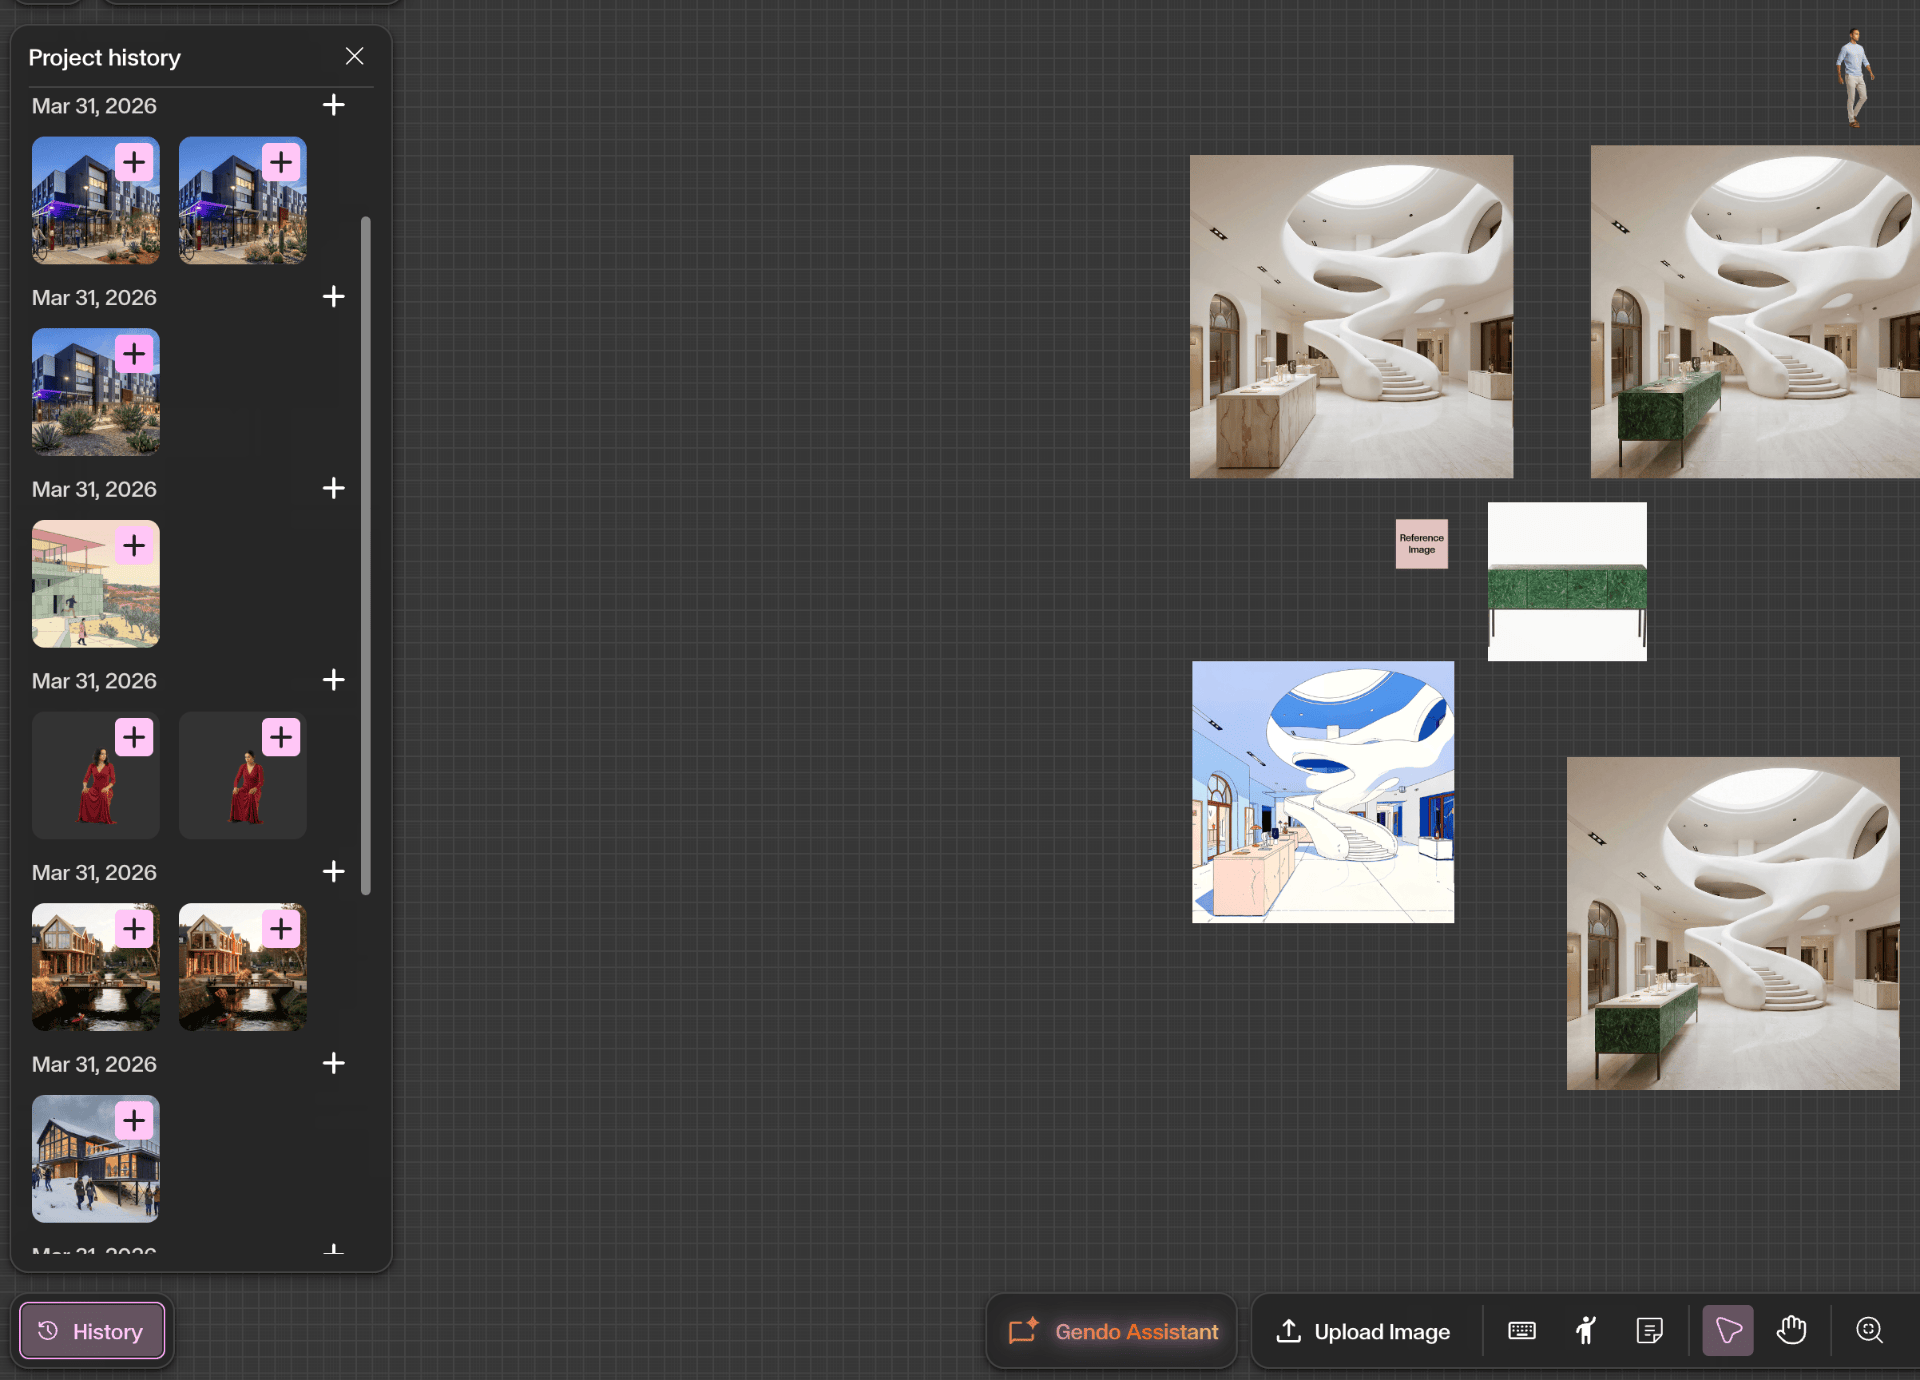
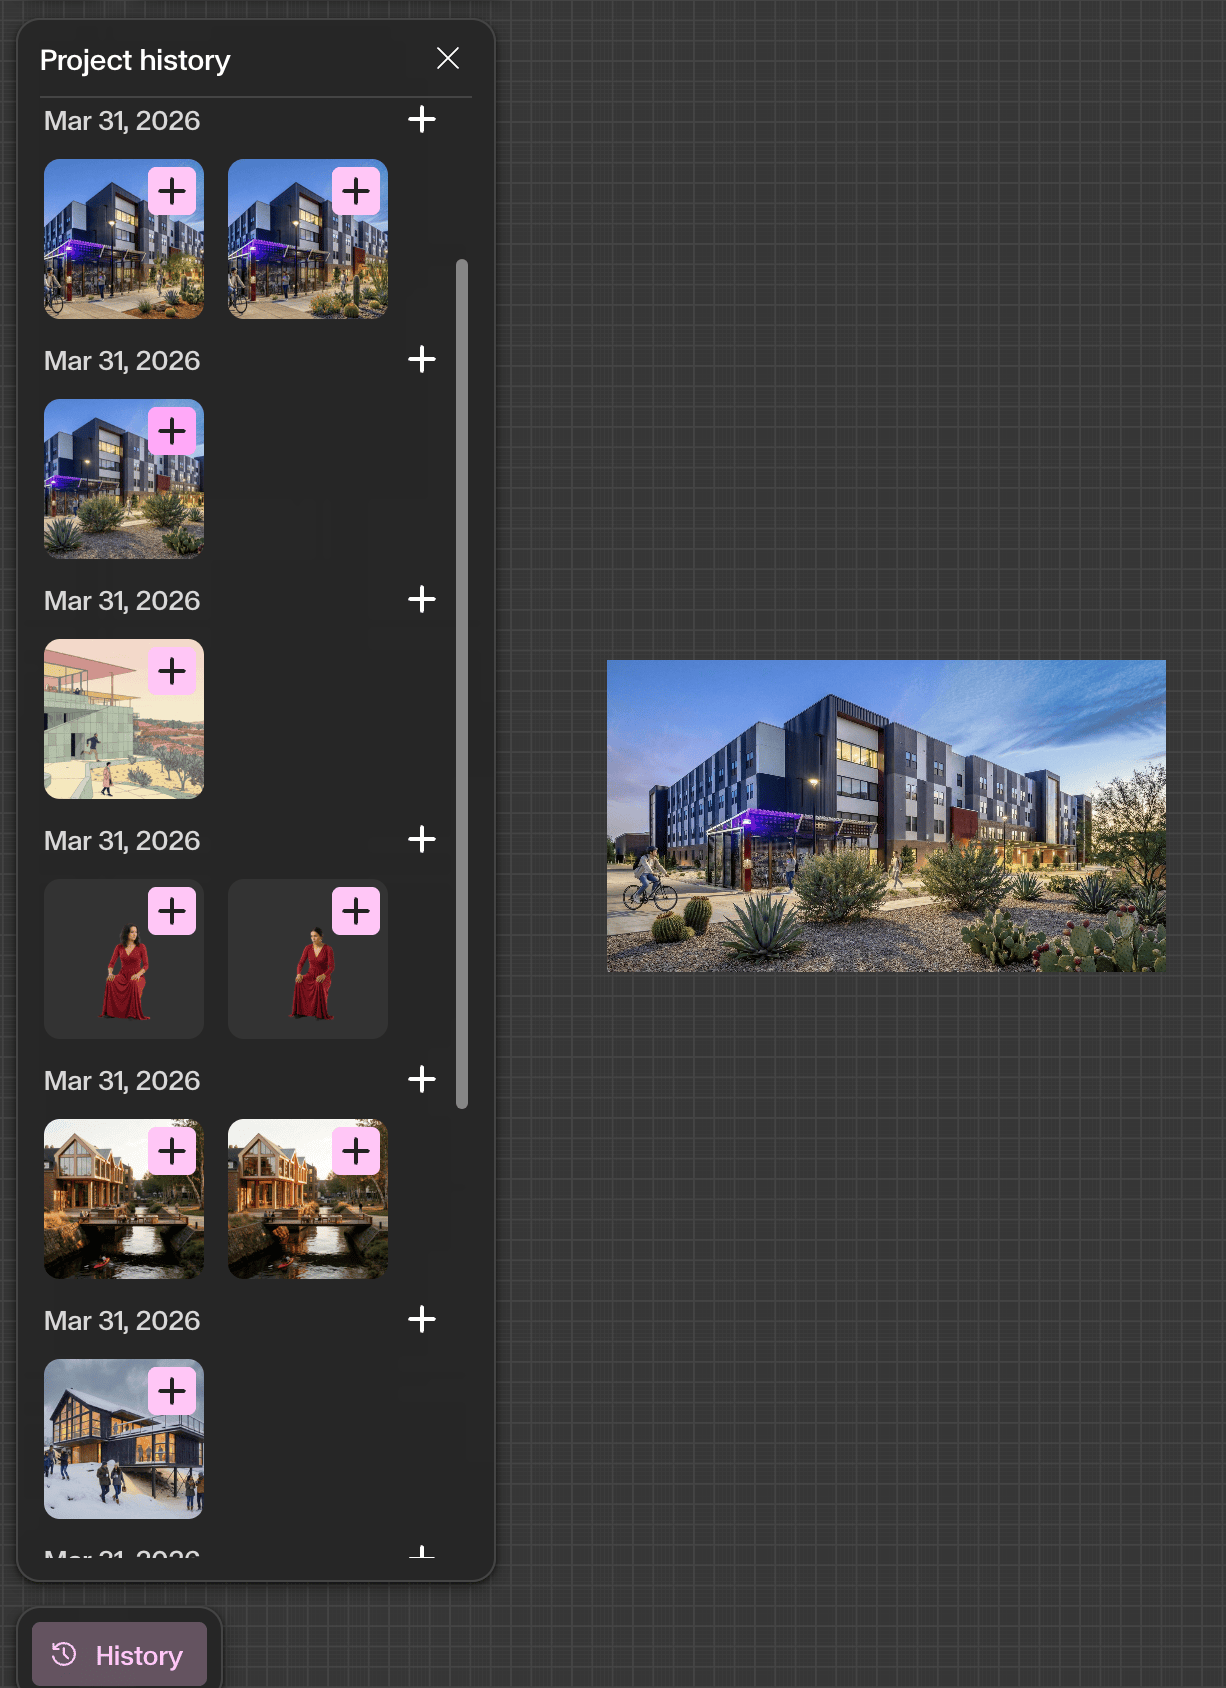
- Project History — Click the History button in the bottom-left corner of the canvas to open a chronological feed of every image generated in the project. Thumbnails are grouped by date, with the most recent at the top. Even if you delete an image from the canvas, it remains here — making Project History essential for recovering accidentally removed assets.
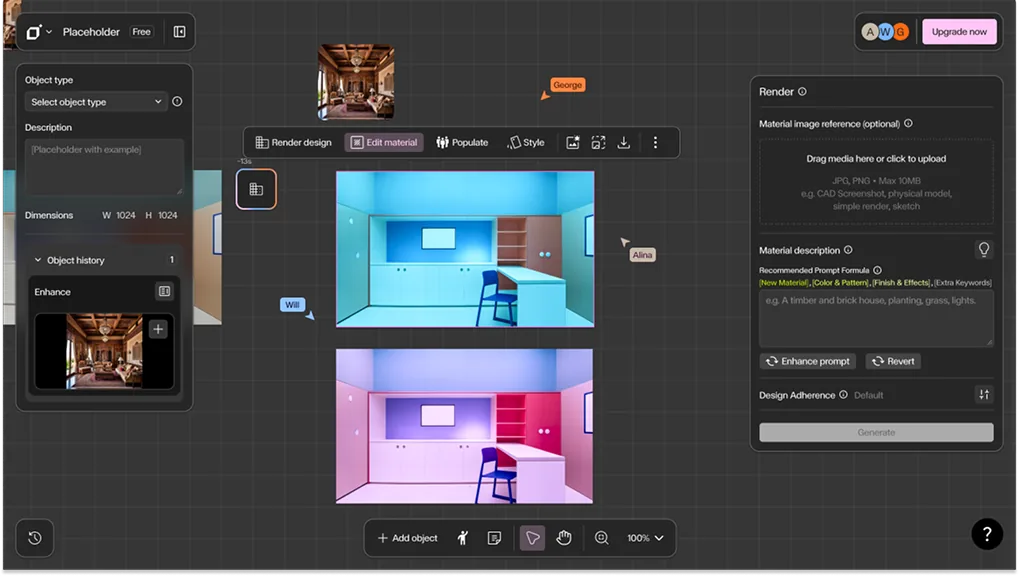
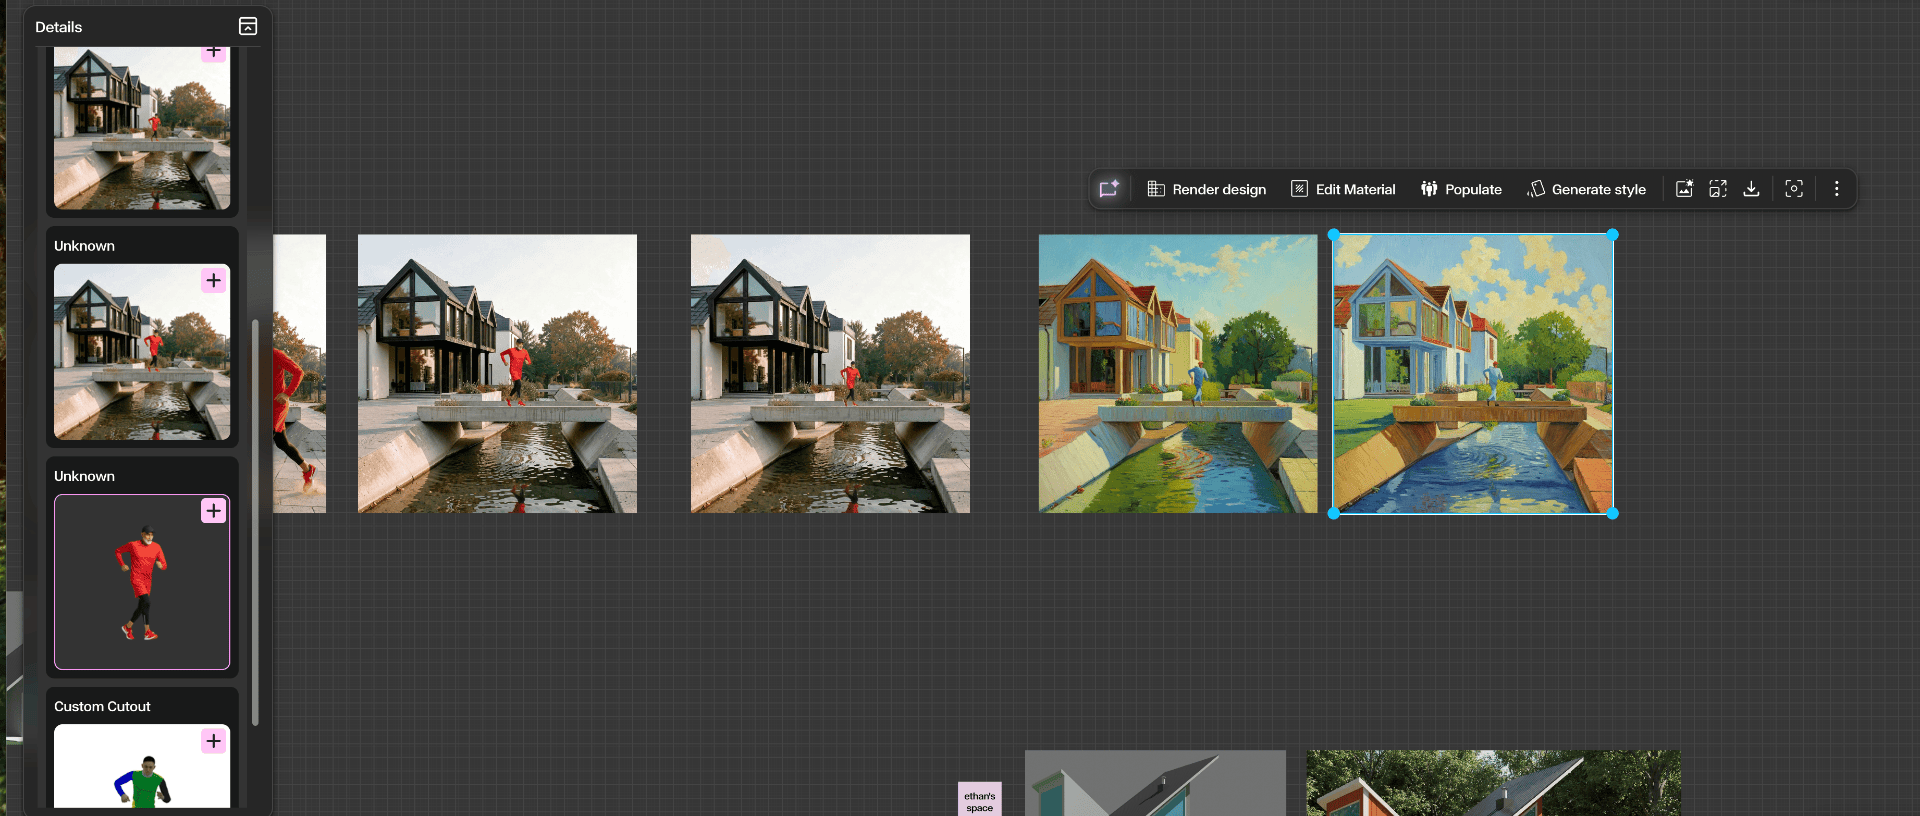
- Object History — Select any image on the canvas to reveal its Details panel on the left. Scroll to the Object History section to see a numbered list of every action applied to that specific image — Render, Populate, Material, Enhance, or Style. This is invaluable for understanding how a particular design option reached its current state and for reverting to an earlier stage if needed.
Step by Step
Open Project History
Click the **History** button at the bottom-left corner of the canvas. The panel slides open showing a scrollable, date-grouped timeline of all generated images.
Recover a deleted or previous image
Scroll through the Project History timeline to locate the image. Click the **+** icon on the thumbnail to place it back onto the canvas. This is particularly useful when you have cleared the canvas for a cleaner workspace but need to retrieve earlier work.
View Object History for a specific image
Select an image on the canvas. The **Details** panel appears on the left, showing the image's **Object type**, **Description**, **Dimensions**, and an expandable **Object History** section. Open it to see the numbered sequence of generations and edits applied to that asset.
Trace and compare design evolution
Use Object History entries to understand the transformation chain — for example, from initial Render → Material swap → Populate → Enhance. Recover an earlier stage by re-adding it from the Project History if needed.
Get Better Results
Use Project History as a safety net — freely delete images from the canvas to keep your workspace clean, knowing every generation is preserved and recoverable.
When comparing design directions, recover multiple earlier generations from Project History and arrange them side by side on the canvas.
Use Object History to trace the exact sequence of AI actions applied to a specific image — essential for understanding how a design option evolved.
Combine both history systems for full accountability: Project History shows what was generated, Object History shows how it was refined.