Getting Started with Gendo Space
A complete walkthrough of the Gendo workspace — projects, teams, organisations, and support.
What is Gendo Space?
Gendo Space is your home dashboard and the starting point for all projects. From here you can create new projects, open existing ones, invite team members, and organise your view with filters and sorting. This guide covers everything you need to know about the workspace — from creating your first project to managing organisations and accessing support. Free Plan users are limited to one project; paid plans support unlimited projects.
Understanding the interface
The Projects Page
Upon logging in, you arrive at the Projects Page — your home dashboard. Each project card shows a preview, the project name, the owner, and when it was last edited.
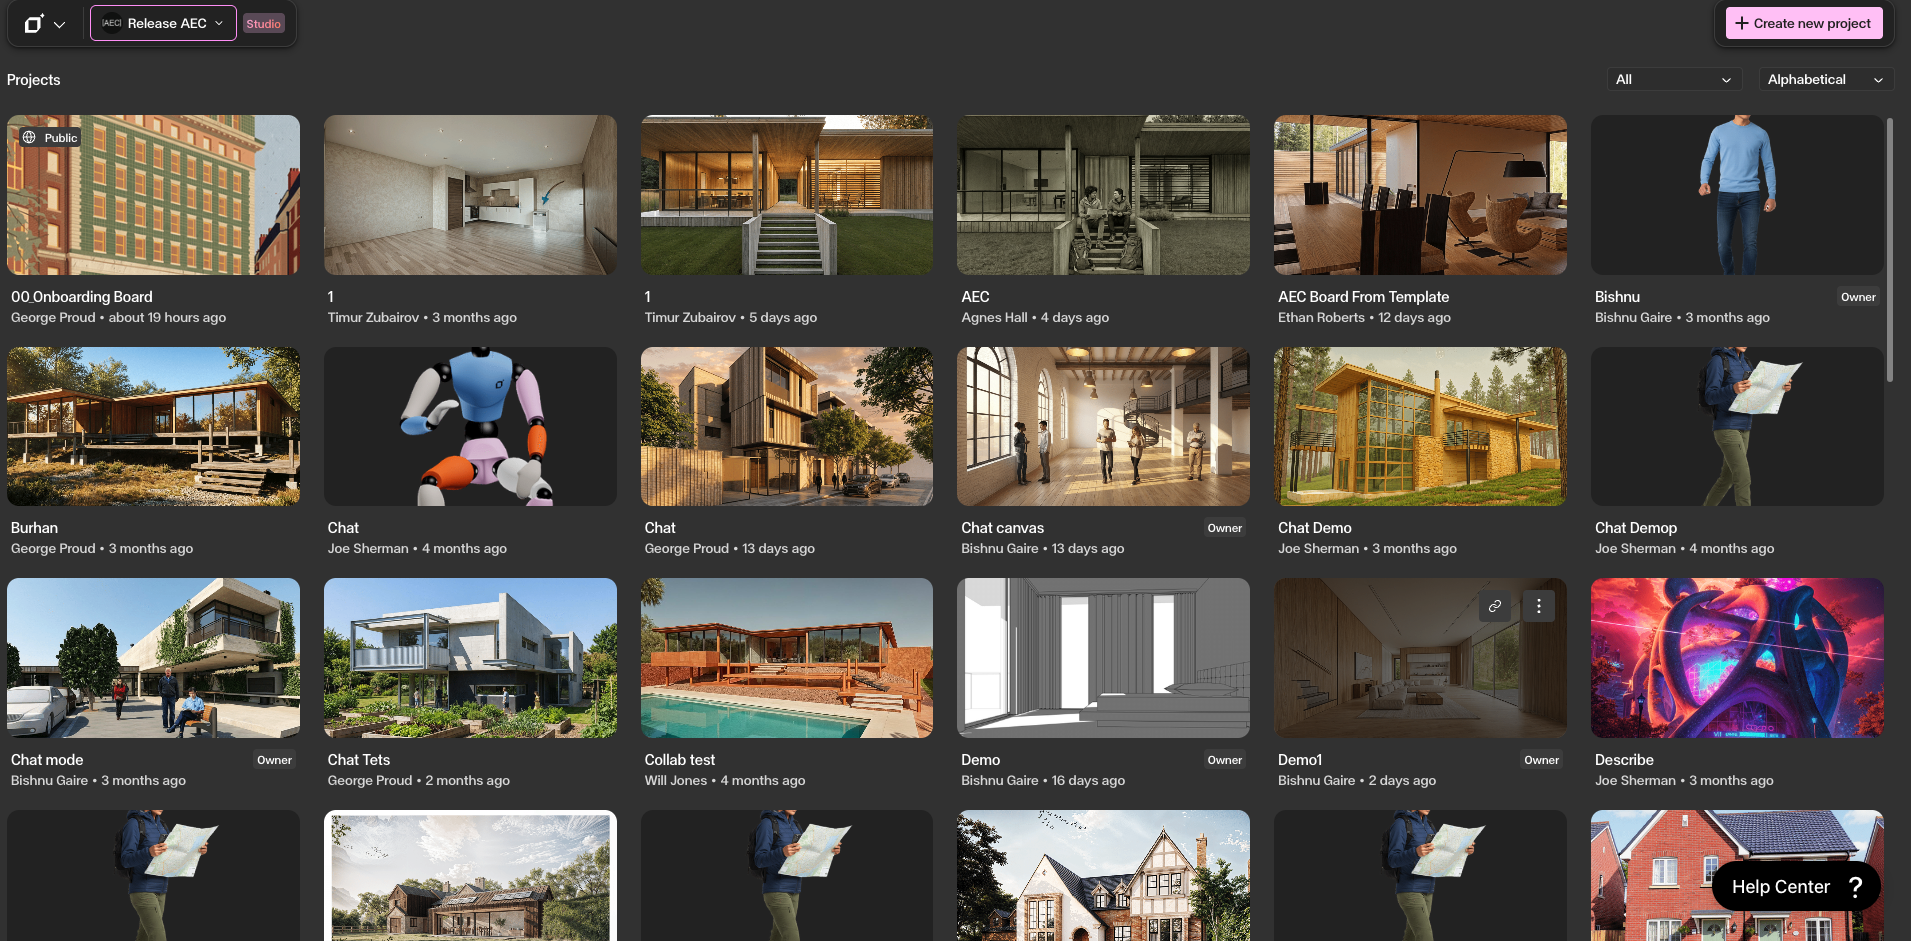
Workspace Overview
The workspace provides quick access to project creation, team invites, filtering, and organisation management — all from a single screen.
Step by Step
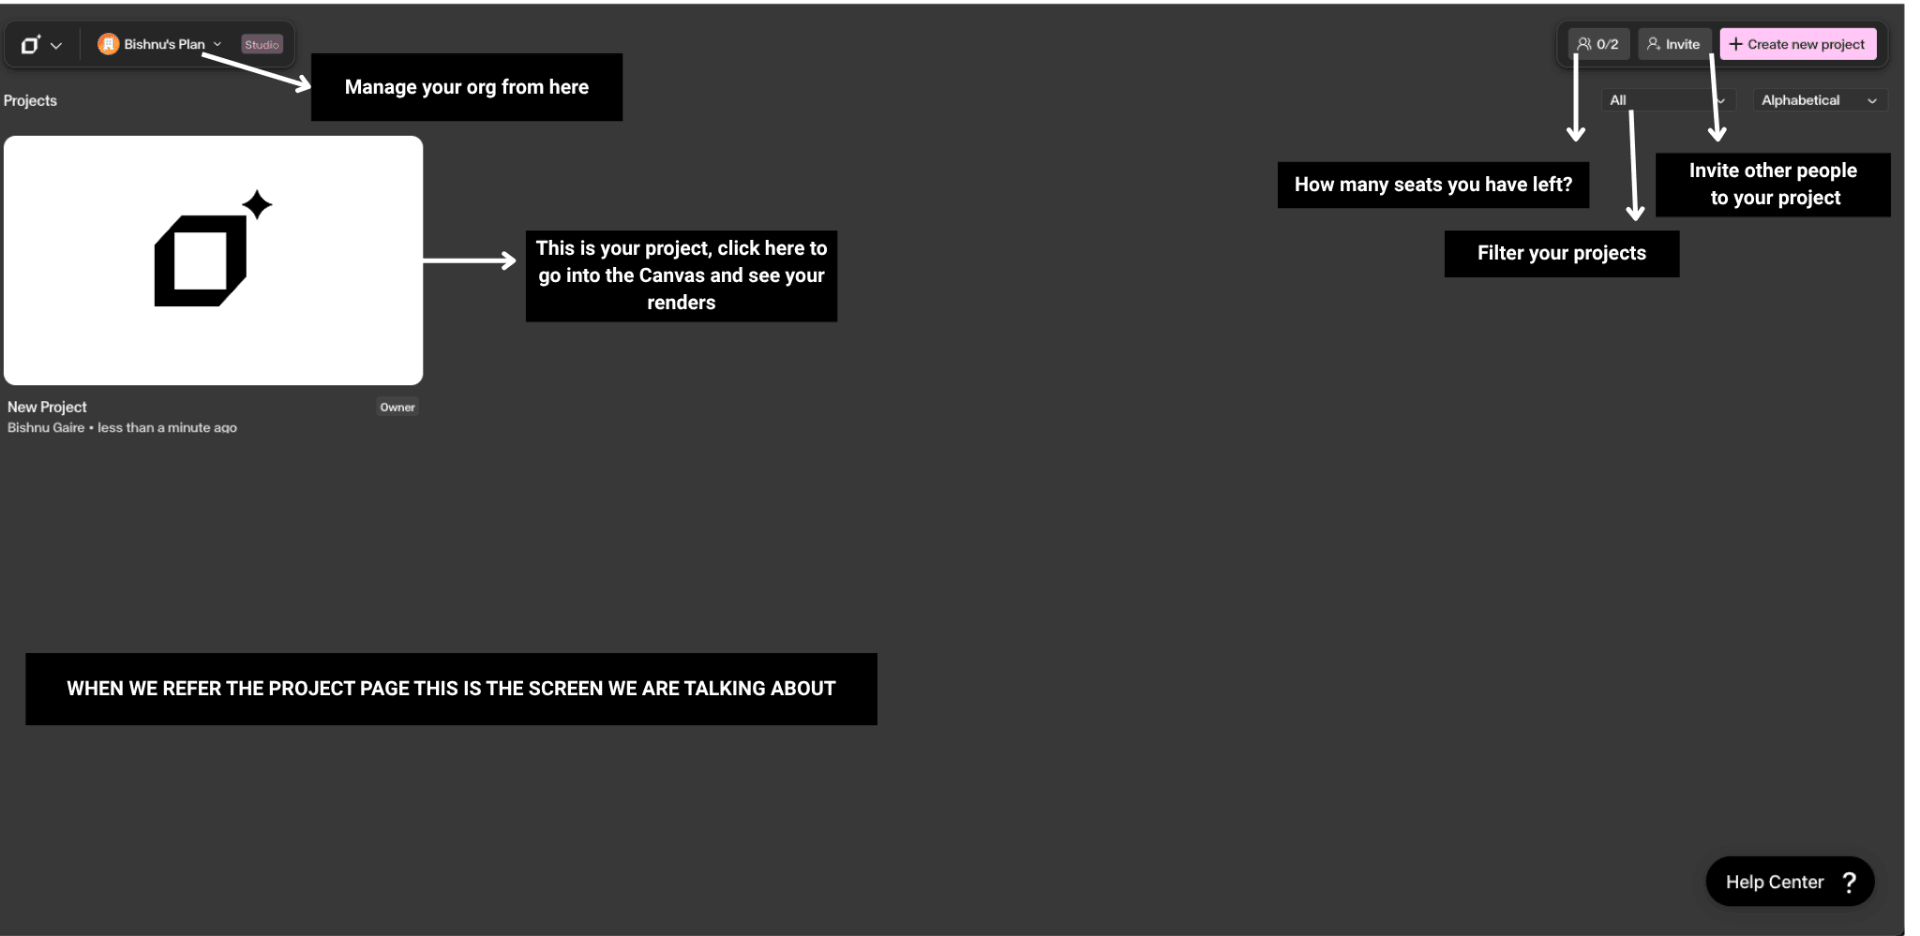
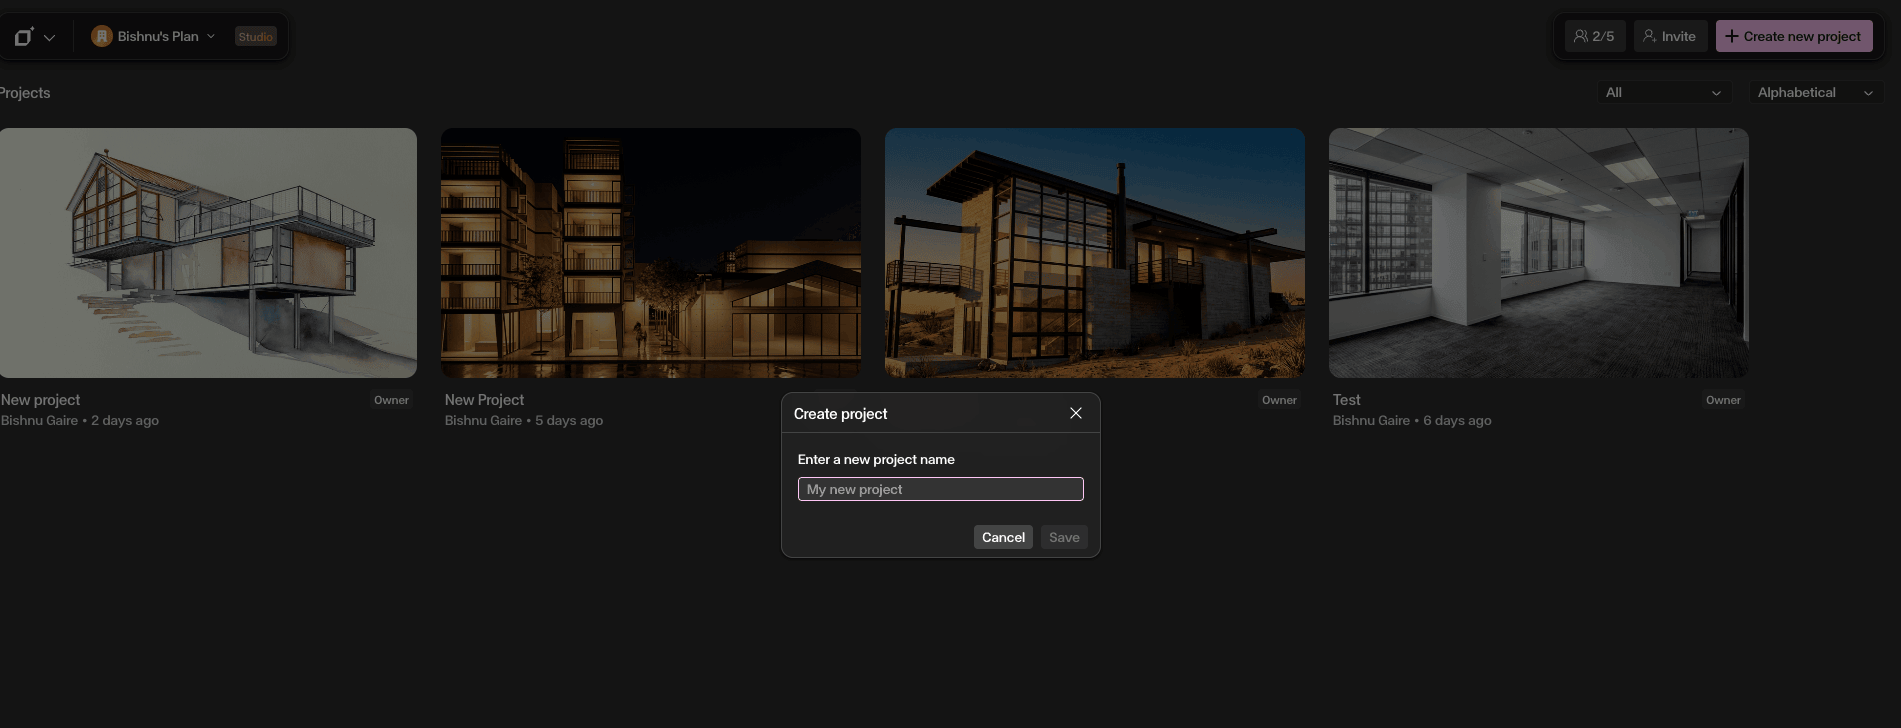
Create a new project
Click the Pink button in the top right corner, name your project, and click save. Your new canvas opens immediately. Note: Free Plan users are limited to one project. Paid Plan users can create unlimited projects.
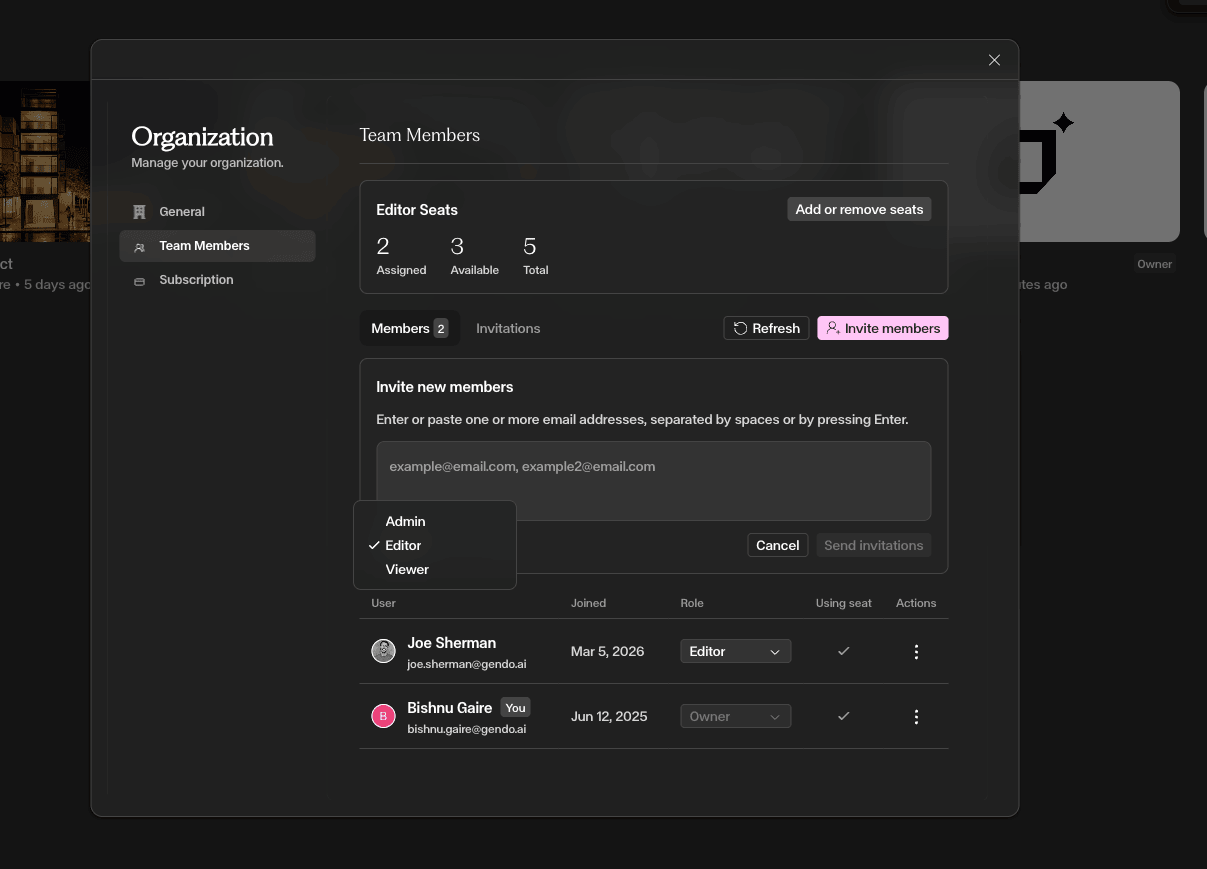
Invite your team
Click the Invite button (person icon) to add colleagues by email. Choose between Admin, Editor, or Viewer access. Invited members gain access to the workspace and shared projects. Free Plan users can invite one collaborator; paid plans include five seats.
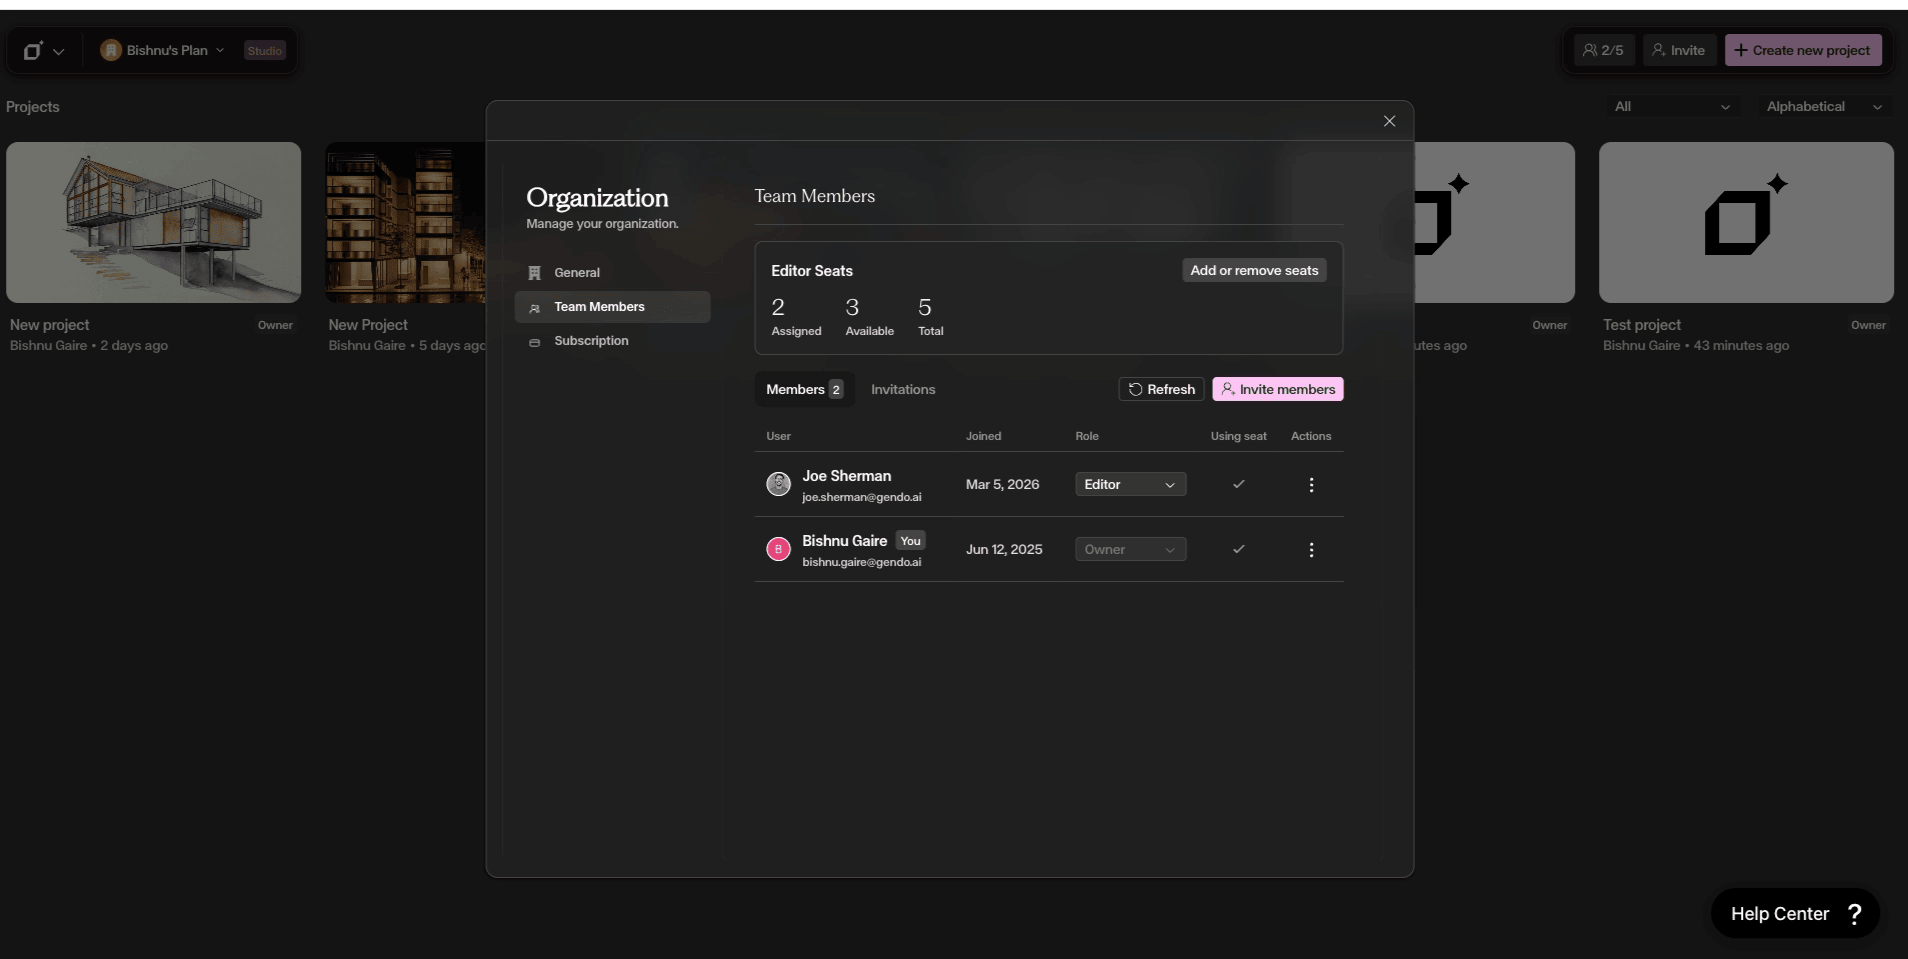
Manage seats and access
The seat counter next to the Invite button shows current usage (e.g. 1/5). If you need more seats, upgrade your plan. Project cards act as containers for all your renders, files, and documentation — click any card to continue working.
Learn more about managing roles, seats, and collaborators in the Team Management guide.
Filter and organise projects
Use the Filter dropdown to limit which projects are shown — for example, only projects you own. Combined with alphabetical sorting, this makes it easy to find what you need quickly.

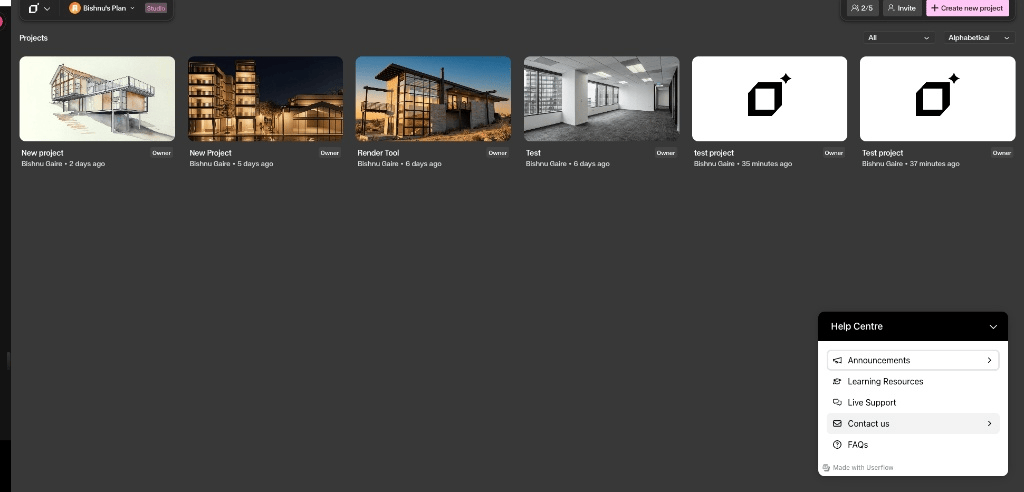
Use the Help Centre
Access Announcements for the latest updates, Learning Resources for tutorials, Live Support for real-time assistance, Contact Us for formal enquiries, and FAQs for common questions — all without leaving your workspace.
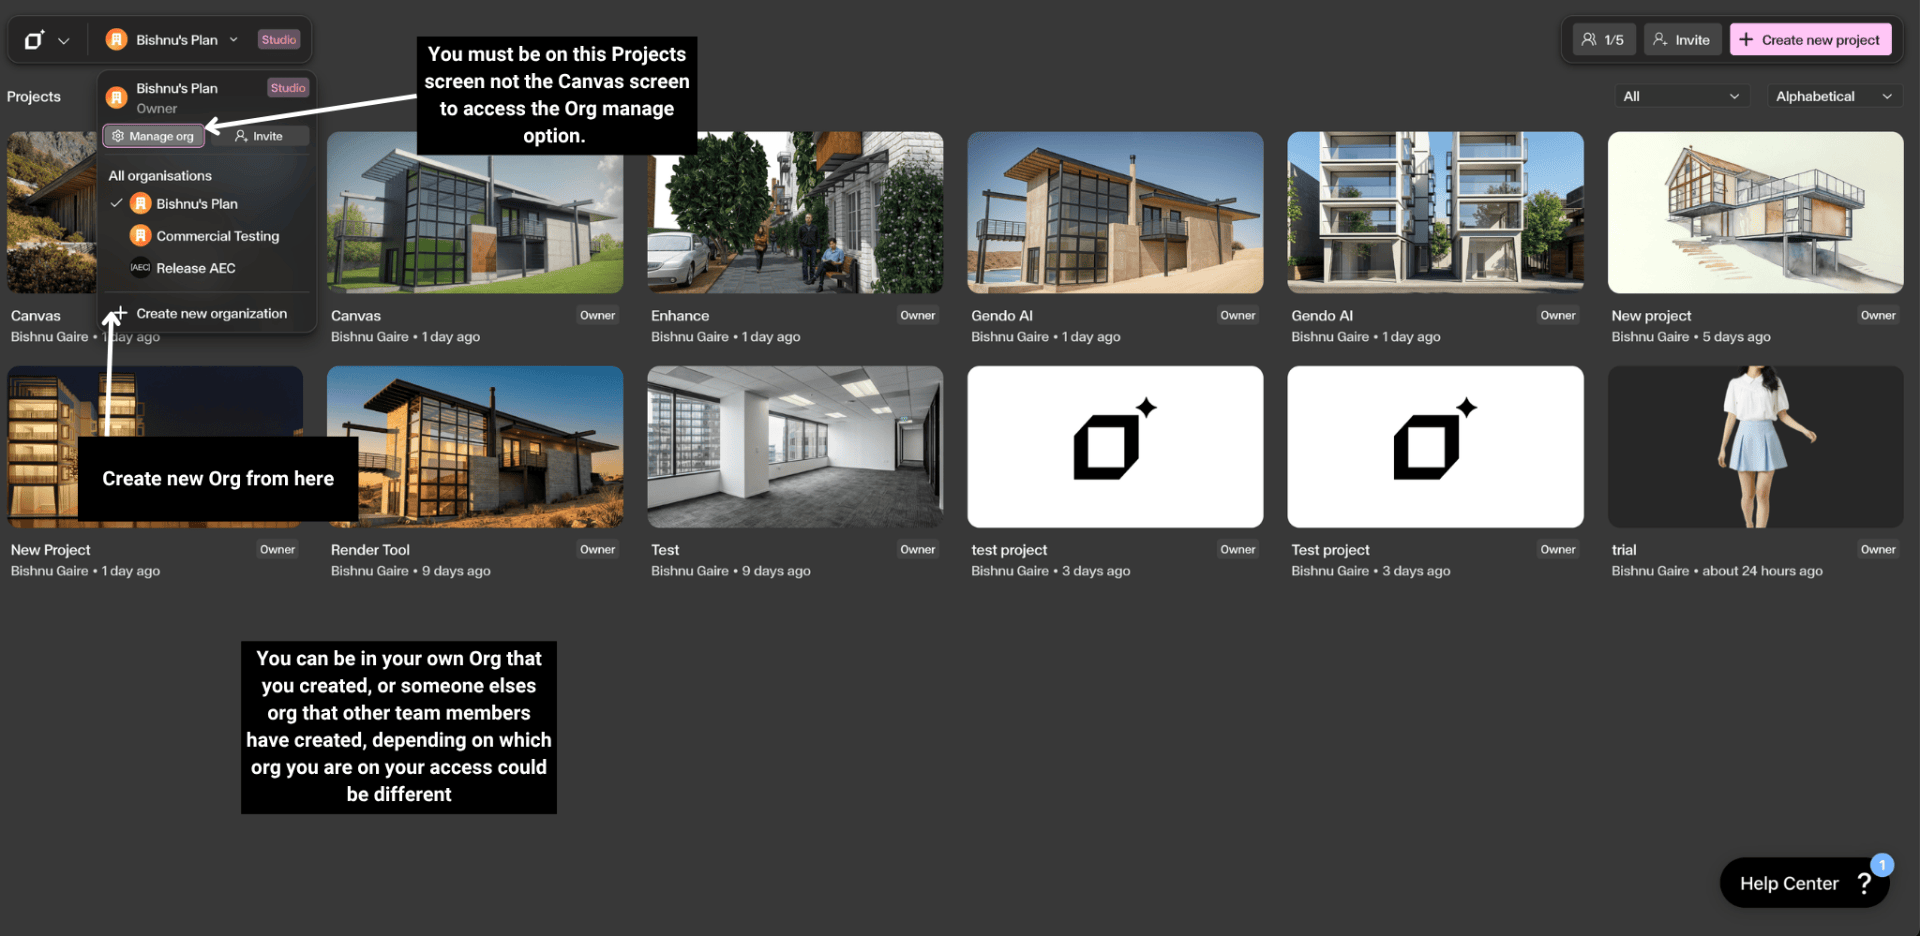
Create a new organisation
Click '+ Create new organisation' at the bottom of the Workspace Selector. Each paid plan is tied to a single organisation, so a paid subscription cannot be shared across organisations. You can have one paid organisation plus a maximum of one additional Free organisation, and within any organisation you can create unlimited projects.
For a detailed walkthrough of organisation settings and ownership, see the Managing Organizations guide.
Get Better Results
Free Plan is limited to one project — upgrade to create unlimited projects and unlock additional seats.
Each project holds one Canvas that can contain multiple images and assets, keeping everything in one place.
Use the Filter dropdown to quickly locate projects by ownership or category.
Organise larger teams into separate organisations to keep departments and project access clearly defined.