Annotate Your Render with Mark up
Draw directly onto an image to tell Gendo exactly what to add and where.
What is Mark up?
Mark up lets you sketch straight onto your render and have Gendo turn those sketches into finished objects. It lives inside the Edit tool. Instead of describing a change in words alone, you draw where you want something to go, tag each drawing with a colour, then tell Gendo what each colour represents. It is the fastest way to add things that are not in the scene yet — the small touches you might otherwise take to Photoshop, such as a figure on the steps or a tree at the edge of the frame.
Your drawing does not need to be neat. What matters is position and scale: a tree drawn tall renders tall, a figure drawn small renders small.
Understanding the interface
The Edit panel
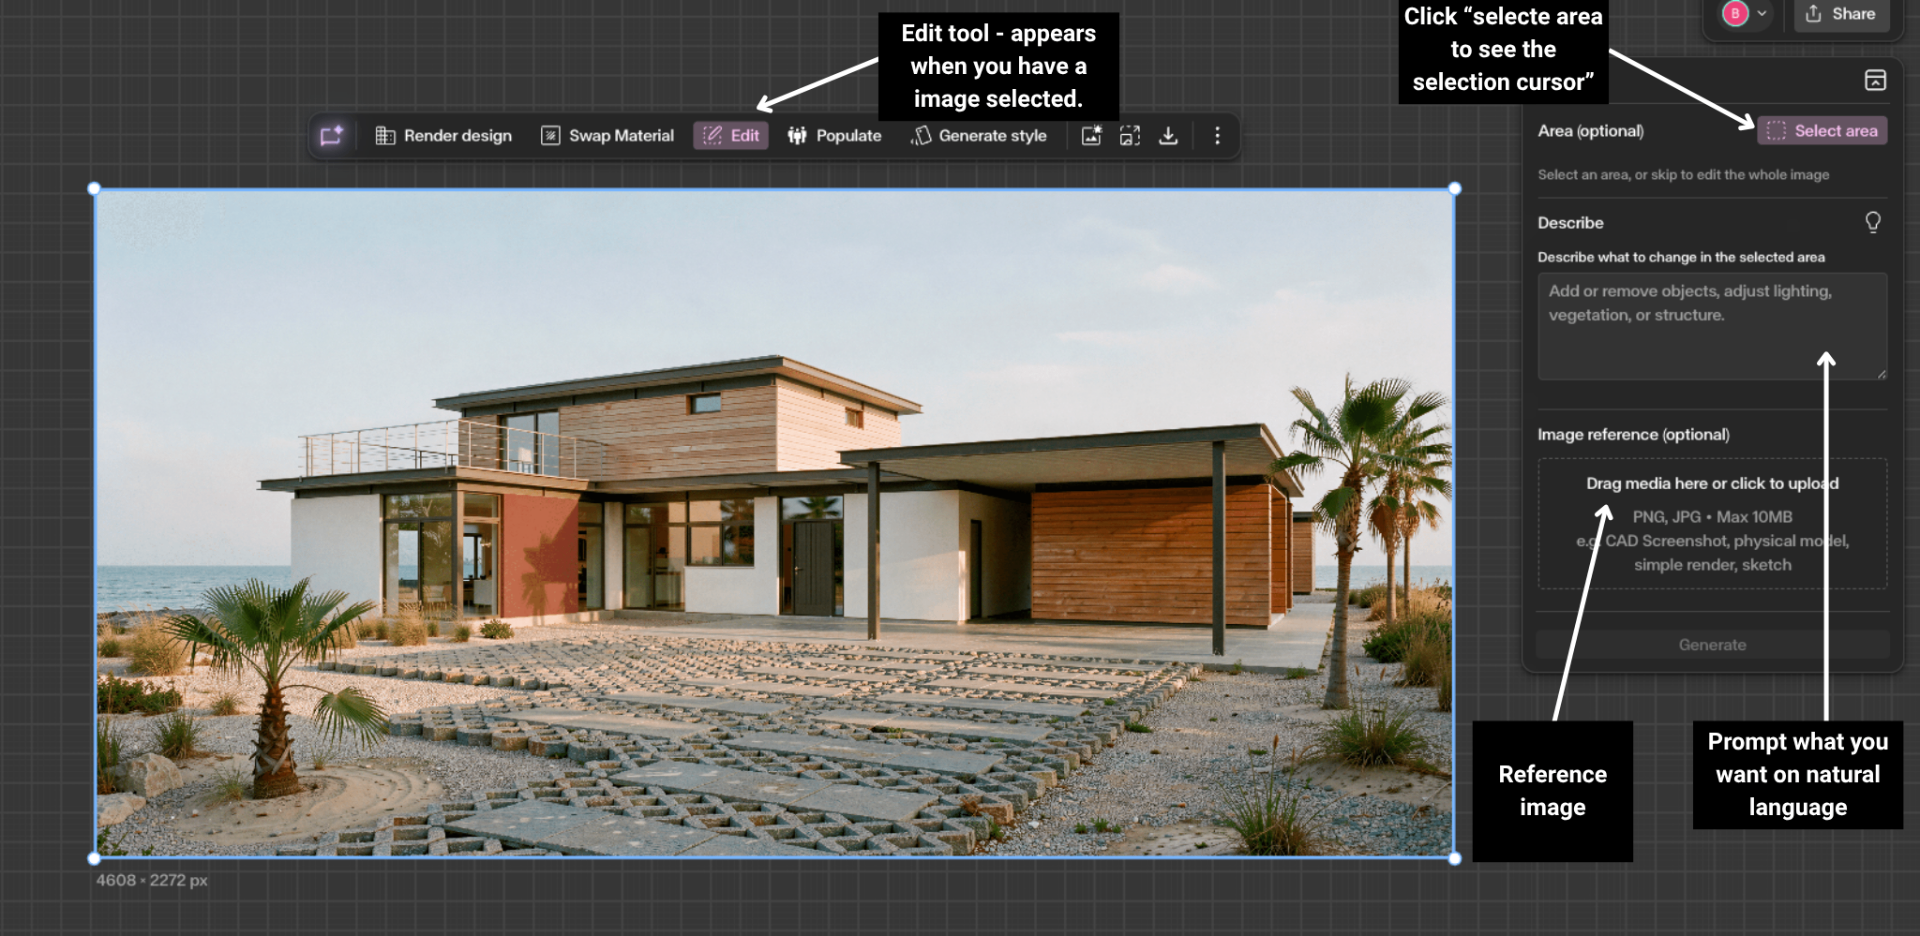
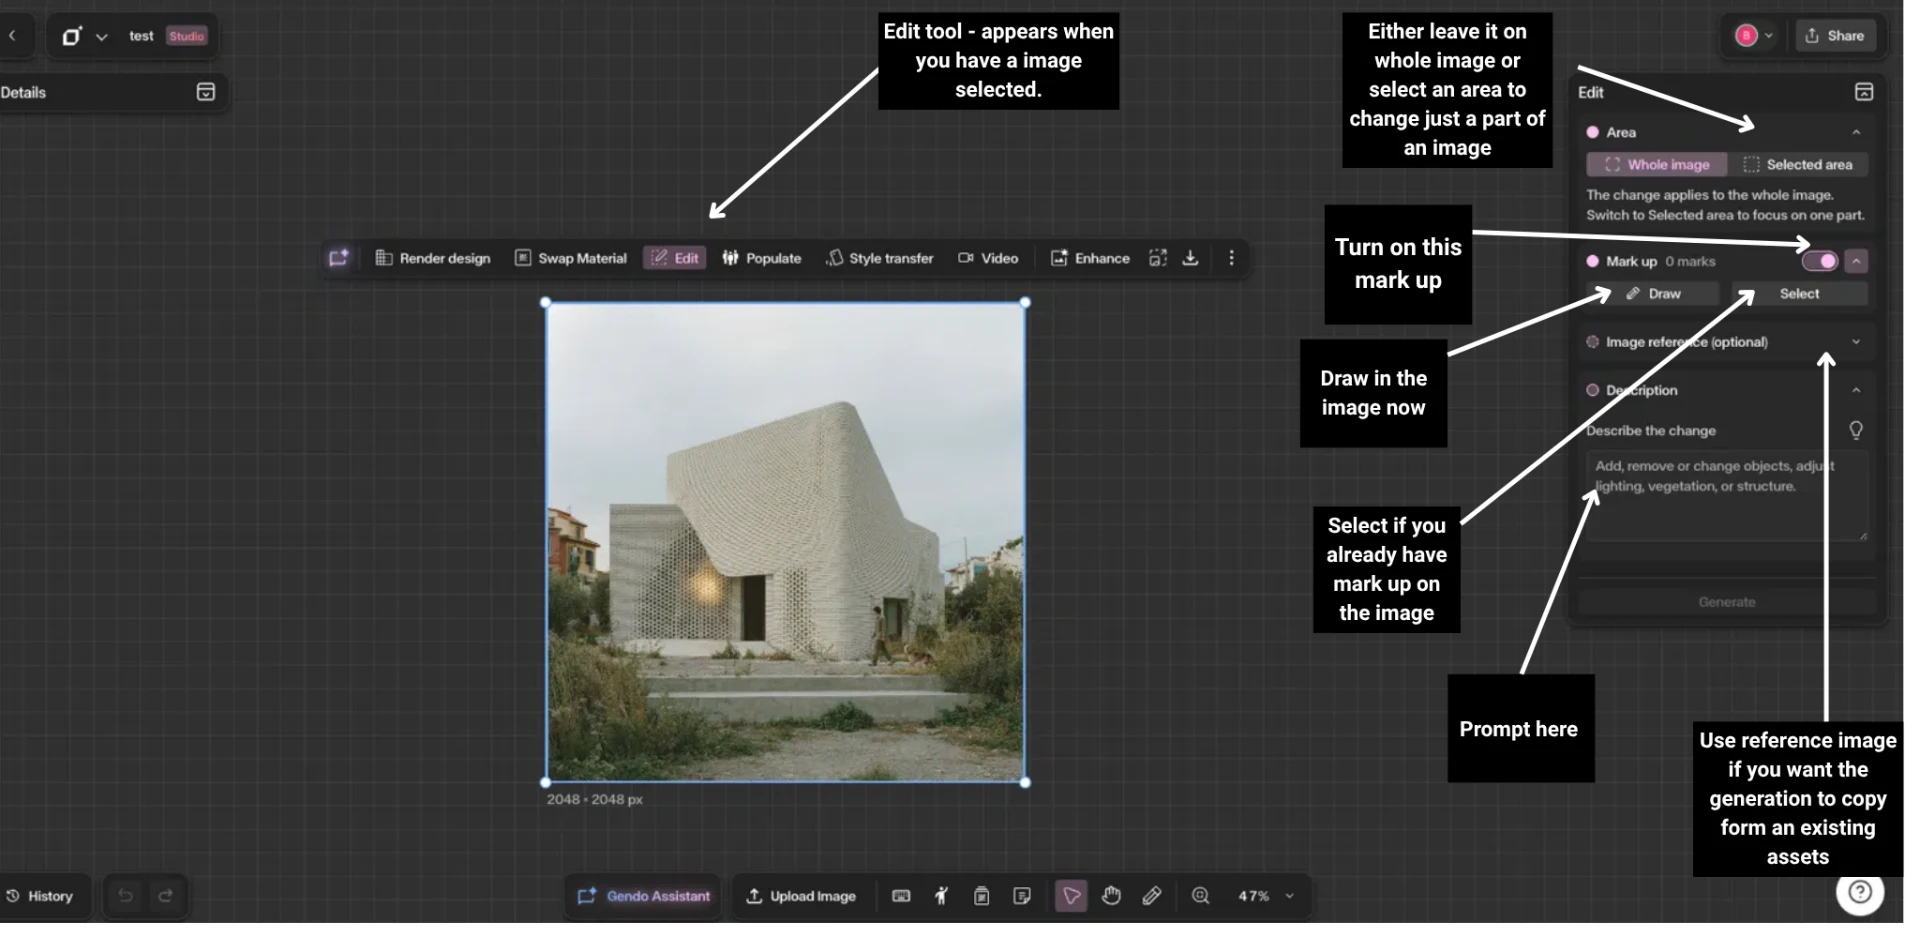
Click your image, then open Edit from the toolbar. The panel on the right holds everything you need.
- Area — sets whether your change affects the Whole image or just a Selected area.
- Mark up — a toggle to switch drawing on, a live count of how many marks are on the image, and two buttons, Draw and Select.
- Image reference (optional) and Description — where you describe the change, followed by the Generate button.
The drawing toolbar
Once you start drawing, a toolbar appears beneath the image with brush options on the left and a colour palette on the right: red, white, orange, yellow, green, blue, pink, and black. Use a different colour for each kind of object so you can refer to them separately in your prompt. The panel also switches to show Cancel and Save mark-up.
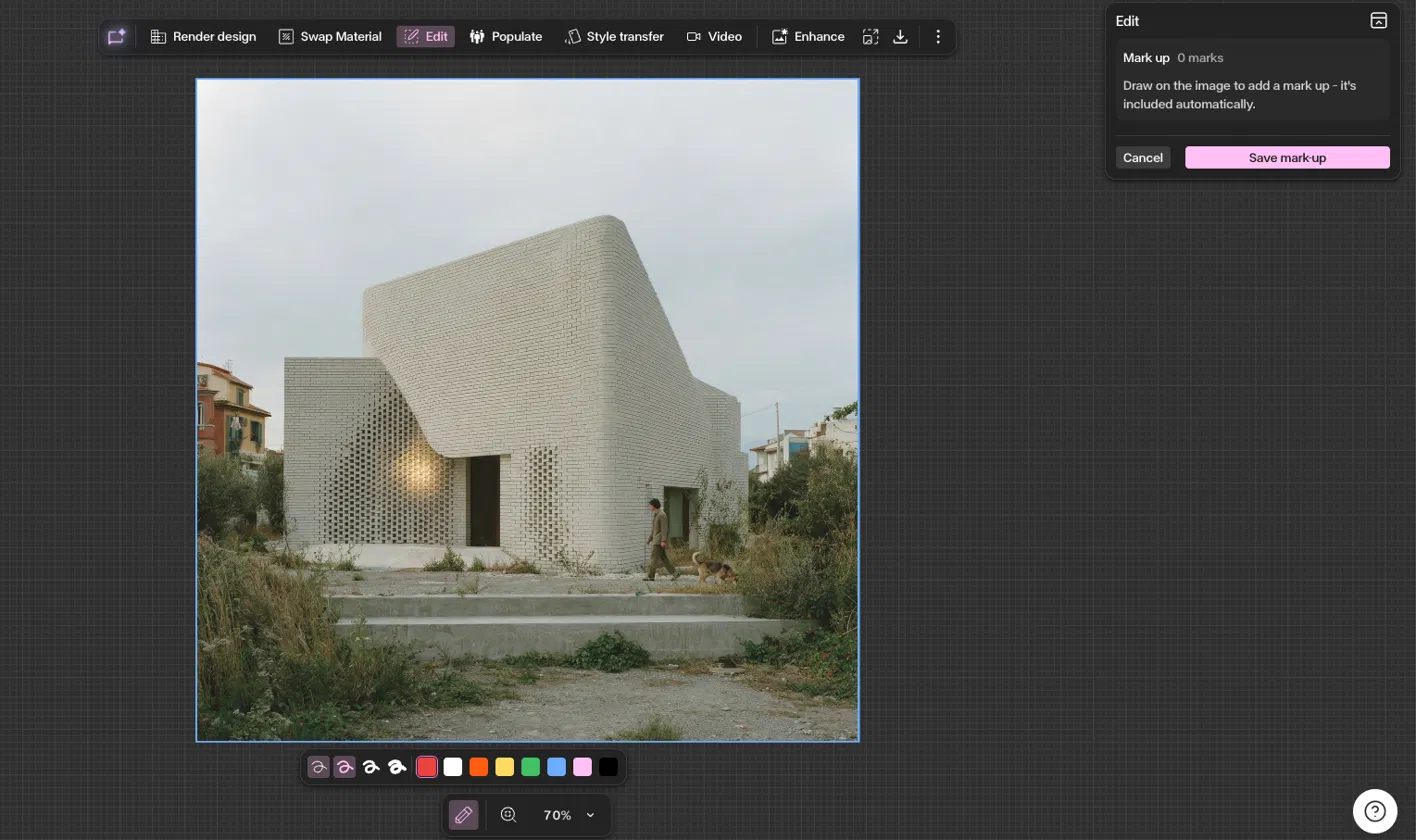
Step by Step
Open the Edit tool
Click the image you want to work on, then select **Edit** from the toolbar. The Edit panel opens on the right.
Turn on Mark up
In the **Mark up** section, switch the toggle on. You will see two options, **Draw** and **Select**. Choose **Draw** to add a new annotation. If the image already has marks on it, **Select** lets you pick an existing one instead.
Set your area
Leave **Area** on **Whole image** to draw anywhere on the render. Switch to **Selected area** if you want both the drawing and the change confined to one part of the image.
Draw your marks and describe them by colour
Pick a colour from the toolbar and draw where you want each object to go. Use a separate colour for each type of object, for example red for a figure and green for a tree. Keep the scale honest: draw the object at the size you want it to appear.
Note: One continuous stroke, drawn without lifting your mouse or pen, counts as one mark. Check the number next to Mark up reflects what you have drawn. Only counted marks are sent to the generation, so a mark that is not registered will not appear in the result.
Then open Description and tell Gendo what each colour stands for. Reference the colours directly so the model knows what each mark means.
Example prompt: the red mark is a person sitting and the green is a small tree
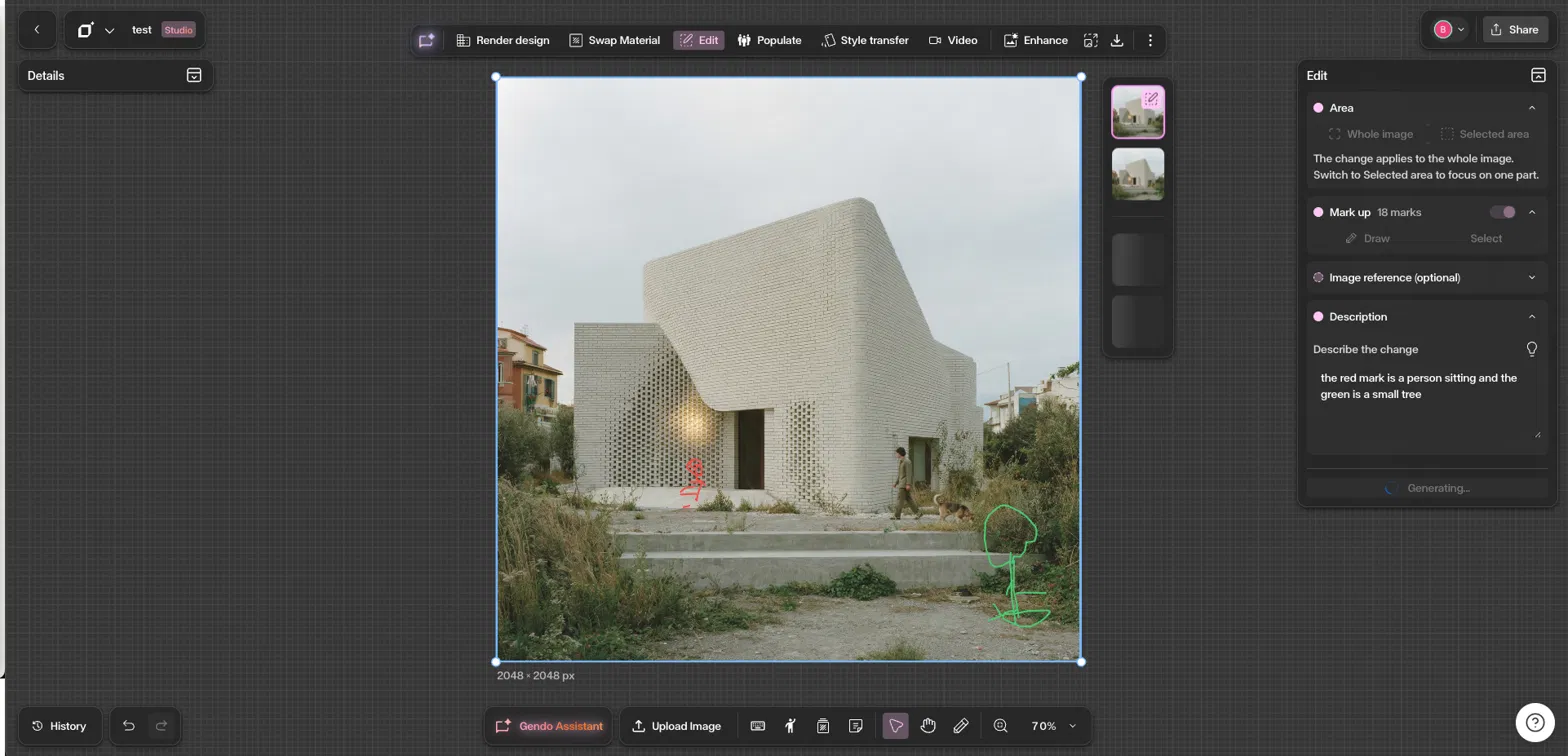
Save and generate
Click **Save mark-up** to lock in your drawing, then click **Generate**. Gendo produces two options.
Choose a result and add it to the canvas
Click a generation to preview it. When you find the one you want, double-click it or drag it to add it to the canvas. Your annotation is done.
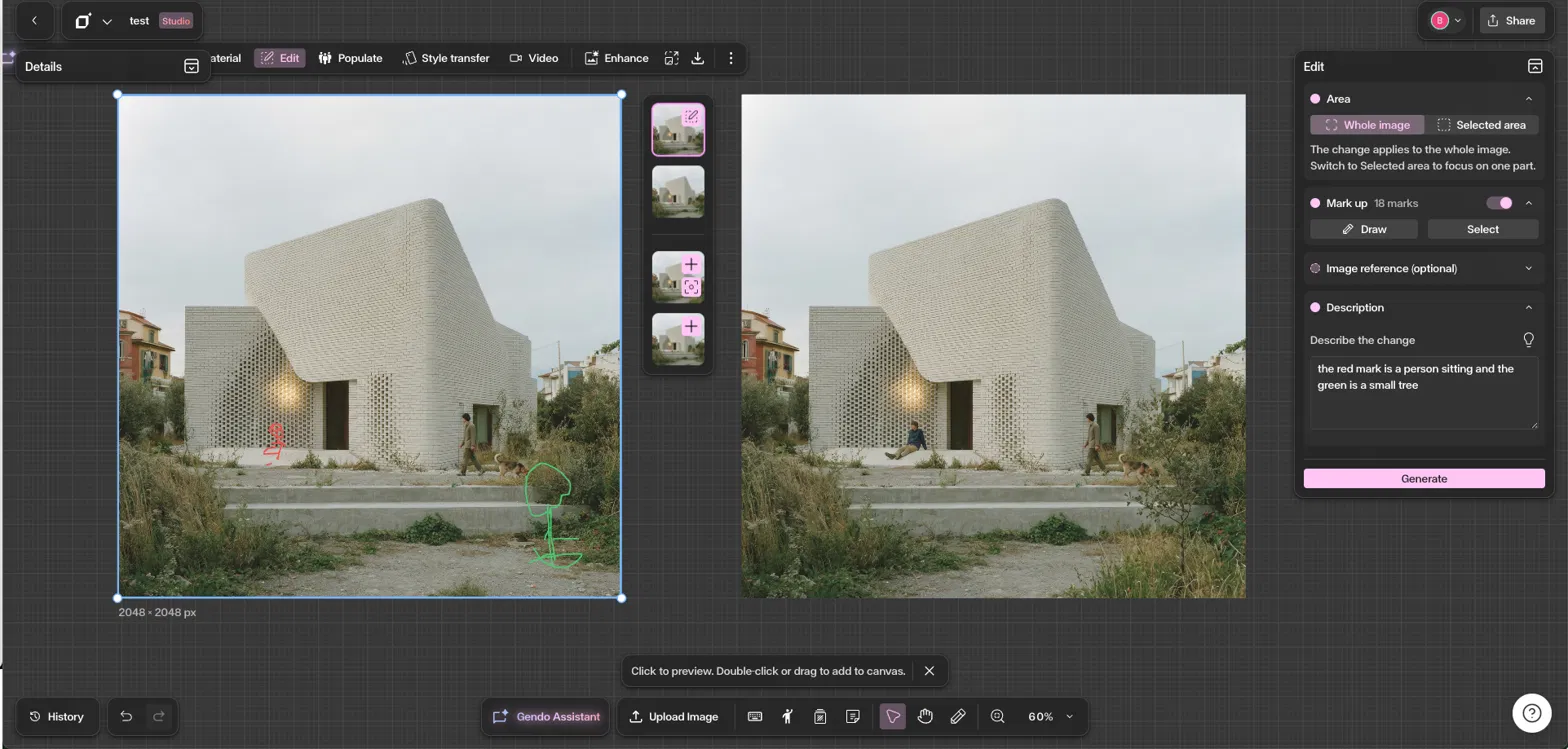
Get Better Results
Draw at the right scale, not the right detail — a rough shape at the correct size beats a neat shape at the wrong size.
Use one colour per object type, then name each colour in your prompt so Gendo can tell your marks apart.
Check the mark count before you generate. If a stroke did not register, it will not be included.
Switch to Selected area when you only want to change one part of the scene and leave the rest untouched.
Keep prompts simple and direct. A short line that maps colours to objects works better than a long description.