Generate a Video from Your Render
Turn a still render into a short, moving clip using built-in camera presets, then top up your balance when you need more.
What is Video?
Video turns a still render on your Canvas into a short clip. You pick a camera motion preset, choose how long the clip should run, and Gendo generates a ready to share file. Output is always 1080p MP4, and clips usually take up to ten minutes to make. Each video draws from your video balance, measured in seconds and shown at the top of the Video panel, so it helps to know how much you have before you start.
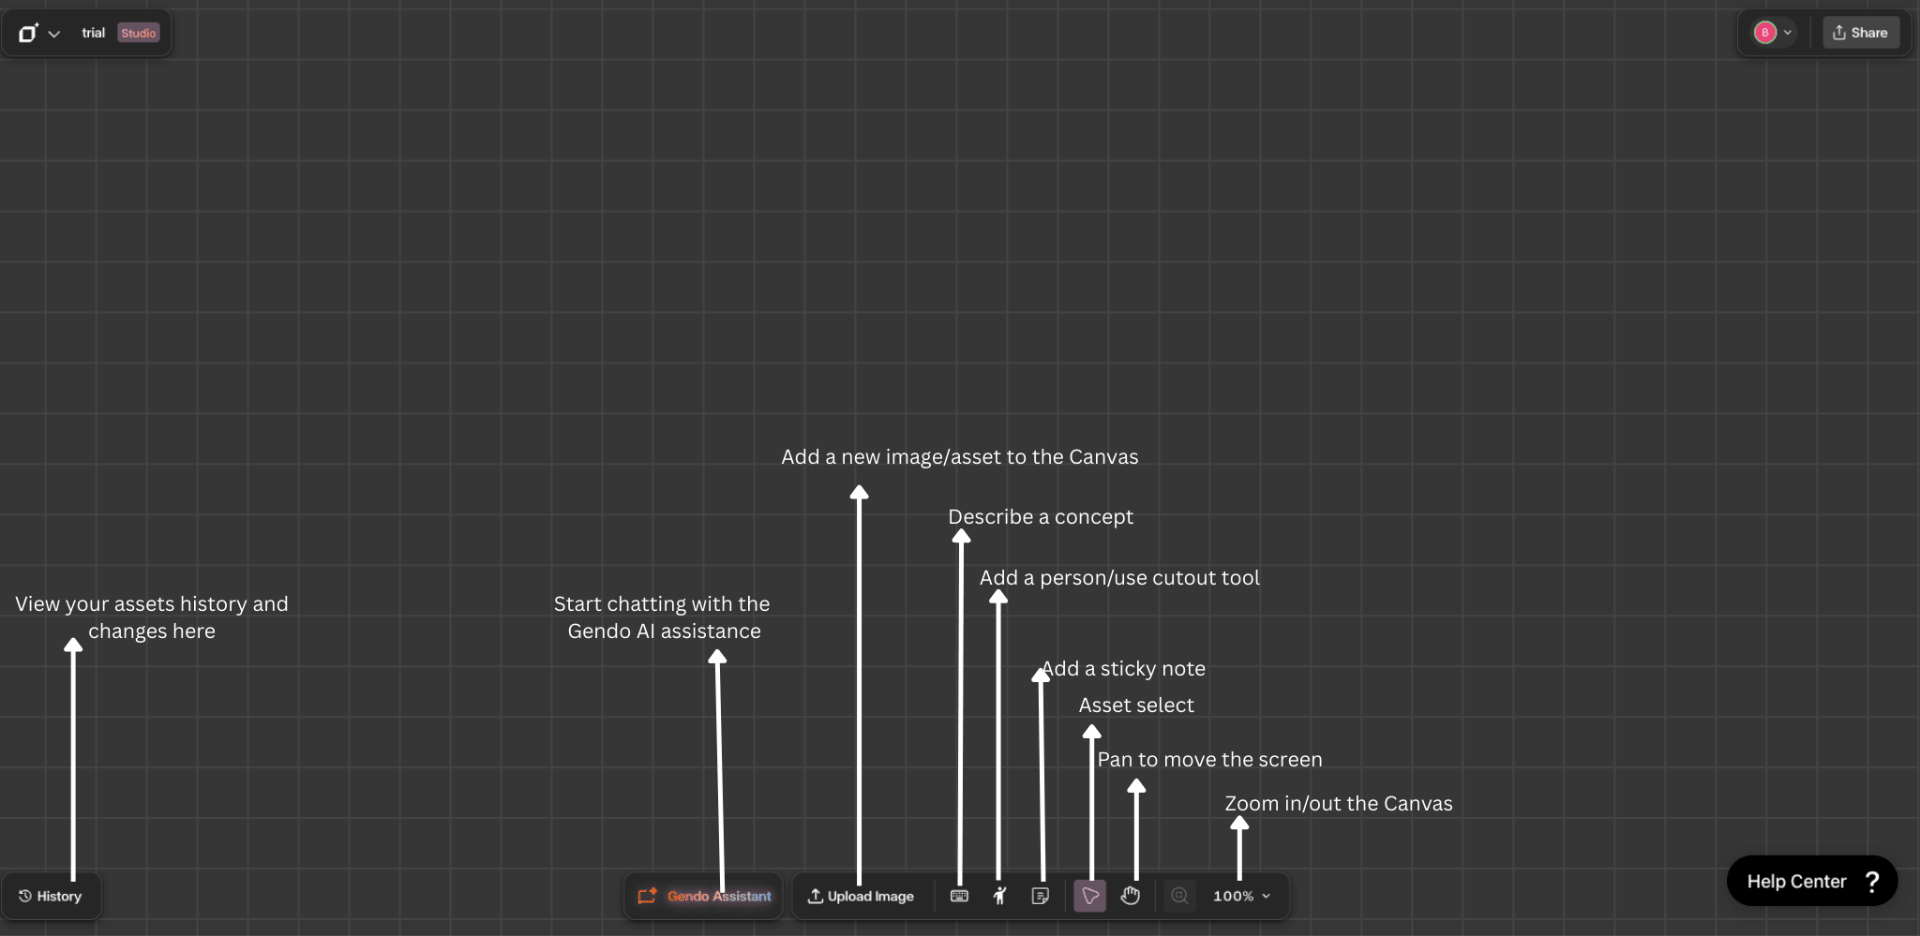
Understanding the interface
The Video panel
With a render selected, click Video in the contextual toolbar above your image to open the Video panel on the right. At the top you will see your remaining video balance in seconds and a + Top up button. Presets are grouped into two sections: Controlled for predictable camera moves, and Creative for AI directed sequences.

Step by Step
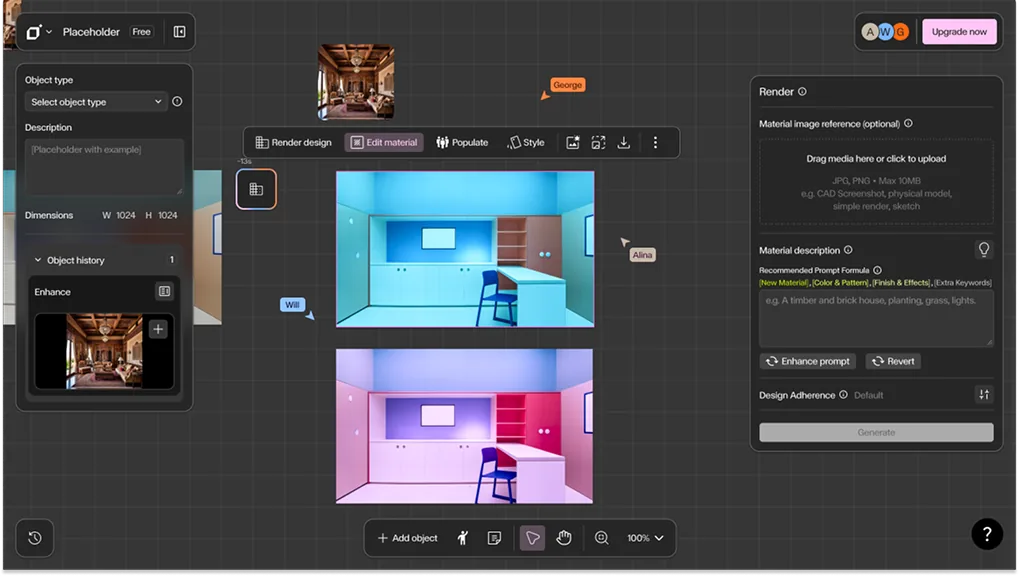
Select your render and open Video
Click your render on the Canvas to select it, then click **Video** in the contextual toolbar that appears above the image. The Video panel opens on the right with eight presets across two groups.
Under Controlled you have Walk forward (eye-level stroll, handheld warmth), Still (camera moves toward subject), Timelapse (locked camera, time of day shifts across the clip), Orbit (circular track around the subject), Pan Left (sweeps left across the scene) and Pan Right (sweeps right across the scene).
Under Creative you have Cinematic edit (AI-directed 4-shot sequence) and Custom transition (smooth transition between your first and last image). Click the preset you want.
Set the duration and generate
Once you pick a preset, the panel shows an **Example output** and a **Duration** toggle. Choose **5s** or **10s**, then click the pink **Generate** button. Output is fixed at 1080p MP4.
Note: Each second of video uses one second from your balance, so a 5 second clip costs 5 seconds and a 10 second clip costs 10 seconds. Videos usually take up to ten minutes to generate.

Watch your video generate
A new panel appears next to your render on the Canvas showing **Generating...** while Gendo works. You can carry on with other work in the meantime, and the finished clip drops into that panel when it is ready.

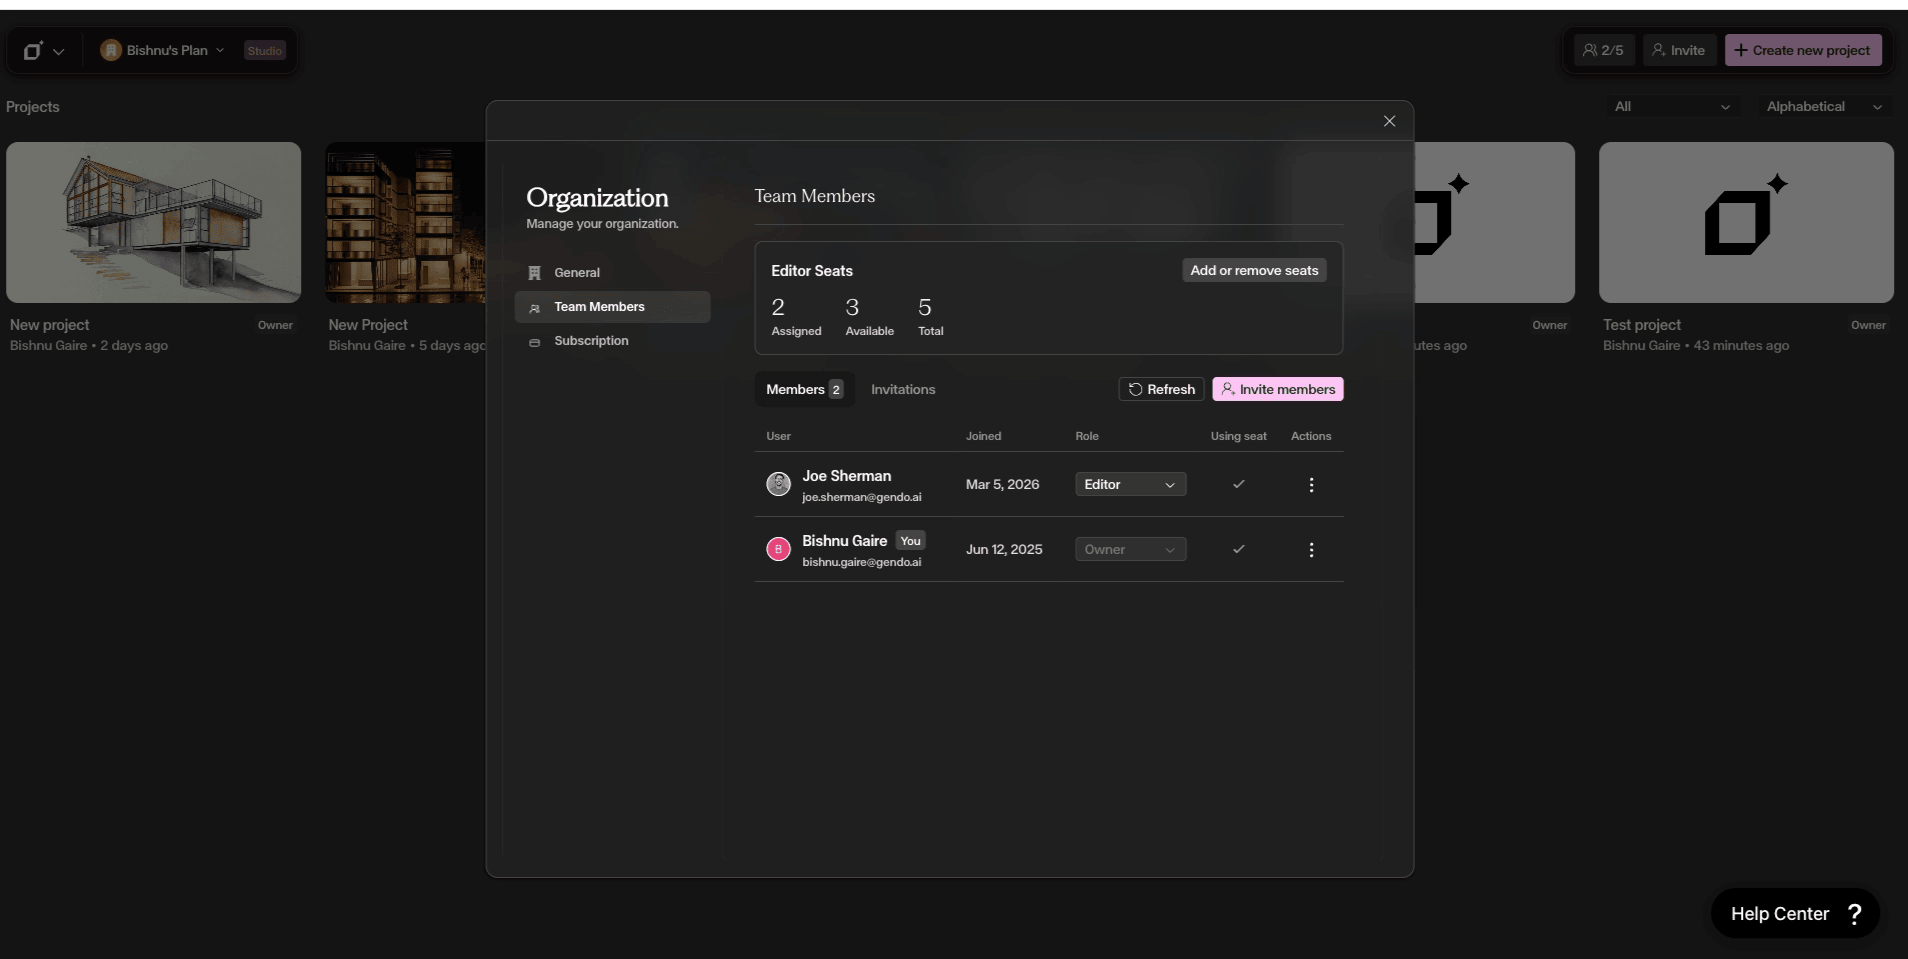
Topping up your video balance
Your video balance is measured in seconds and shown at the top of the Video panel. Balances never expire, but you will lose your balance if you cancel your subscription. Buying more is restricted to your organisation administrator.
If you can top up: Click + Top up to open the Buy video packs window. Three one off packs are available, priced in £ GBP, € EUR or $ USD, with other local currencies available at checkout:
- 100 seconds — 20 videos of 5 seconds, 1080p. £40 one-off (excl. tax). £0.40 / second.
- 250 seconds — 50 videos of 5 seconds, 1080p. £75 one-off (excl. tax). £0.30 / second. Save 25%.
- 500 seconds — 100 videos of 5 seconds, 1080p. £125 one-off (excl. tax). £0.25 / second. Best value, save 38%.
Each card shows what your balance becomes after the purchase. Click Buy pack under the option you want. Applicable taxes are calculated at checkout.
If you do not see a top up option: If you click + Top up and see the message *Contact your organization administrator to top up your video balance*, then buying packs is limited to your organisation administrator. Ask them to top up the shared balance for your organisation.

From still render to moving clip
Real outputs generated on the Canvas. The render on the left is the input; the clip on the right is what Gendo produced.

Brick house at dusk
Locked camera with the time of day shifting across the clip, applied to a dusk exterior render.
Get Better Results
Match the preset to the shot: use Controlled moves like Orbit or Pan Right for clean architectural reveals, and Creative options for edited sequences.
Check your balance before you generate, since a 10 second clip costs twice as much as a 5 second one.
Start at 5s to test a preset, then regenerate at 10s once you like the motion.
Use Custom transition when you have a clear first and last image, as it animates the move between them.
Keep working while a clip renders. The Generating... panel updates on its own.